Learning to draw with augmented reality is easier than it seems, once you know where to start and how to build your practice the right way. In this article, we break down everything: from setting up your workspace to developing an independent drawing skill.
Table of content
What Is AR Drawing
Many people have heard of augmented reality in the context of games or navigation. But few think of it as a tool for learning how to draw.
Augmented reality is a technology that overlays digital objects onto the real world through a smartphone or tablet camera. The real world does not disappear, it simply gets an extra digital layer placed over it.
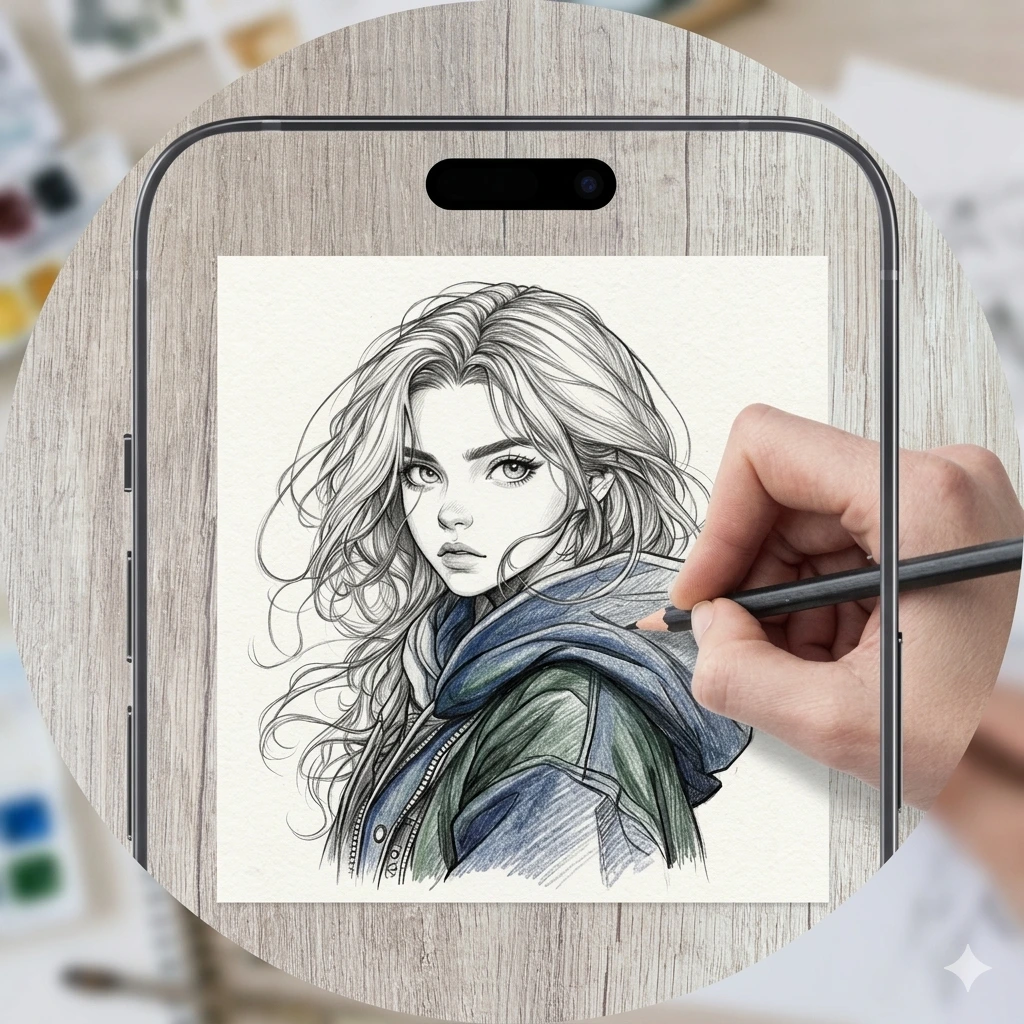
Drawing with augmented reality works like this: the app overlays a selected image onto whatever the camera sees: a table, a sheet of paper. You look at the screen and trace the outlines with a pencil directly onto the paper. The principle is similar to tracing paper, except that instead of a transparent sheet, you use a smartphone screen.
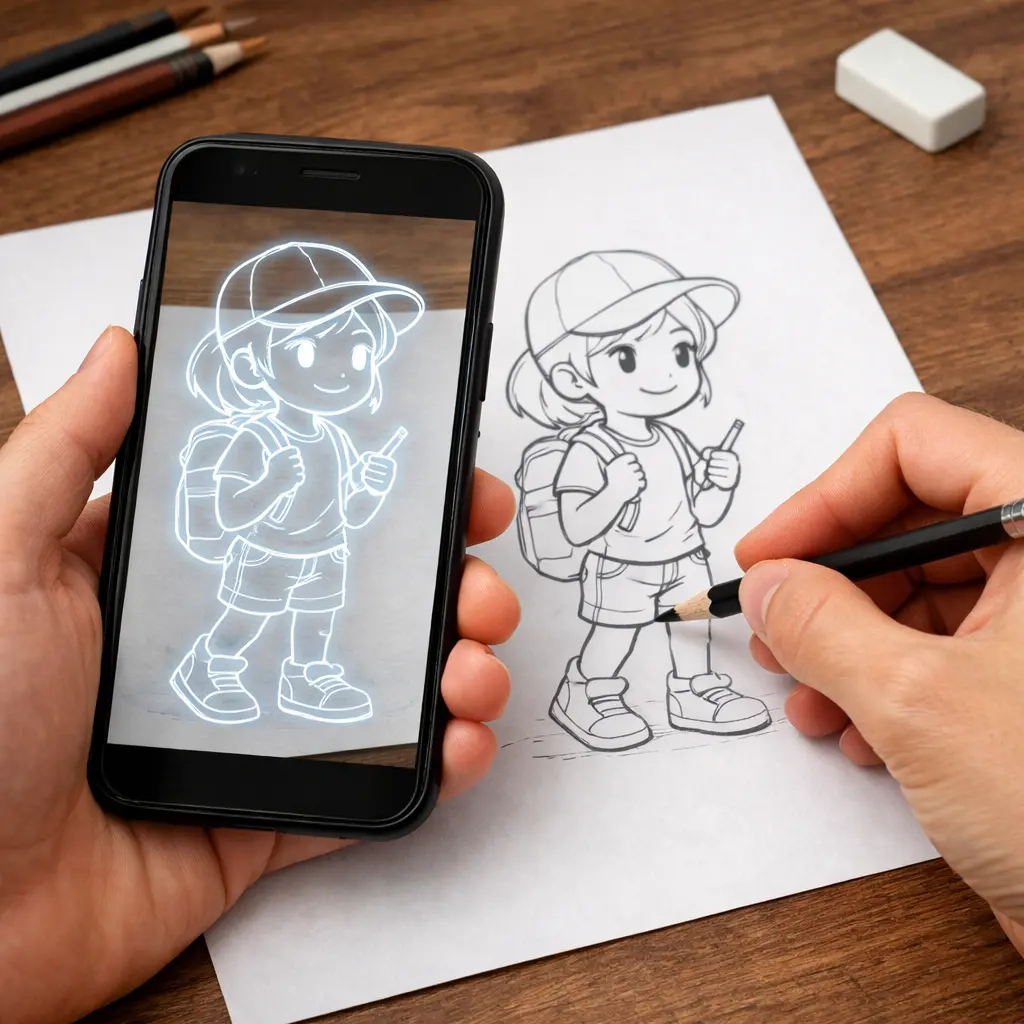
It is important to understand that the image is not physically projected onto the paper. It exists only on the device screen as a virtual layer over the real object. That is why a stable stand or tripod is essential for comfortable work, even the slightest movement of the phone shifts the outline.
The app does not draw for you. It removes the main barrier - the fear of a blank page, and lets you focus on what actually develops skill: pressure control, line quality, and hand coordination.
Research in art education confirms that copying and tracing are considered classic methods for training hand control and developing visual accuracy. They have been used in academic drawing for centuries. Augmented reality simply brings this method into a format that feels natural to people who grew up with a smartphone in their hands.
A Beginner's Step-by-Step Workflow
Most beginners make the same mistake: they open the app right away and try to draw something complex, then quit by the second session. The right approach is built step by step.
Stage 1 — Preparing the Workspace
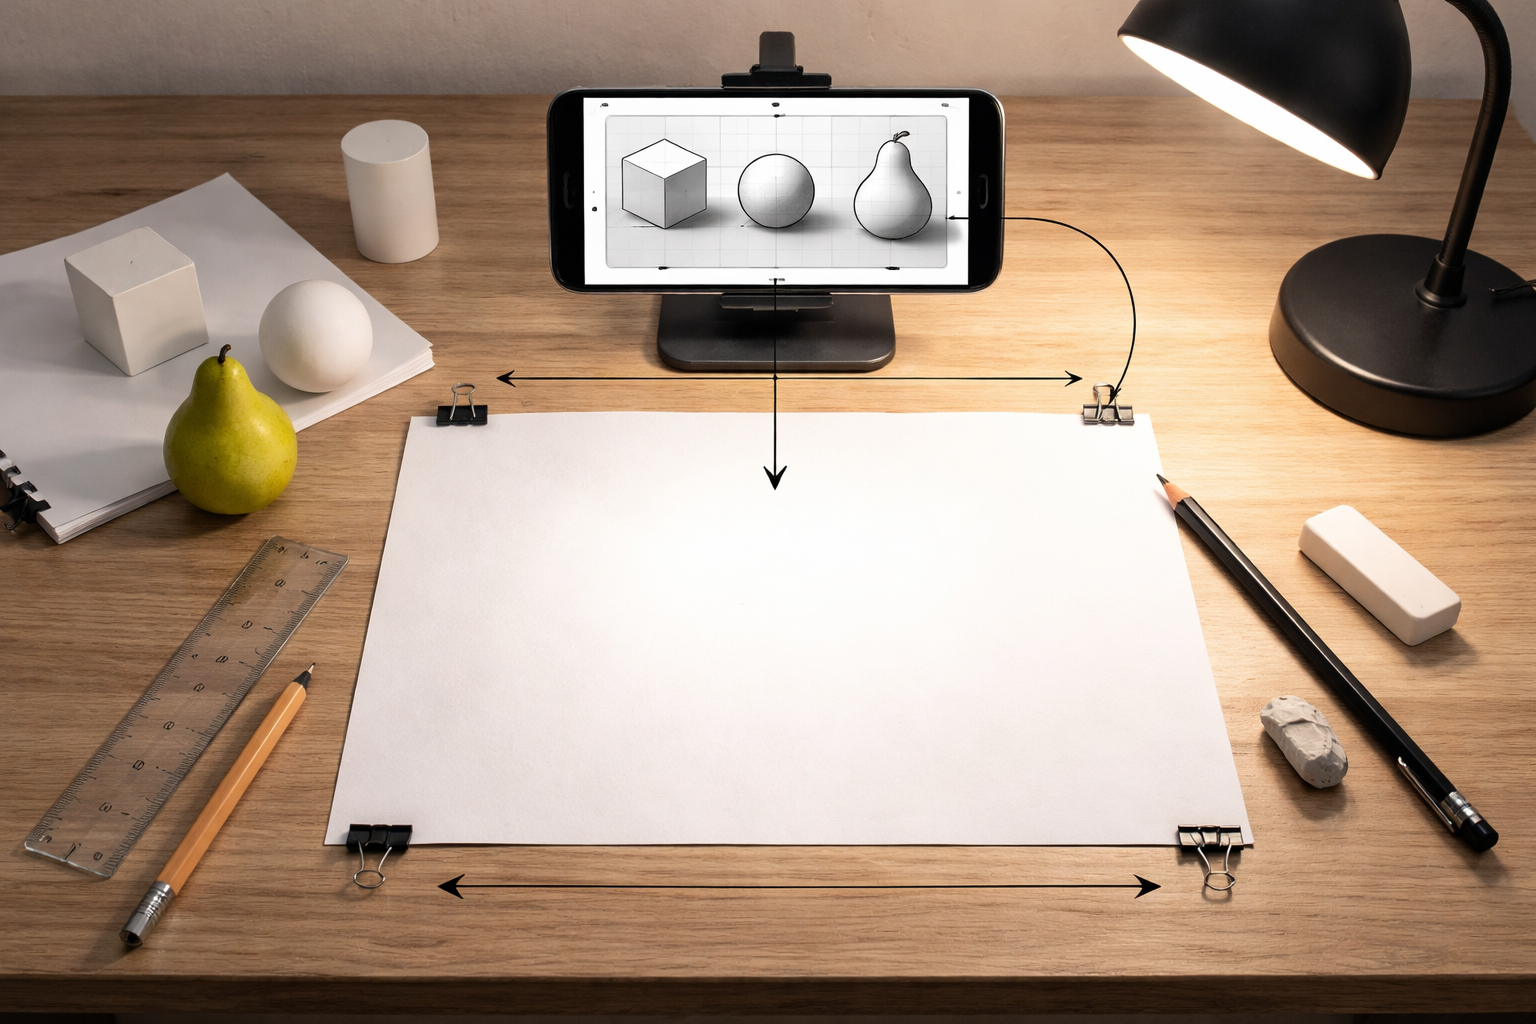
Before opening the app, set up your physical space. Place a sheet of paper on a flat horizontal surface. Secure your smartphone on a stand or tripod so that the camera points straight down at the sheet without any tilt, because even a slight angle distorts the proportions of the overlaid image.
Lighting is just as important. The camera needs even, diffused light that clearly shows the edges of the sheet. A regular desk lamp directed away from the paper usually works best.
For your first drawing, choose simple objects: geometric shapes, simple silhouettes, or an animal with clear contours. Starting with a complex composition almost guarantees that you will give up after the first attempt.
At the beginning, you only need the bare minimum of materials. A simple HB or 2B pencil, regular 80 g/m² office paper, and a soft eraser. This set is enough for полноценную practice.
Stage 2 — Working with the Overlay to Build Basic Skills
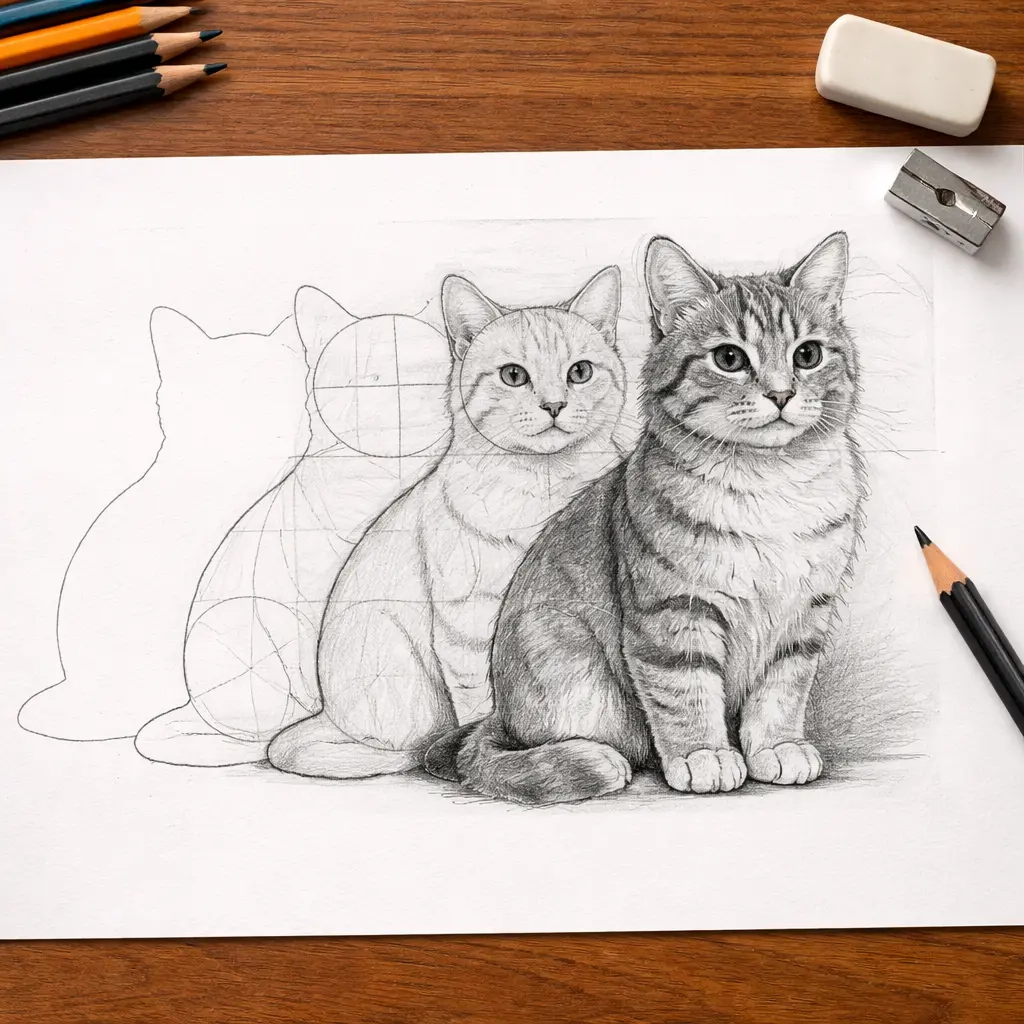
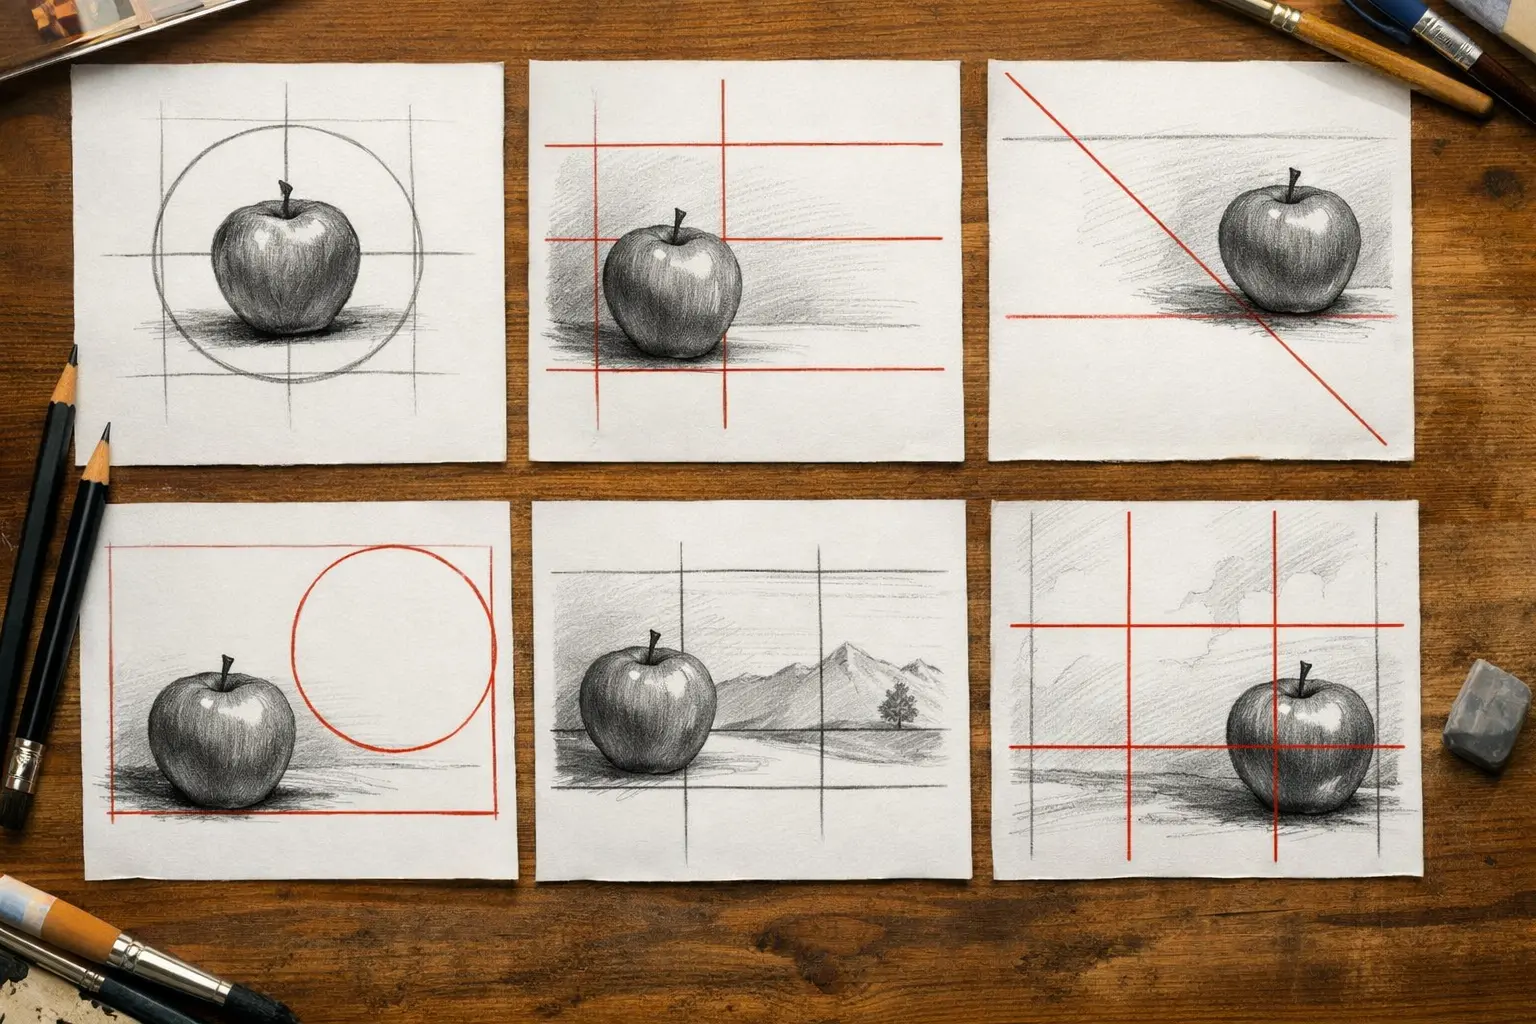
Once the workspace is ready, open the app, choose an image, and calibrate it to fit your sheet size. A semi-transparent overlay will appear on the screen. Now you can begin. Most beginners immediately go for the details, lose the overall proportions, and then do not understand why the drawing “doesn’t look right.” To avoid that, work in layers.
1
Silhouette
Trace only the outer contour of the form, without touching the inner lines. Your goal at this step is to understand the object’s overall size: how wide it is in relation to its height, where its visual center is, and how the overall form sits on the page. Everything else is built on what you establish here.
2
Structural lines
Once the silhouette is ready, move on to the major internal divisions of the form. Where does the eye line run on a face? Where does an animal’s torso end and its legs begin? Structural lines show how the object is built internally, not just how it looks on the outside. This is the stage where what artists call “constructive vision” begins to form.
3
Details
When the silhouette and structure are fixed, move on to the details: textures, small elements, shading. By this point, the overall form is already established, and the details fit naturally into the finished structure.
4
Perspective and space
If the app has a built-in grid, turn it on and choose an image with clear straight lines: a city street, a corridor, a room with furniture, or railroad tracks. Perspective reads most clearly in these kinds of subjects.
Find the horizon line on the screen. In a city scene, it usually runs around where the first floors of the buildings end; in a landscape, it is where the sky meets the land.
Once you find the horizon, pay attention to the parallel lines around it. The edges of the road, windowsills, building cornices — all of them converge toward a single point on the horizon line. On paper, extend several of these lines with your pencil until they intersect, and check whether they meet at one point.
After several exercises like this with different subjects, you will begin to notice perspective automatically.
5
Awareness during the process
At each of the previous steps, trace the contours consciously rather than mechanically. Pay attention to how the parts of the image relate to one another: where the widest point is, where the center is, how one form flows into another. This is how an understanding of proportions is built.
Stage 3 — Gradually Letting Go of the Guides
At this stage, the app stops being your main tool and becomes a means of checking your work. Your goal is to learn to draw independently, using the overlay only to compare results rather than to follow the contour step by step.
1
Silhouette with the overlay, details independently
Draw the silhouette using the overlay, then turn it off and try adding the structural lines from memory. Do not peek right away. Only after you finish should you turn the overlay back on and compare where the proportions diverged.
2
Silhouette without the overlay
Draw the entire silhouette without the overlay, turning it on only at the end to check. See where the proportions went off, where the line lost confidence. Each comparison like this gives you more than countless mechanical tracings with the contour left on.
3
A fully independent drawing
Draw the same object completely without the overlay, then turn the contour on over your finished drawing and evaluate the difference. At this point, you will most likely be surprised by how much more accurate your hand has become compared to the first session.
4
Visual journal
Photograph every drawing or keep all your sheets in one folder. Progress in drawing is almost impossible to feel from the inside, but when you place a drawing from the first week next to one from the fourth, the difference becomes obvious.
Key Drawing Skills
An AR app is only a tool, while the main goal of practice is to develop your eye and muscle memory. Below are the key academic drawing skills that can be effectively trained with the help of digital overlay.
Composition
Composition determines what the viewer notices first and how they read the drawing as a whole. Use the overlay to try different ways of placing the object on the page: centered, off-center, with different balances of empty and filled space. See how the feeling of the drawing changes depending on exactly where the object is placed. Once you start to feel this difference, you can move on to specific techniques, such as the rule of thirds: divide the page into nine equal parts and place key elements at the intersections of the lines.
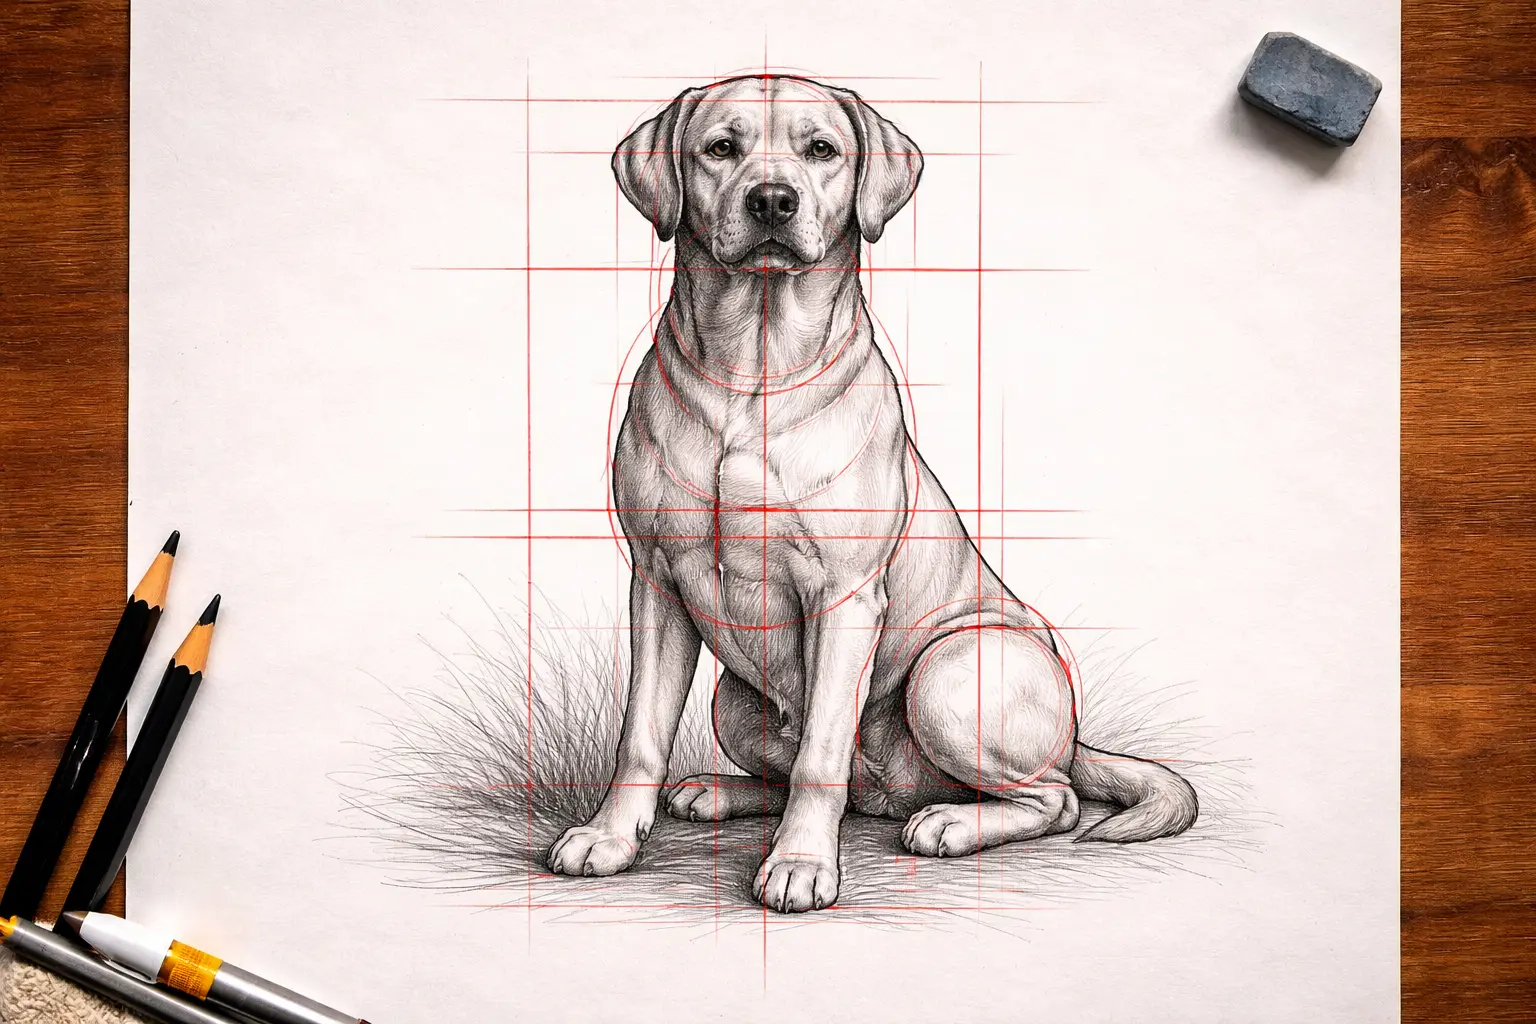
Proportions and anatomy
In academic drawing, proportions are considered one of the first skills an artist develops, because they support the entire composition. If they are off, the drawing loses credibility, even when all the details are carefully rendered. Start with simple objects: animals, household items, simple still lifes. Overlay the image and sketch it from different angles by changing the camera position. This is one of the most effective ways to understand how form changes depending on the viewpoint. Once simple objects feel comfortable, you can move on to more complex forms: the portrait or the human figure.
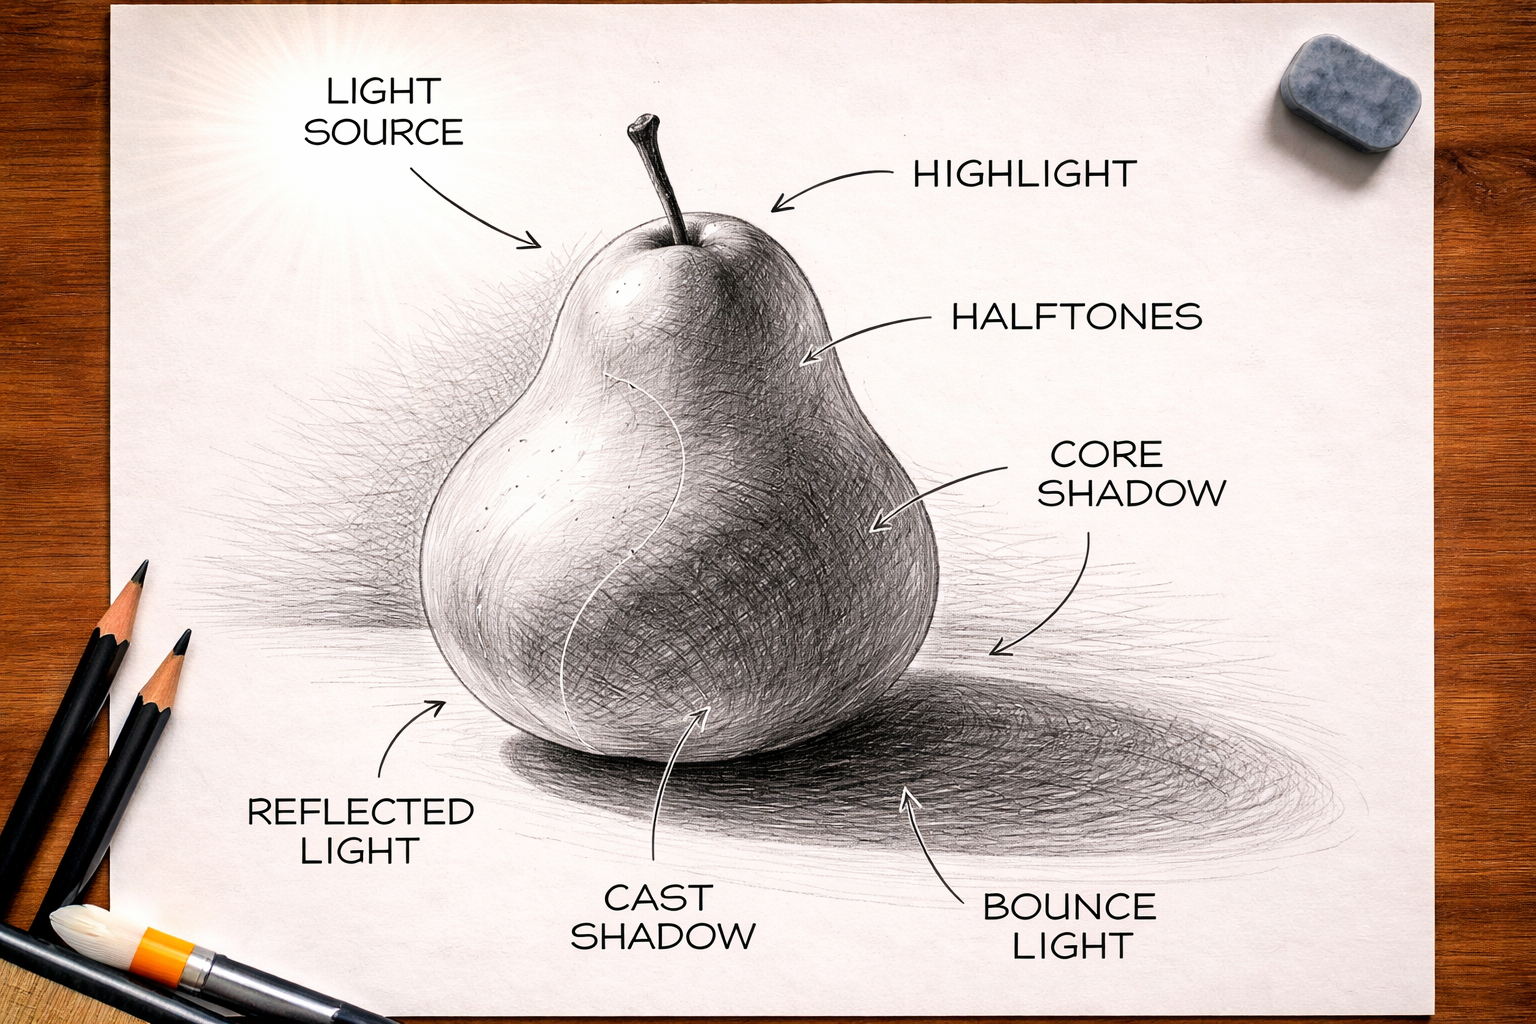
Light, shadow, and volume
Light and shadow turn a contour drawing into a three-dimensional form. Professional artists distinguish between two types of shadow: the form shadow, which appears on the object itself, and the cast shadow, which the object throws onto a surface. Understanding this difference completely changes your approach to shading. Upload a photo of an object with a strong light source into the app and use the overlay to study exactly where the shadows fall and how they wrap around the form.
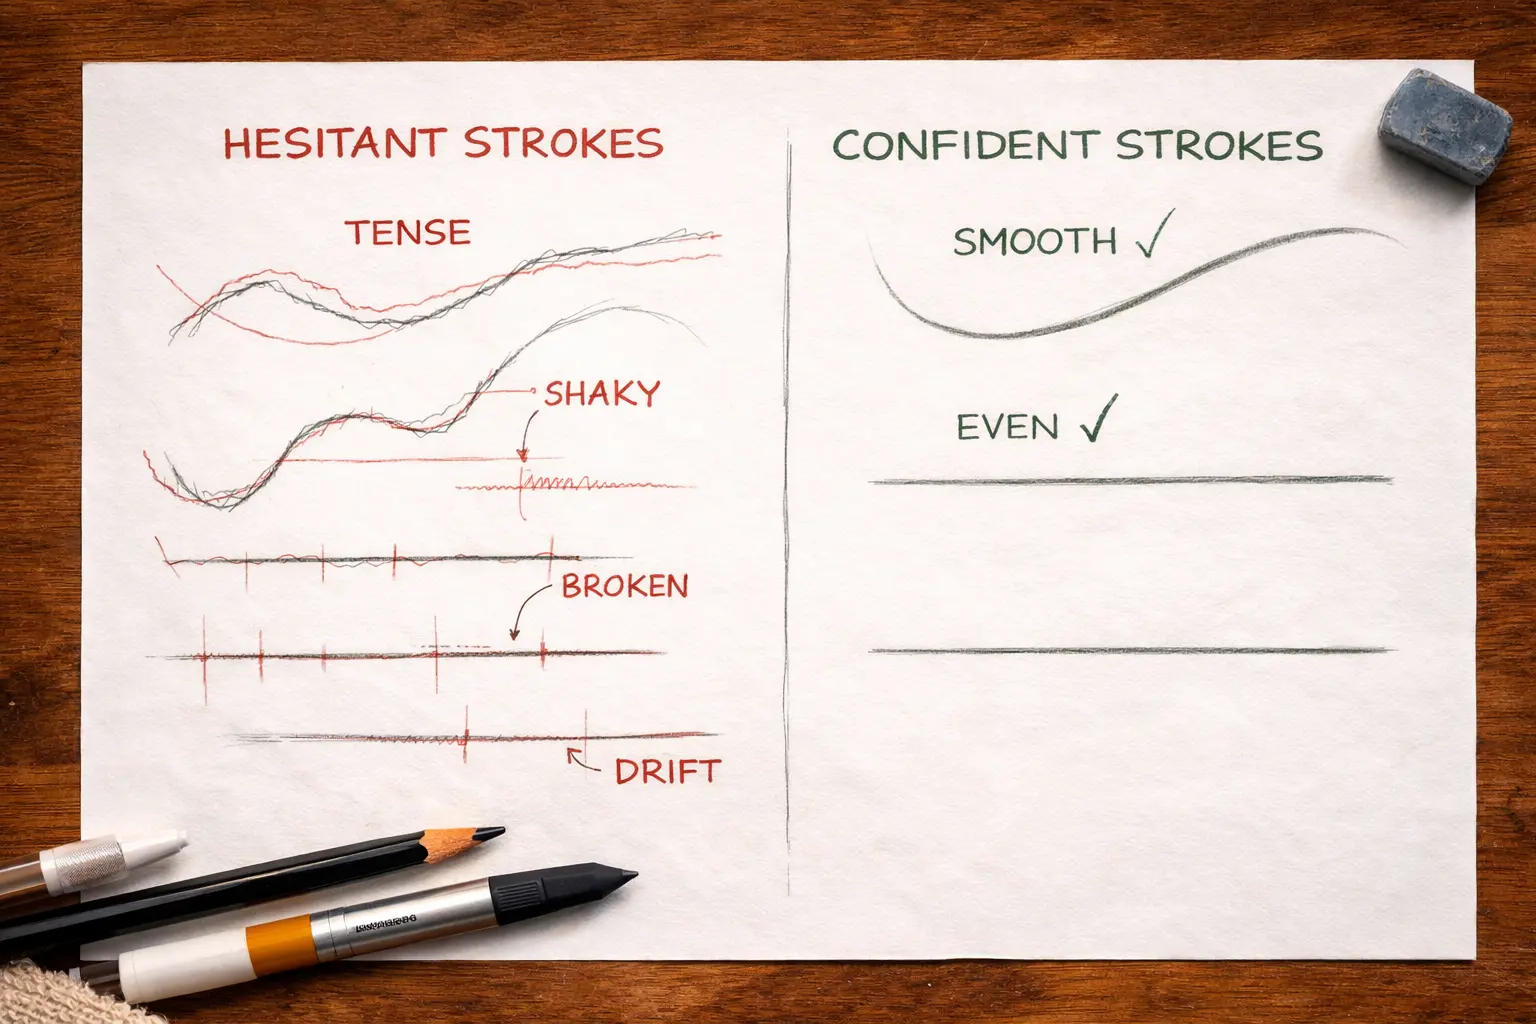
Line confidence and stroke quality
Most beginners draw with short, broken strokes because they are afraid of making a mistake. Over time, this becomes a habit that is hard to get rid of later. Use the overlay as a reference: draw a line, then compare it to the contour in the app. This will show you where your hand tenses up, where pressure gets lost, and where the line drifts away. Practice smooth curves and long straight strokes separately, drawing them in one continuous motion from start to finish. This type of line forms the foundation of confident drawing.
Perspective
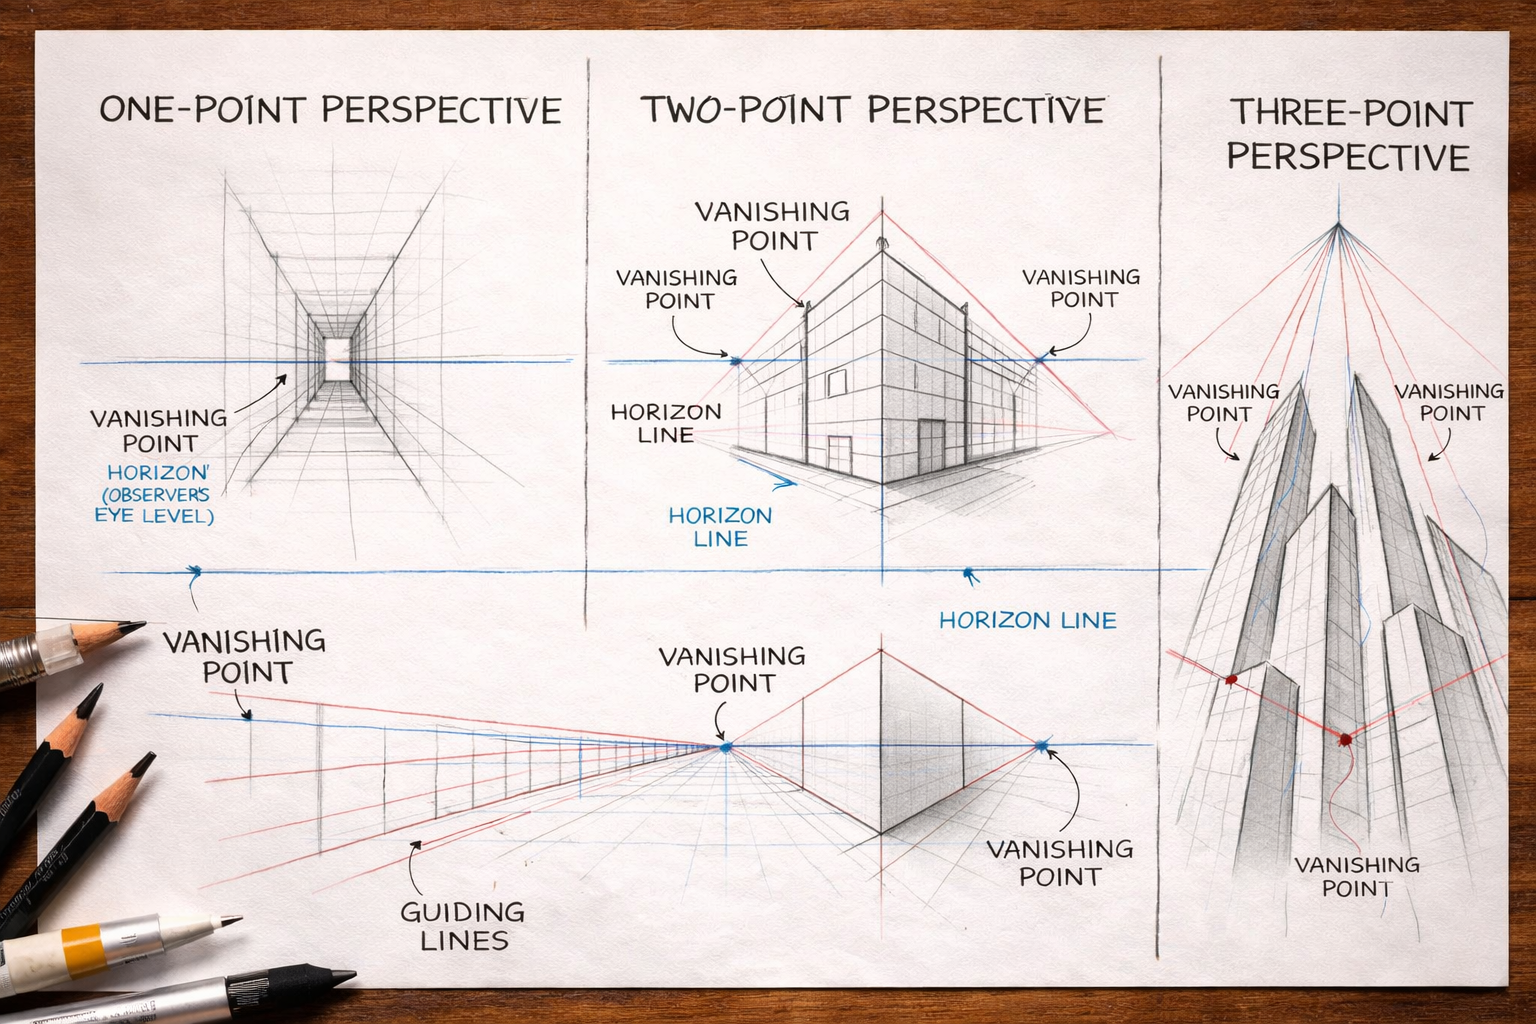
Perspective helps an artist convey depth and space so that the three-dimensional world looks convincing on a flat sheet of paper. Any perspective grid is built from three elements: the horizon line, which is always at the observer’s eye level, vanishing points, and guiding lines.
One-point perspective is the simplest type, where all guiding lines converge at a single vanishing point. It works well for scenes where depth extends directly in front of the viewer: a corridor, a road, a view into a room.
Two-point perspective is the most commonly used type, where the object is visible from two sides and two vanishing points are used. An important nuance: the closer the vanishing points are to each other, the more distorted the object becomes, so for a natural-looking image it is better to place them beyond the edges of the page.
Three-point perspective is useful for conveying scale, especially in buildings, and for depicting city views, looking upward from below or downward from above.
Upload references with different types of perspective into the app and consciously track where the lines go and where the vanishing points are. At the same time, watch for typical mistakes: lines should not spread outward, only converge toward the vanishing point, otherwise the perspective “breaks.”
Common Pitfalls and How to Avoid Them
Even with the right learning approach, there are mistakes that slow progress.
Skipping the workspace setup stage
Many beginners open the app and start drawing immediately while holding the phone in their hand. This is one of the most common reasons why the first experience ends badly. Every movement of the hand shifts the camera, the virtual contour drifts aside, and the lines stop matching the paper. As a result, the person thinks the problem is them, when in fact the problem is the setup.
The solution is simple: secure the smartphone on a stand or tripod before opening the app. Make sure the camera is perpendicular to the paper, the lighting is even, and the sheet lies on a flat surface.
Mechanical tracing without awareness
This is the least noticeable mistake of all. On the outside, everything looks correct: the person sits, traces the contour, and the drawing comes out neat. But if you ask them a week later whether they can draw the same object without the overlay, the answer is usually no. That means the hand was moving, but no learning was taking place.
Tracing works only when you are simultaneously analyzing what you are drawing. Ask yourself questions during the process: why is this line curved exactly this way, where is the widest point of the form, how does this contour relate to the one next to it? This approach turns a mechanical exercise into conscious practice that truly develops skill.
Dependence on the overlay
The overlay is a transition tool, not a permanent working mode. Some users practice with the app for months but never try drawing without it. In that case, progress stops: the hand gets used to following a ready-made contour and stops learning how to work independently.
To prevent this, structure your practice so that every session includes at least one drawing without the overlay. You do not have to draw the whole object from scratch right away. Start by tracing the silhouette with the overlay and adding the details on your own. Then gradually remove the overlay earlier and earlier, until you can work without it completely.
Starting with an object that is too complex
The desire to immediately draw a portrait or a human figure is understandable. These are exactly the kinds of works that inspire and motivate people to learn. But the human face and body are among the most difficult subjects in drawing: the viewer instantly notices any mismatch in proportions, because the brain has been trained to recognize human features from birth.
Start with objects that are more forgiving of inaccuracies: geometric forms, household items, simple animal silhouettes with clear contours. On these subjects, you will train the basic skills: line, form, proportions. Once simple objects start coming out confidently, move on to more complex ones. The portrait is not going anywhere, and the skills built on simple forms will make working on it much easier.
Ignoring the layered approach
When a drawing does not work, most beginners look for the problem in the details: a line that is not accurate enough, incorrect pressure, messy shading. In reality, the problem is usually deeper: the details were drawn before the overall form was established. The eyes may be carefully rendered, but the face still looks wrong. The fur of an animal may be accurately shown, but the silhouette feels flat.
Work in the right order: first the silhouette, then the structural lines, and only then the details. This is the principle professional artists follow regardless of their level of experience. Augmented reality does not change this order, it only makes each of these layers more visible.
Ignoring the fundamentals
Augmented reality lowers the barrier to entry, but it does not replace foundational knowledge of drawing. Some users spend a lot of time with the app while avoiding the study of proportions, anatomy, and the laws of perspective, assuming the overlay solves these issues automatically. That works only up to the moment when the person tries to draw something without a guide.
Understanding proportions matters even when the contour is already on the screen. It helps you see where the reference differs from what is happening on the paper and consciously correct the result. Without that understanding, mistakes build up unnoticed, and the person cannot even explain to themselves why the drawing does not look the way they wanted.
Supplement your app practice with drawing from life. Take any object from your desk and draw it without any digital help. This exercise develops observation and teaches you to see form independently, rather than only following a ready-made contour. Two or three such drawings a week noticeably speed up overall progress.
Irregular practice
Drawing is a motor skill, and it develops by the same laws as any other: through regular repetition. A person who practices once a week for two hours will progress much more slowly than someone who practices for twenty minutes every day. The brain does not закрепляет the skill through long sessions, but through frequent repetition with short intervals between them.
Do not set yourself the task of drawing for a long time. Set yourself the task of drawing regularly. Twenty minutes a day is enough to maintain progress and gradually build confidence. If you miss a few days, do not try to compensate with one long session. Simply return to your usual rhythm and continue.
Lack of feedback
Practice without analyzing results is movement without direction. You can draw every day and still reinforce the same mistakes simply because no one and nothing points them out. This is one of the reasons many people practice for a long time but feel as if they are standing still.
Build a simple feedback system. Photograph every drawing and periodically compare your work: what has changed over the last two weeks, where proportions have become more accurate, where the line has become more confident. If possible, show your work to other people or post it in themed communities. An outside eye notices what you have already gotten used to and stopped seeing. Even a short comment from a more experienced person can point out a problem you may not have been aware of for months.
Poor reference selection and a lack of variety in practice
The quality of the reference directly affects the quality of your work with the app. A blurry photo, an image with a cluttered background, or weak contrast between the object and the background creates two problems at once: the tracking algorithm works unstably, and the contour does not give a clear idea of the object’s form. Choose images with a clean background, good lighting, and strong contours. For the first sessions, graphic illustrations and line drawings work especially well: they contain no unnecessary details, and the form reads clearly.
But even a high-quality reference loses value if you keep using the same type of object again and again. Attachment to familiar subjects creates the illusion of progress: the drawings become cleaner, but only because the hand has gotten used to a specific form. Alternate object types: animals, still life, landscape, architecture. Each new type activates different aspects of the skill and prevents practice from turning into mechanical repetition.
Popular Augmented Reality Drawing Apps
AR Drawing. The app uses a smartphone camera to overlay an image onto any surface: paper, canvas, or wall. The library includes a large selection of templates and step-by-step lessons across categories such as portraits, animals, anime, landscapes, and architecture. Available on iOS and Android.
Sketchar. One of the first apps to apply augmented reality to drawing. In addition to AR overlay, the app includes a digital canvas with professional tools: layers, custom brushes, and line smoothing. Available on iOS and Android.
ArtEasy. This app focuses not on mechanical tracing, but on understanding drawing fundamentals: form, proportions, and structure. Here, AR overlay is combined with step-by-step lessons and an AI-based sketch generator. The templates cover a wide range of categories: from anatomy and portraits to tattoos and food. Available only on iOS.
Augmented reality gives you a strong start. But what makes you an artist is not the app — it is the number of hours spent in conscious practice. The tool can be anything; what matters is what happens in your mind while your hand moves across the paper.
.webp)


.webp)