Get app for free now
.webp)

Augmented reality technologies are gradually transforming familiar creative processes. Today, they allow users to transfer images onto paper or any other surface directly through a smartphone camera. In this article, we’ll explore how this technology works and the possibilities it opens up.
Before diving into AR Drawing, it helps to understand the technology behind it. Don’t worry — this won’t be a lecture. Just the essentials you actually need to know.
Augmented reality is a technology that overlays digital objects onto the real world you see through the camera of a smartphone or tablet. The key word here is “augmented.” The real world doesn’t disappear — it simply gains an additional digital layer on top of it.
Chances are you’ve already encountered augmented reality without realizing it. Remember the filters in Instagram or Snapchat that add cat ears or sunglasses to your face? That’s augmented reality in action. Or think of Pokémon Go, the game where virtual creatures appeared on real streets through your phone’s camera. The principle is always the same: the real world combined with a digital object in real time.
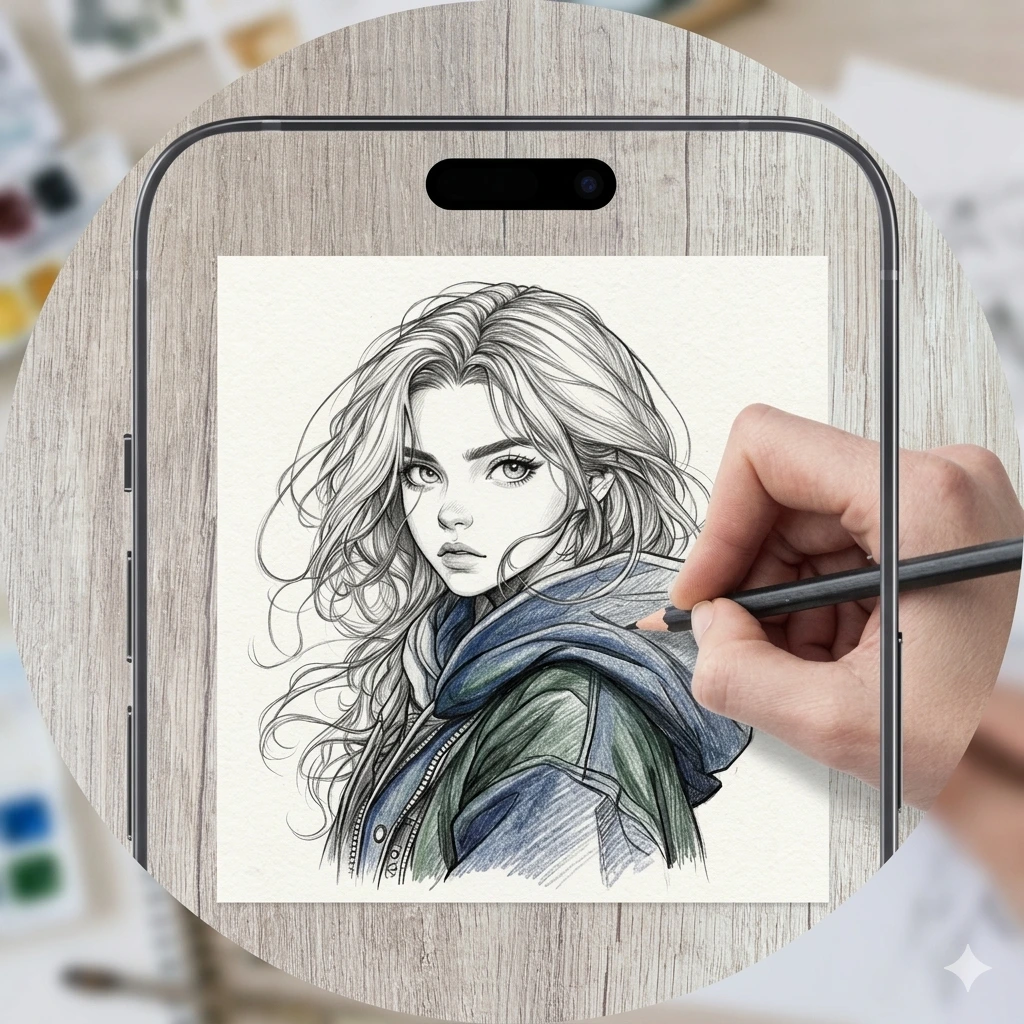
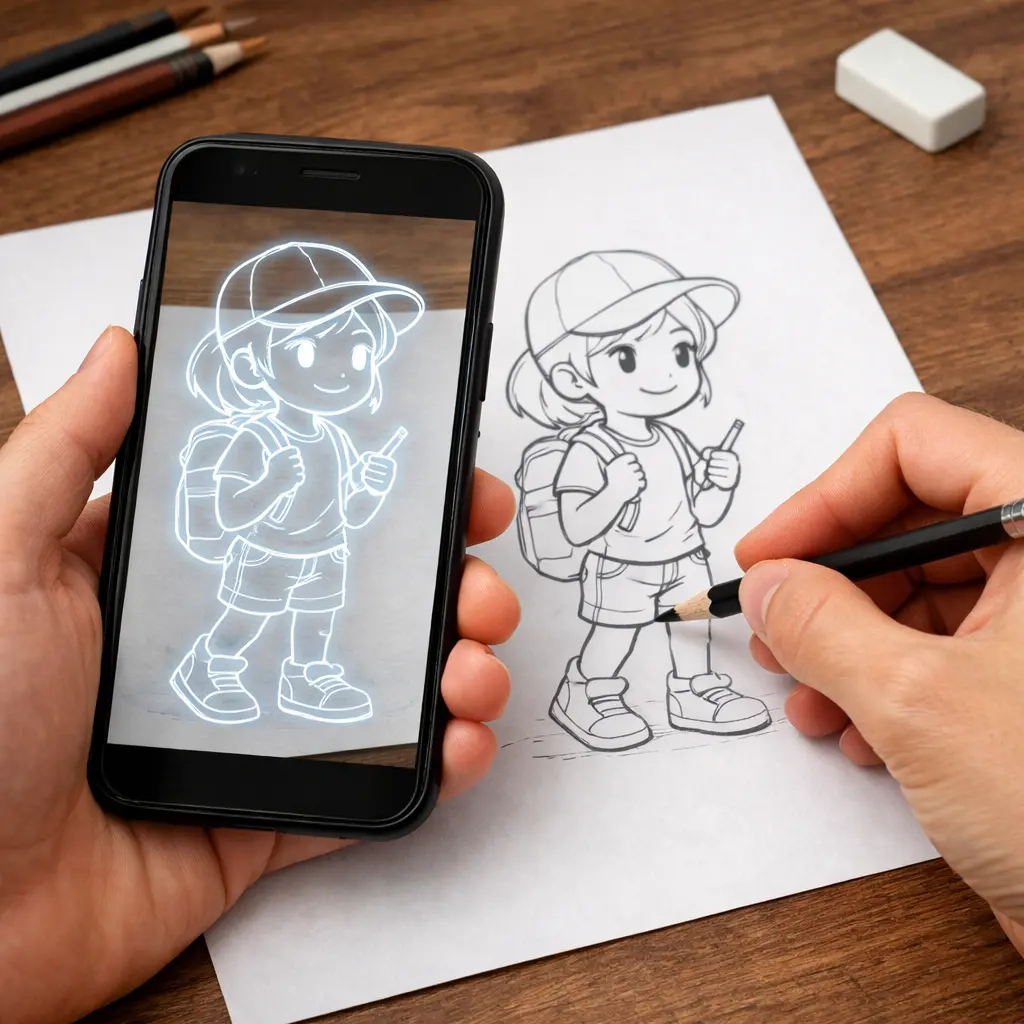
AR Drawing is a way of drawing with the help of augmented reality. A smartphone app overlays an image directly onto a real sheet of paper through the camera. You see the picture on the screen and trace it on paper — similar to using tracing paper, except the phone screen replaces the transparent sheet.
The process is extremely simple:
Many people, when they hear about AR Drawing, imagine a tablet and stylus. But these are fundamentally different tools. With digital drawing, the final result exists only on the screen. With AR Drawing, the result is created on real paper using traditional materials: pencil, marker, watercolor, and so on. In this process, the phone acts as an advanced stencil. It shows what to draw and where, but it doesn’t draw anything itself.
One important thing to understand from the start: the app does not draw for you. The projected outline removes the main barrier — the fear of a blank page — and allows you to focus on what actually develops drawing skills: pressure, line quality, and the way your hand learns to follow form.
That’s why two people working with the same template will always produce different drawings. The app defines the proportions, but everything else is done by the person.
For parents, this is especially important to understand. When a child traces lines through the screen, they are not bypassing the learning process — they are participating in it.
Research in art education shows that copying and tracing are classical methods for training hand control and improving visual accuracy. These techniques have been used in academic drawing for centuries. AR Drawing simply translates this method into a format that feels natural for a generation that grew up with smartphones.
AR Drawing and traditional drawing are not opposites — they are simply two different approaches to the same creative process. The fundamental artistic skills remain the same: the artist still draws lines manually and works with form, proportions, and details. The difference lies in how the visual reference is presented during the process.
In traditional drawing, the artist usually looks at a reference separately — for example, on a phone or computer screen — and then transfers the image onto paper. This requires a well-developed eye for proportion and the ability to mentally compare shapes.
With AR Drawing, the image is overlaid directly onto the drawing surface through the device camera. The artist sees the outlines on top of the paper and can follow them while working.
Before AR apps appeared, artists already used various methods to transfer images onto paper, canvas, or other surfaces. These techniques are well known and are still used in illustration, design, and art education.
The most common methods include lightboxes, art projectors, and the grid method. AR Drawing doesn’t replace these techniques — it simply offers a more digital approach. To understand its role, it helps to examine how each method works, its advantages, and where augmented reality may be more convenient.
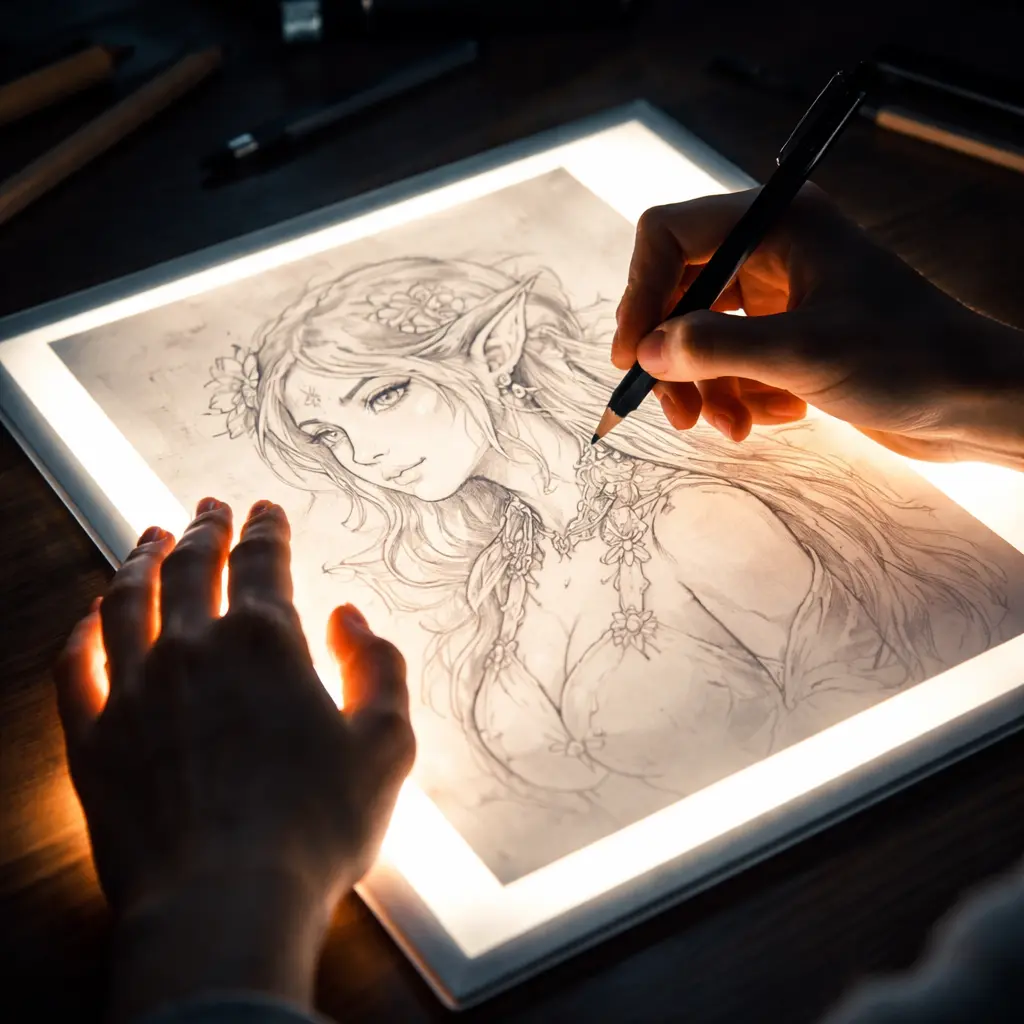
A lightbox is a flat illuminated panel that lights an image from below. The artist places a printed reference image on the lightbox, then places a blank sheet of paper on top. Because of the light shining through the layers, the lines of the original image become visible through the top sheet, making it possible to trace them.
There is no complex electronics, apps, or software involved. Essentially, all you need is a light panel and a sheet of paper. The results can be very accurate, since the original lines and the traced copy align almost perfectly. For smaller formats, especially A4 and smaller, lightboxes work extremely well.
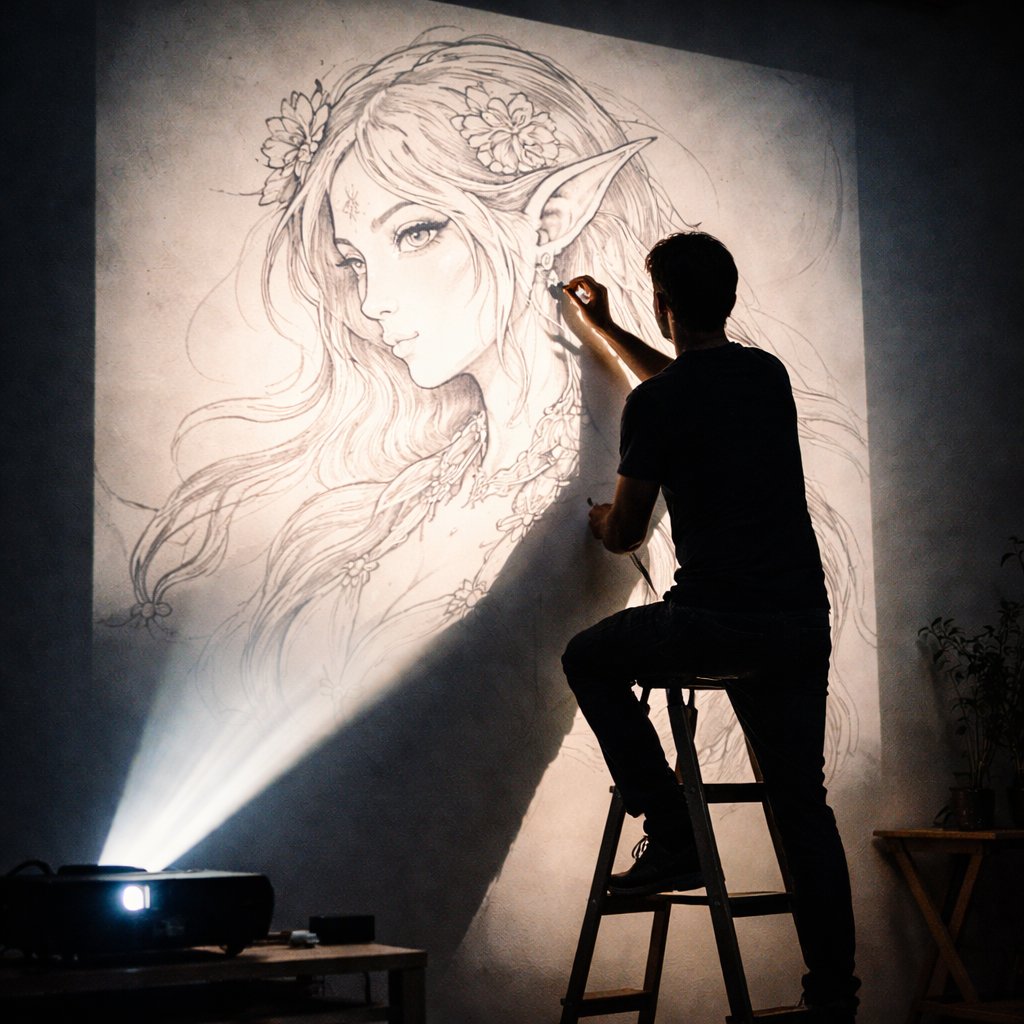
Another common way to transfer images is by using an art projector. This device projects an image onto a surface using lenses and a light source. The artist places the reference inside the projector (or connects it to a digital device), points the projection toward a wall or canvas, and receives an enlarged image that can be traced. This method is especially popular among artists working with large formats.
The main advantage of a projector is scale. A small sketch can be enlarged to several meters and transferred onto a wall while preserving proportions. That’s why projectors are frequently used by mural artists, interior designers, and creators of large wall paintings.
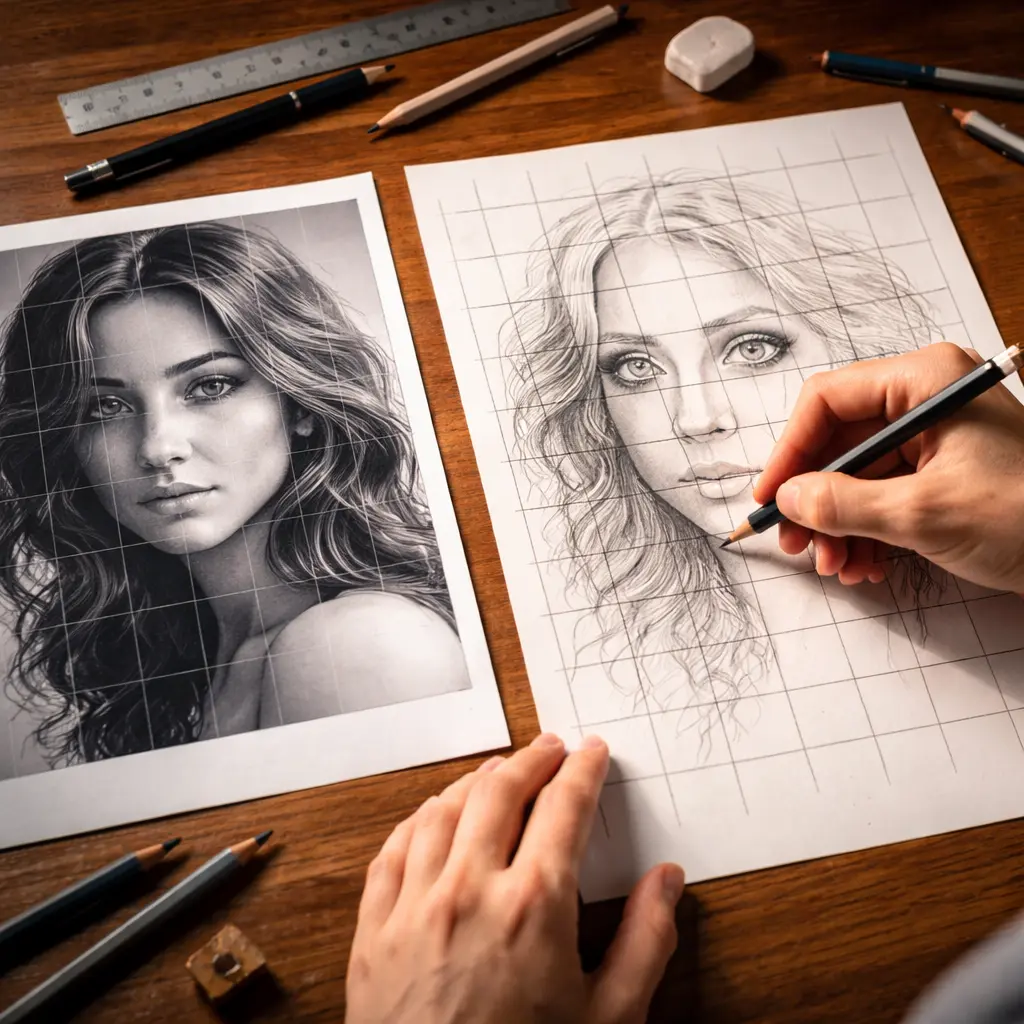
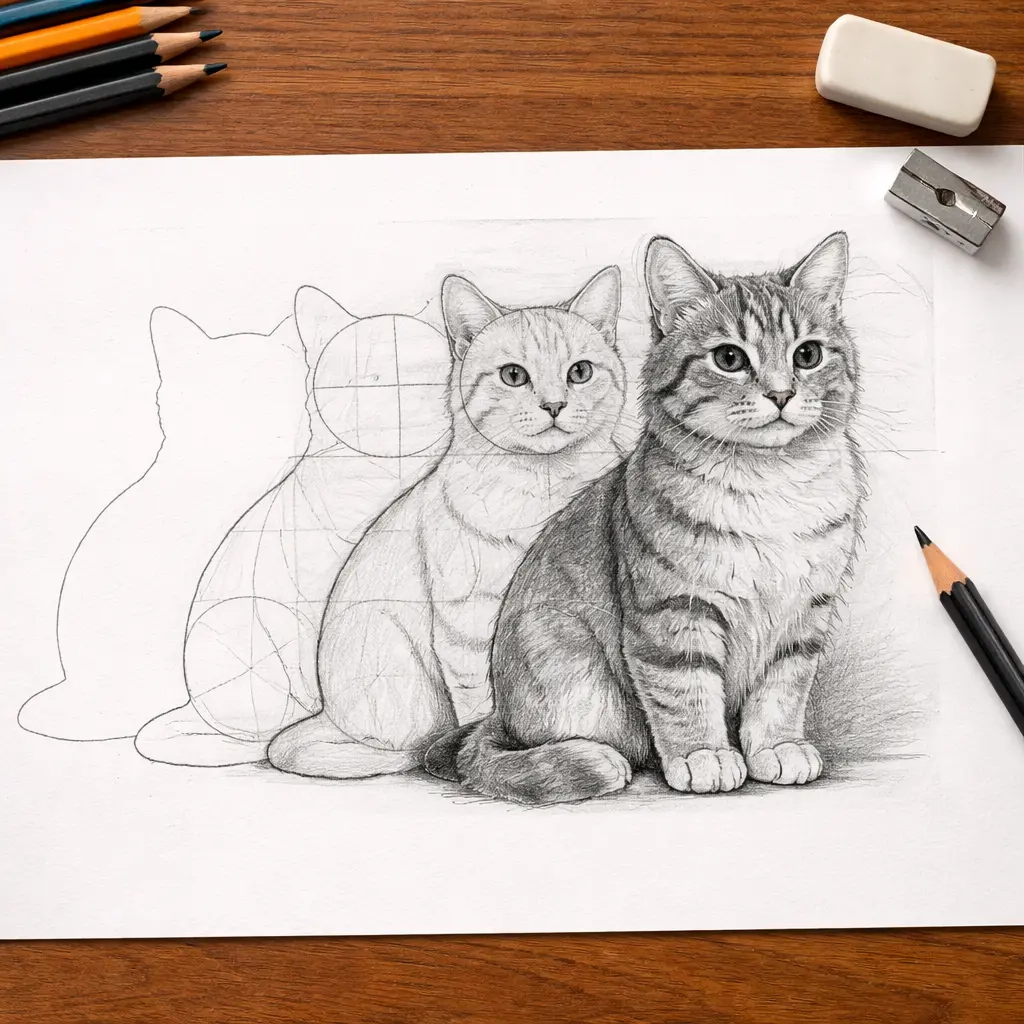
The grid method is one of the most well-known classical ways to transfer an image. Its principle is based on dividing a drawing into equal squares. First, a grid is drawn on the reference image. Then the same grid is drawn on the blank paper or canvas. The artist then transfers the image piece by piece, filling in each cell individually. This approach helps maintain proportions and allows the image to be recreated gradually.
This method requires almost no special tools — only a ruler, pencil, and paper. It also helps develop a strong sense of proportion and spatial awareness. For this reason, it is still widely used in art schools and academic drawing courses.
Before starting the drawing, you first need to draw the grid on the reference, then on the canvas, and only after that can you begin transferring the image. For complex drawings, the preparation stage may take longer than the drawing itself. If several cells are transferred slightly inaccurately, the final image may gradually drift out of proportion. After the drawing is finished, the grid lines remain on the paper and must be carefully erased. This adds an extra step and sometimes leaves marks.
AR Drawing removes many of the limitations of these methods. The reference can be taken directly from your phone gallery or the internet. The working surface can be almost anything: paper, canvas, fabric, or even a wall. And the only device required is a regular smartphone.
For comfortable work with AR Drawing, only a minimal set of tools is required:

.webp)