How to draw a butterfly step by step
In this lesson, we will learn how to draw a butterfly. Start with a light pencil sketch to outline the general shapes of the wings and body. Then add details: patterns on the wings, antennae, and shadows to give the butterfly volume. This is a very simple lesson — you will definitely succeed.
Step 1

Draw a small circle — this will be the butterfly’s head.
.
.
Step 2

From the circle downward, draw a long, elongated oval shaped like a drop. This is the butterfly’s abdomen.
.
.
Step 3
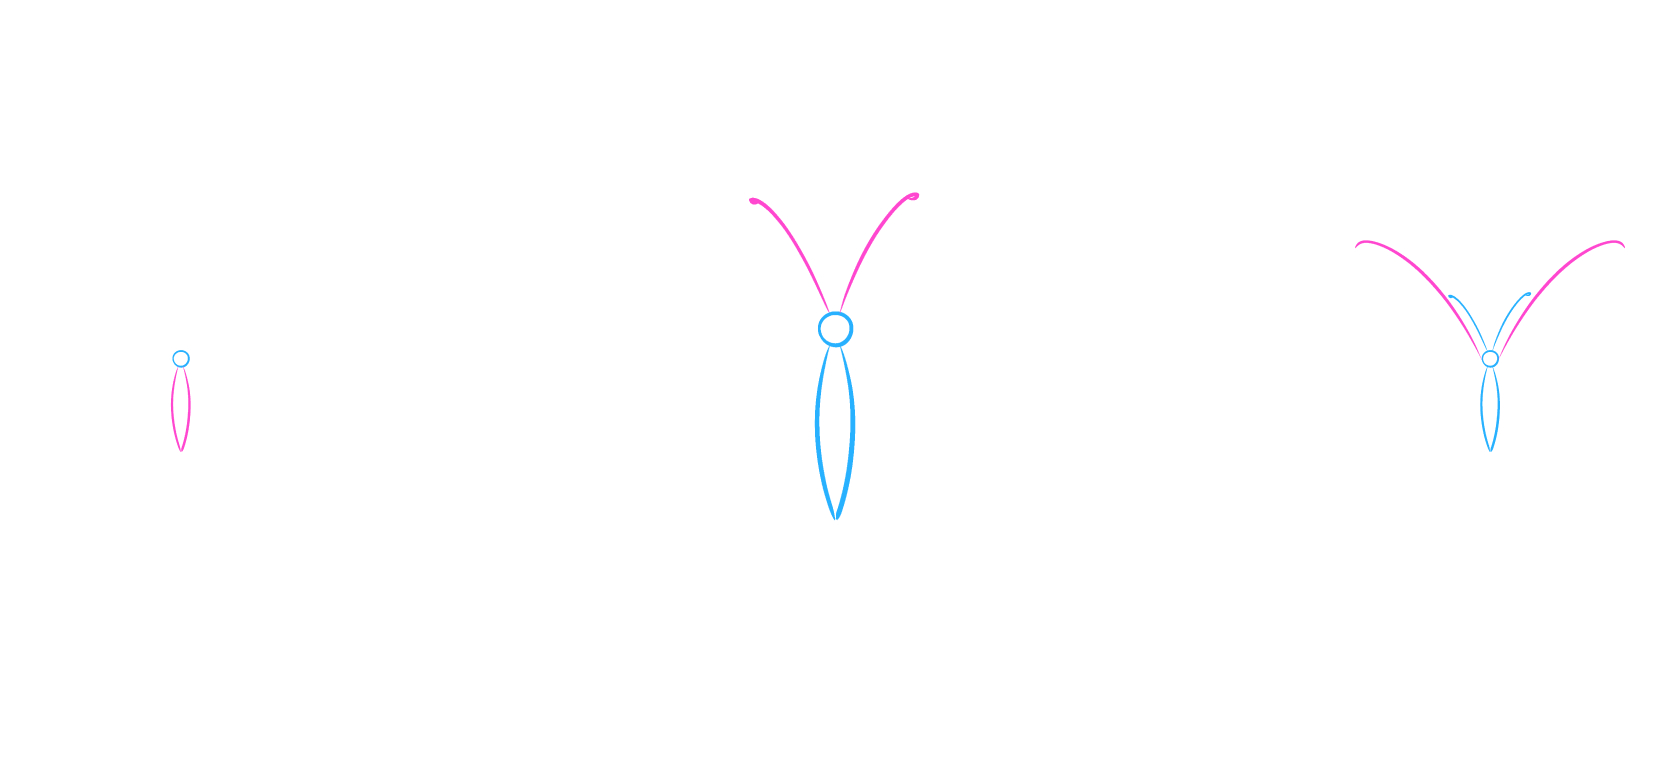
From the butterfly’s head, draw two graceful lines upward. At the end of each line, add small “droplet” shapes.
.
.
Step 4
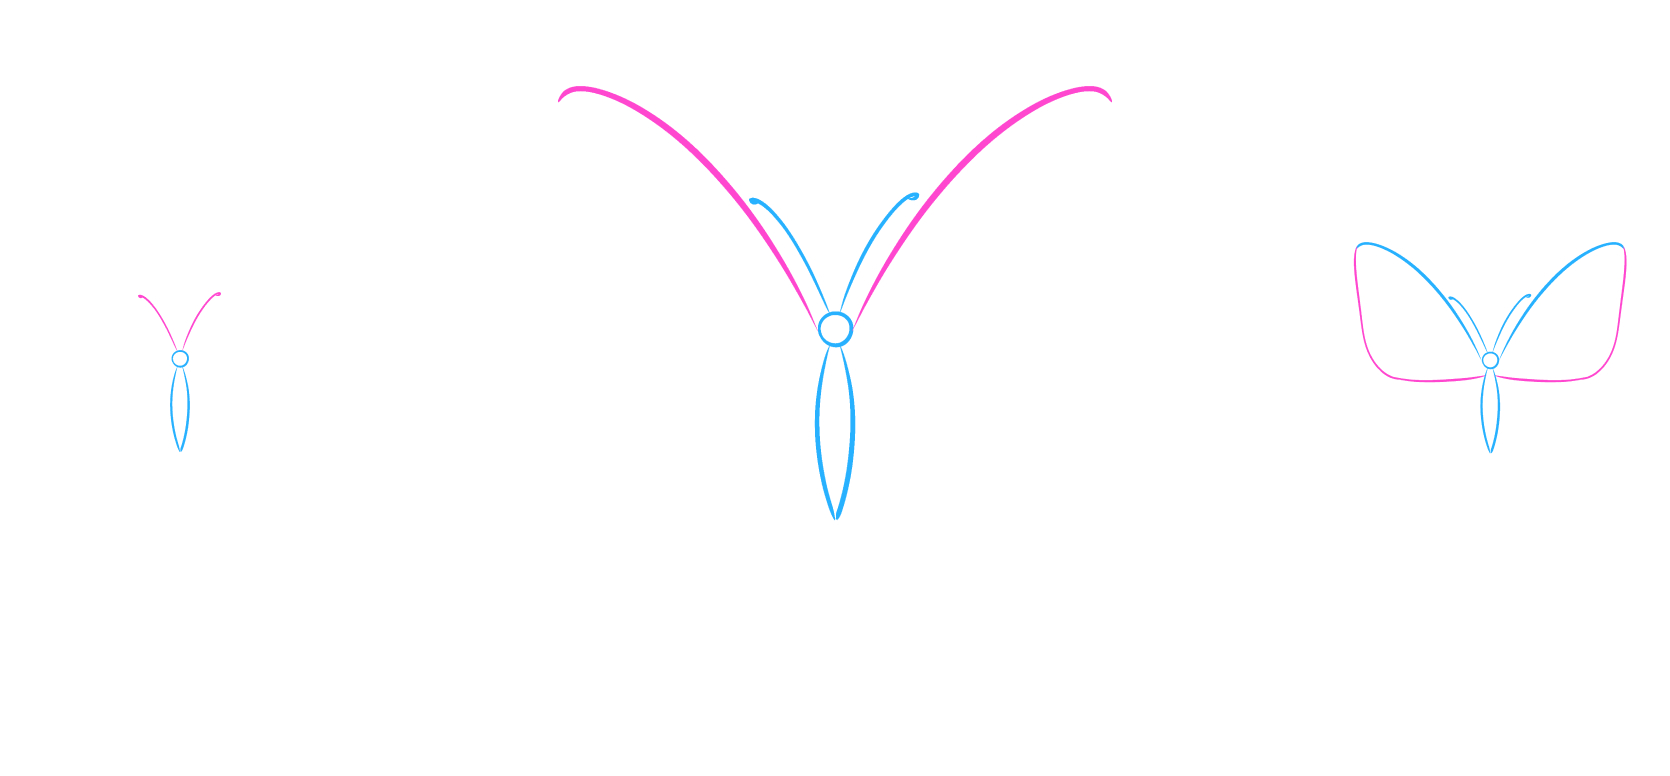
Draw very light curved lines upward from the body on each side. These lines will show the direction and curve of the upper wings.
.
.
Step 5
Using the guidelines, draw the upper wings. Their shape usually resembles an elongated triangle with rounded corners or a large petal. Try to make the wings symmetrical.
.
.
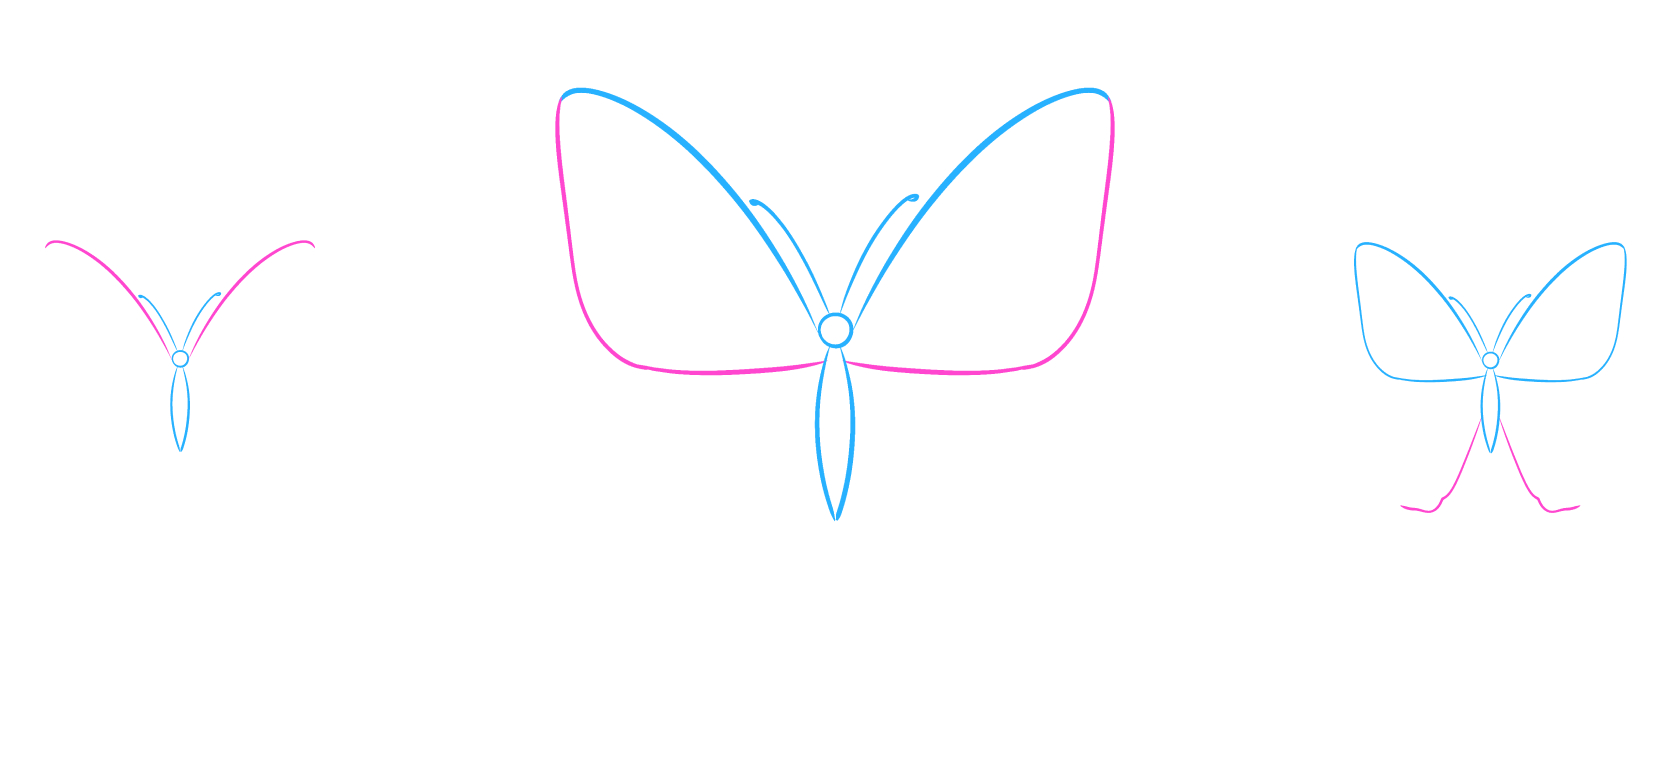
Step 6
Now, beneath the upper wings and the abdomen, lightly sketch the placement of the lower wings. They are usually rounder and smaller.
.
.
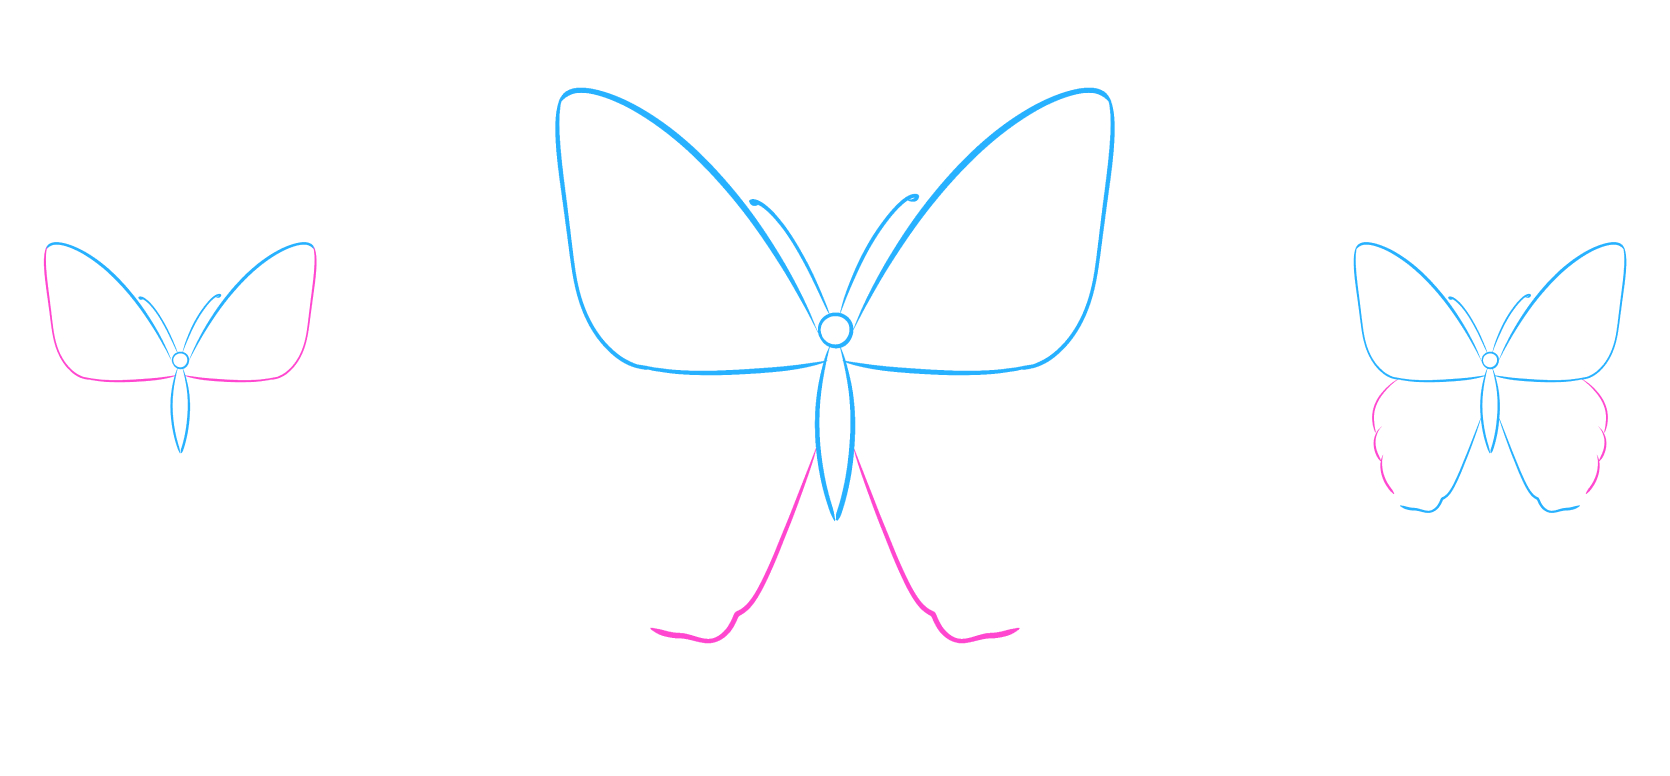
Step 7
Using smooth, wavy lines, finalize the contours of the lower wings, giving them a beautiful and irregular shape.
.
.
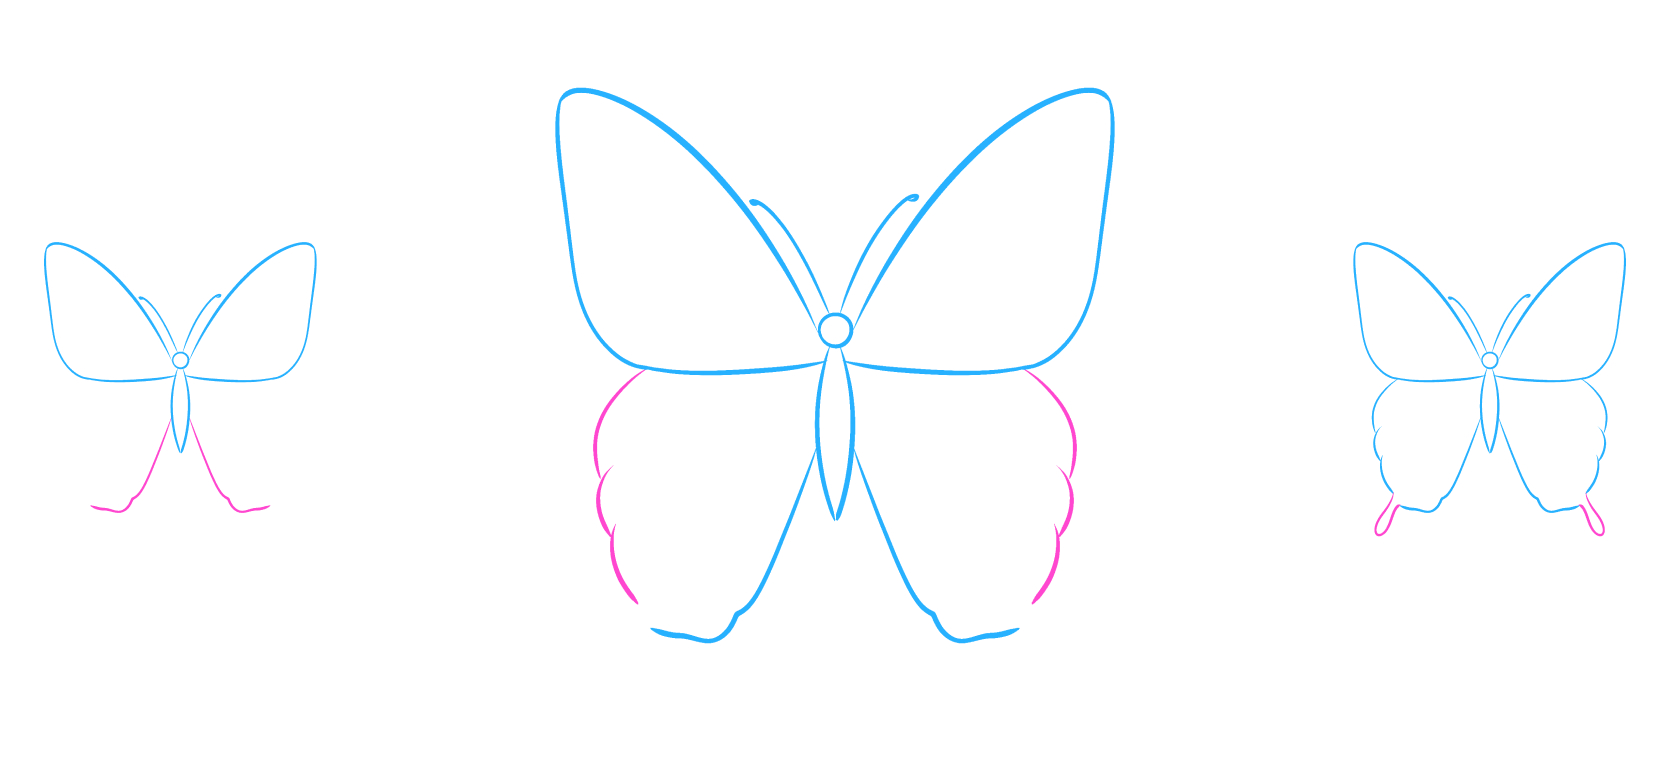
Step 8
Decorate the lower wings with “tails.”
.
.
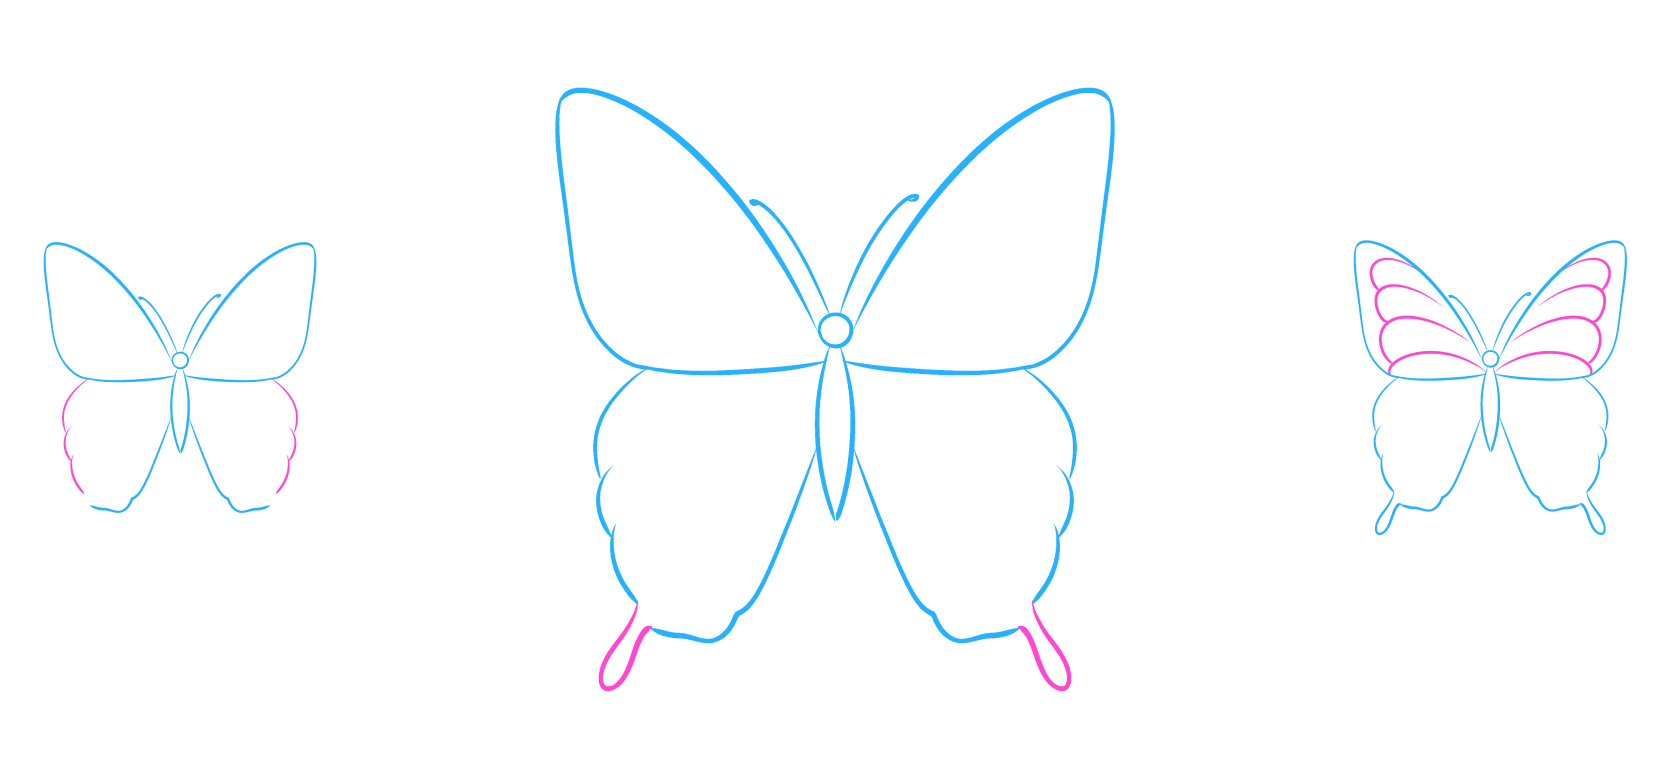
Step 9
Add patterns to the upper wings. These can be any symmetrical designs you like.⠀⠀⠀⠀⠀⠀⠀
.
.
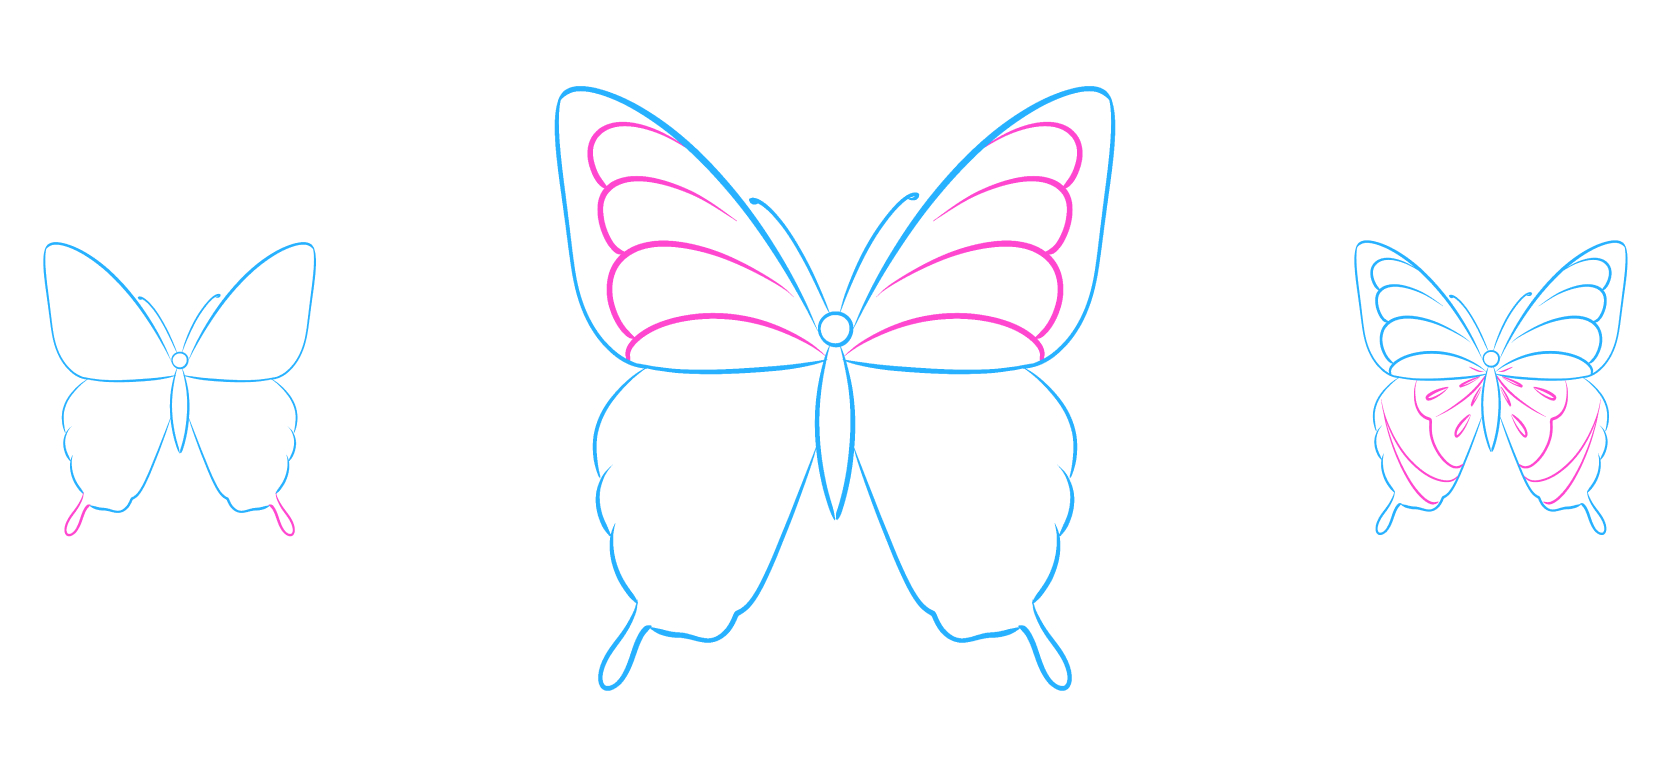
Step 10
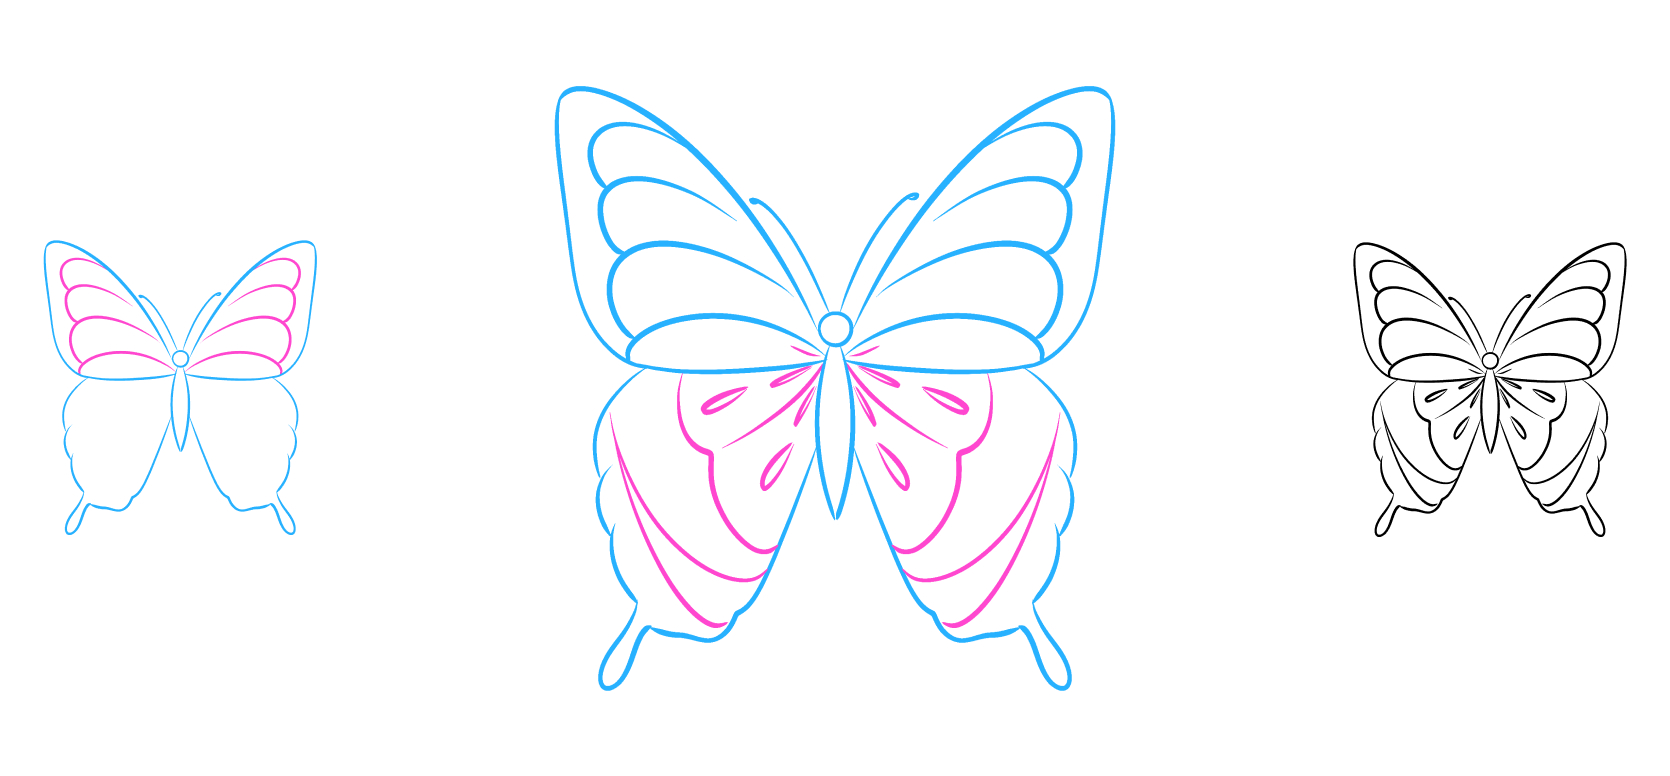
Finish decorating the lower wings with patterns that harmonize with the upper wings.
.
.
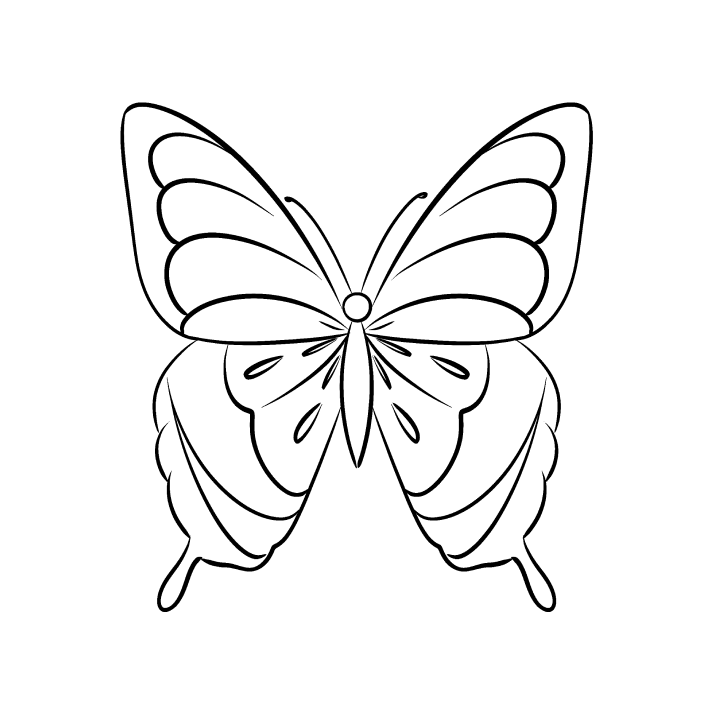
Congratulations!

The drawing is ready!

_1_1_1_1_1_1.webp)