How to draw a chair step by step
A chair seems like a simple object until you try to draw one. Beginner artists often end up with wonky legs, a lopsided seat, or weird perspective. The problem isn't talent, it's the lack of a method. Our guide will teach you how to draw a chair in 10 steps.
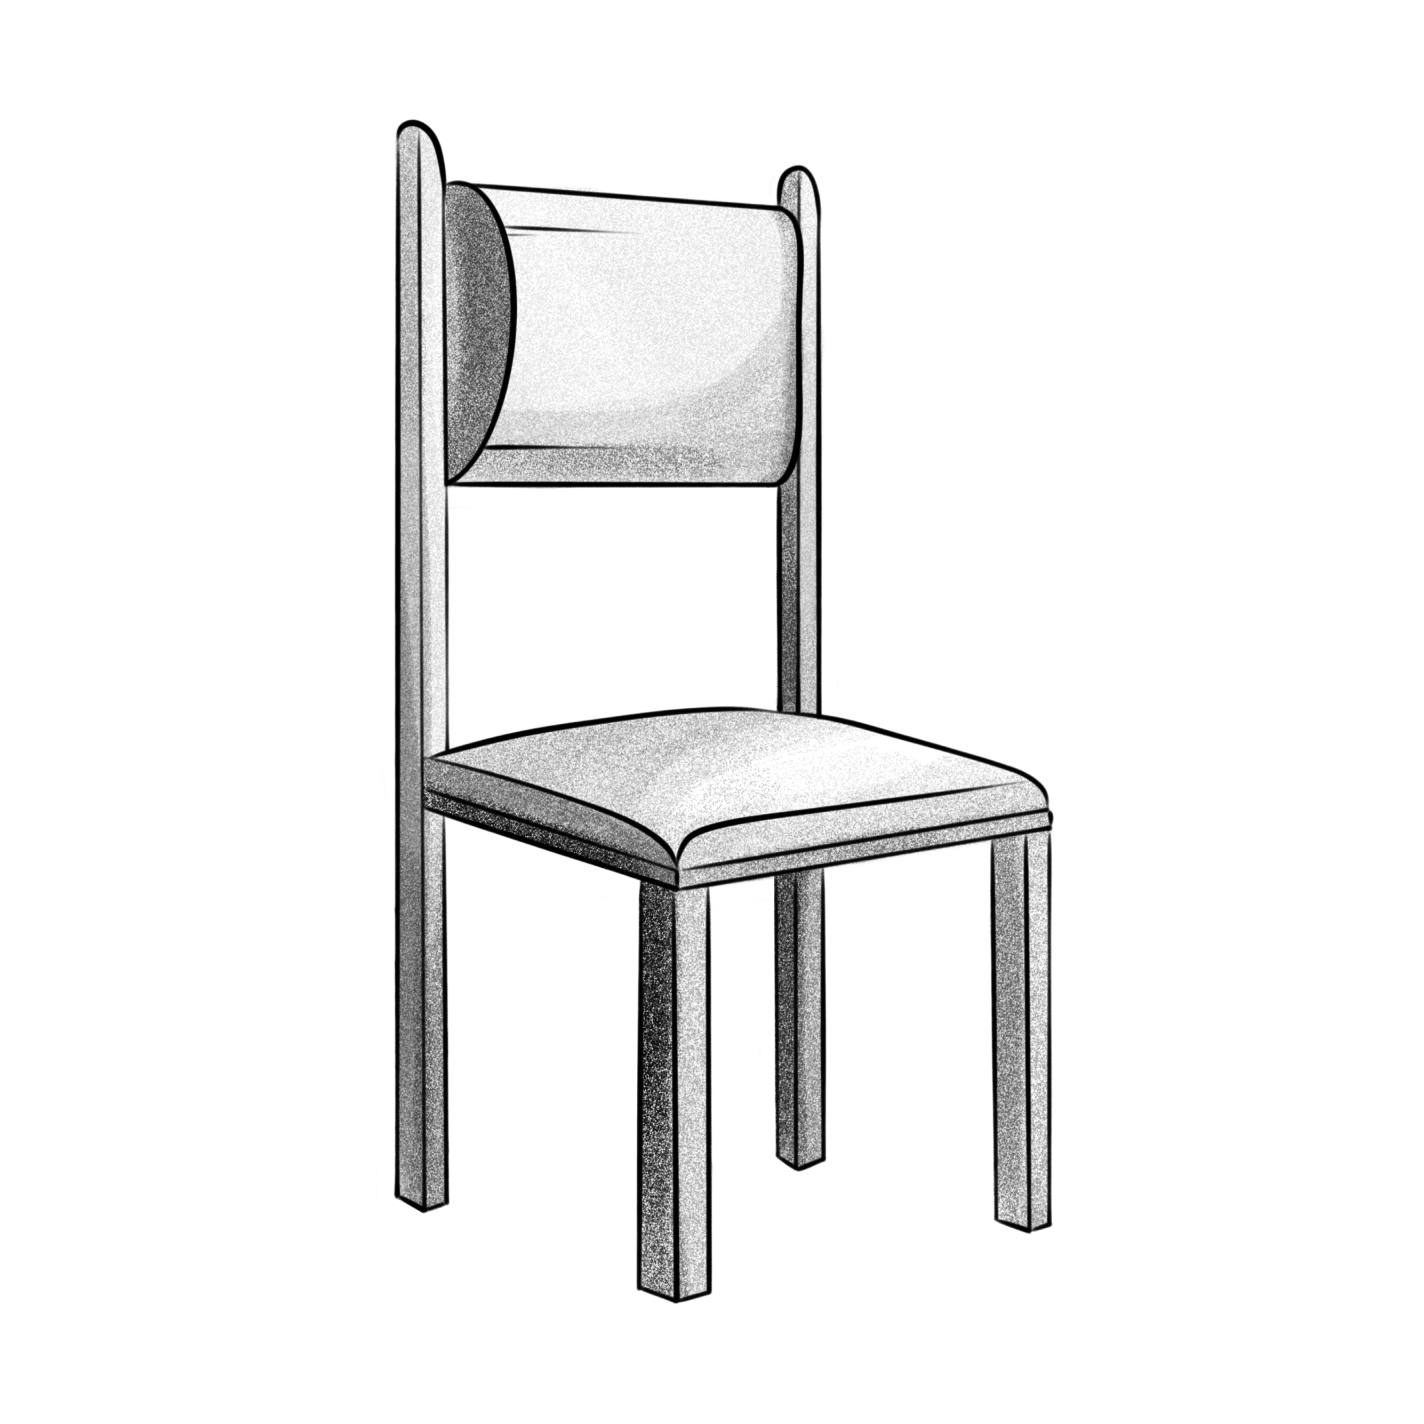
Step 1. Start by constructing the frame
Draw a cube using light, thin lines. This is your starting point for the chair drawing. The cube establishes the boundaries and proportions of the entire structure.
Imagine you're looking at the cube from a slight angle. Vertical edges stay straight up and down, while horizontal ones recede into depth at an angle. Don't press hard with your pencil, these marks are temporary, and you'll erase them later. First draw the near face of the cube, then add the far edges.
Check yourself: all verticals should be strictly upright, and the depth line should angle inward.
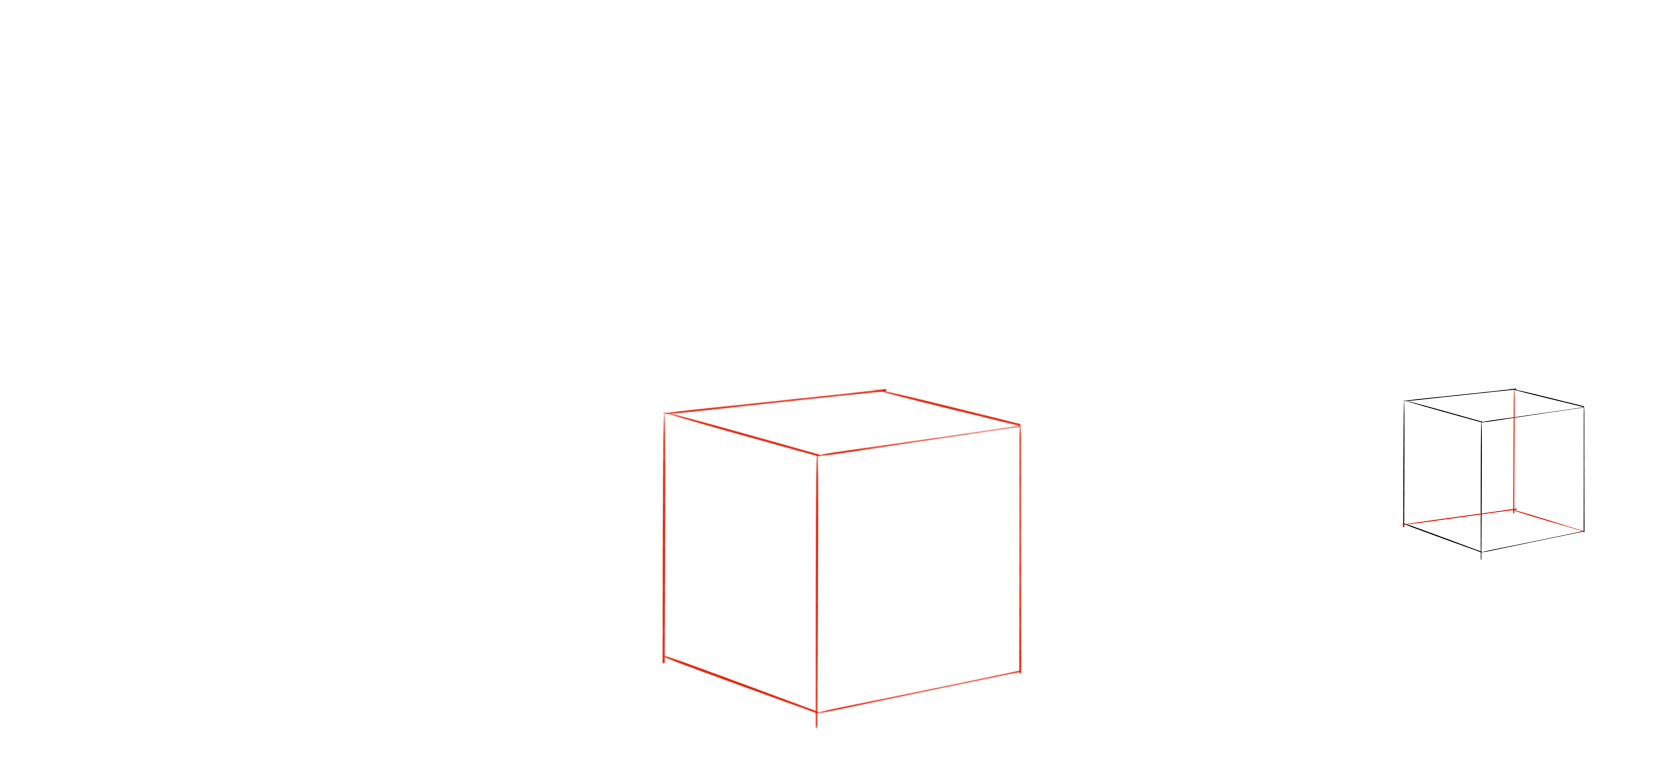
Step 2. Show the Internal Edges
Add the cube's internal edges, the parts that would be hidden from view in a real object. Draw lines showing the back interior face of the cube.
Why do this? They help you understand the volume and depth of the form. You're seeing through the cube, which makes it easier to construct the details of your drawing of a chair later on.
Keep these lines barely visible, they'll be completely erased in the final stage.
Step 3. Add the Foundation for the Backrest
Draw a vertical rectangle extending upward from the top back edge of the cube. This is the framework for the chair's backrest.
The rectangle's height determines how tall the backrest will be. Make it about 1.4 times the height of the cube. This keeps the backrest looking proportional.
Tip: To keep your verticals straight, visually align them with the vertical edges of your paper.
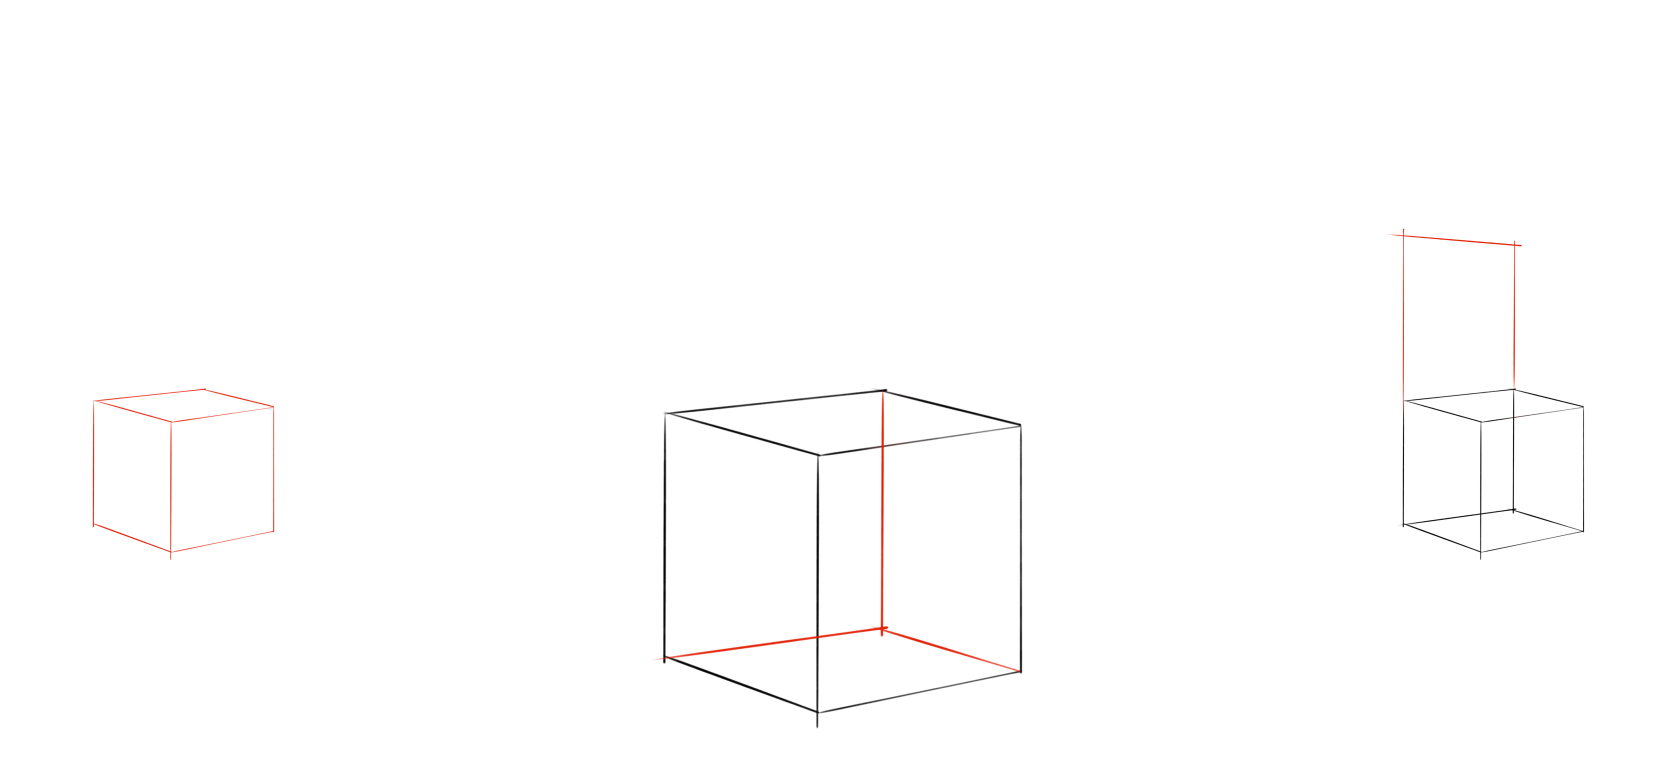
Step 4. Define the Seat
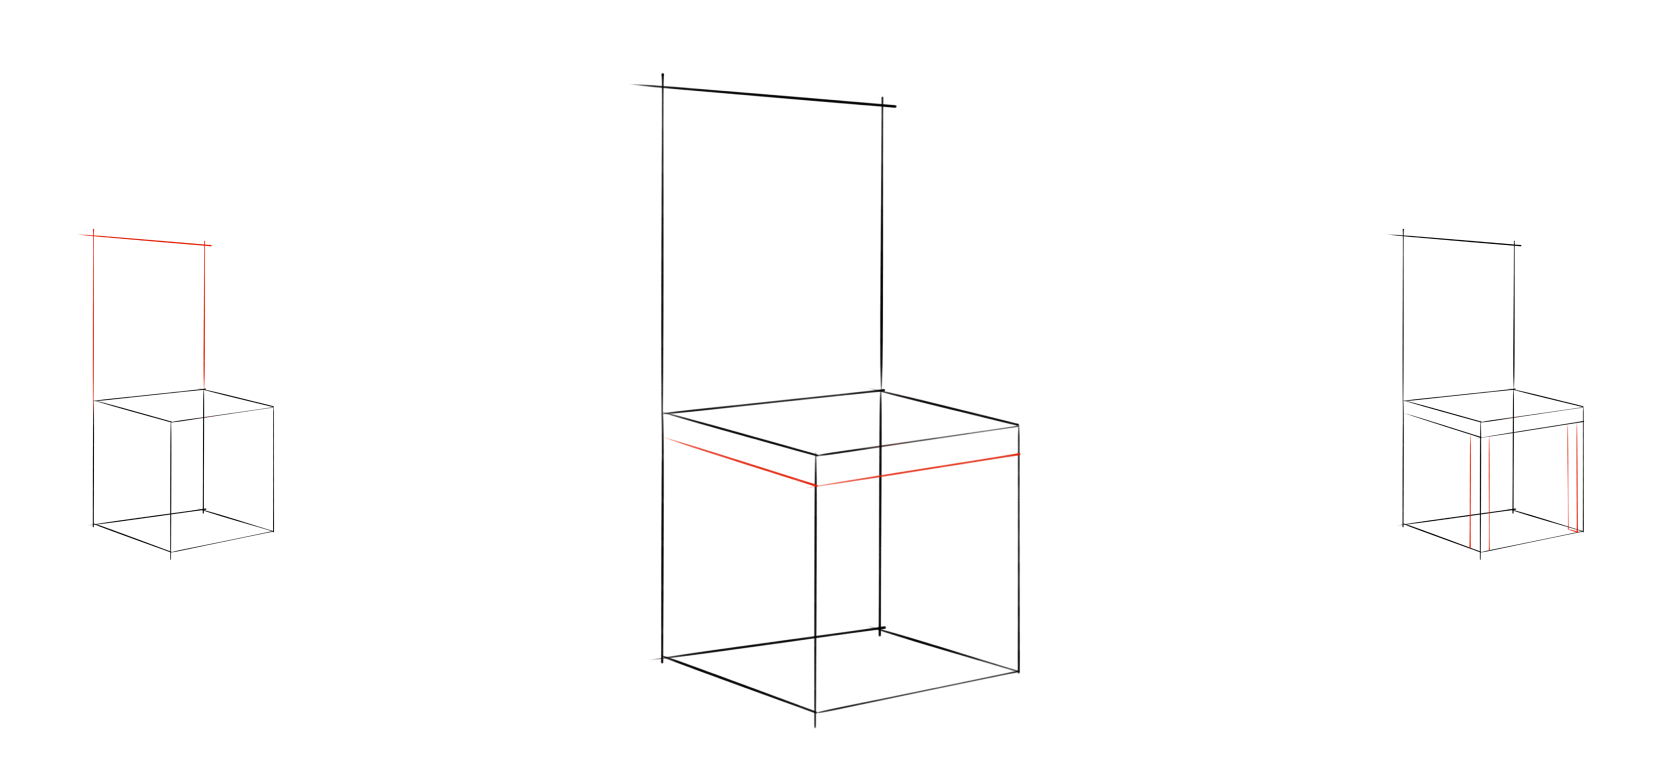
Draw two horizontal lines inside the top face of the cube, parallel to its edges. Drop them slightly lower, this creates the seat's thickness, an essential step when you draw a chair in proper perspective.
Make sure the thickness stays consistent on all sides. A common mistake is making one edge thicker than the other due to perspective distortion.
The seat thickness should be roughly 1/8 to 1/10 of the cube's height.
Step 5. Draw the Front Legs of the chair

Draw two vertical edges from the front corners of the seat down to the floor. Each leg consists of a pair of lines that create thickness.
The thickness of one leg should be about 1/8 of the seat's width (or 2–3 mm on an A4 sheet). Both legs must be strictly parallel to each other.
Check: they are equally thick and stand vertically.
Step 6. Add the Back Legs of the chair
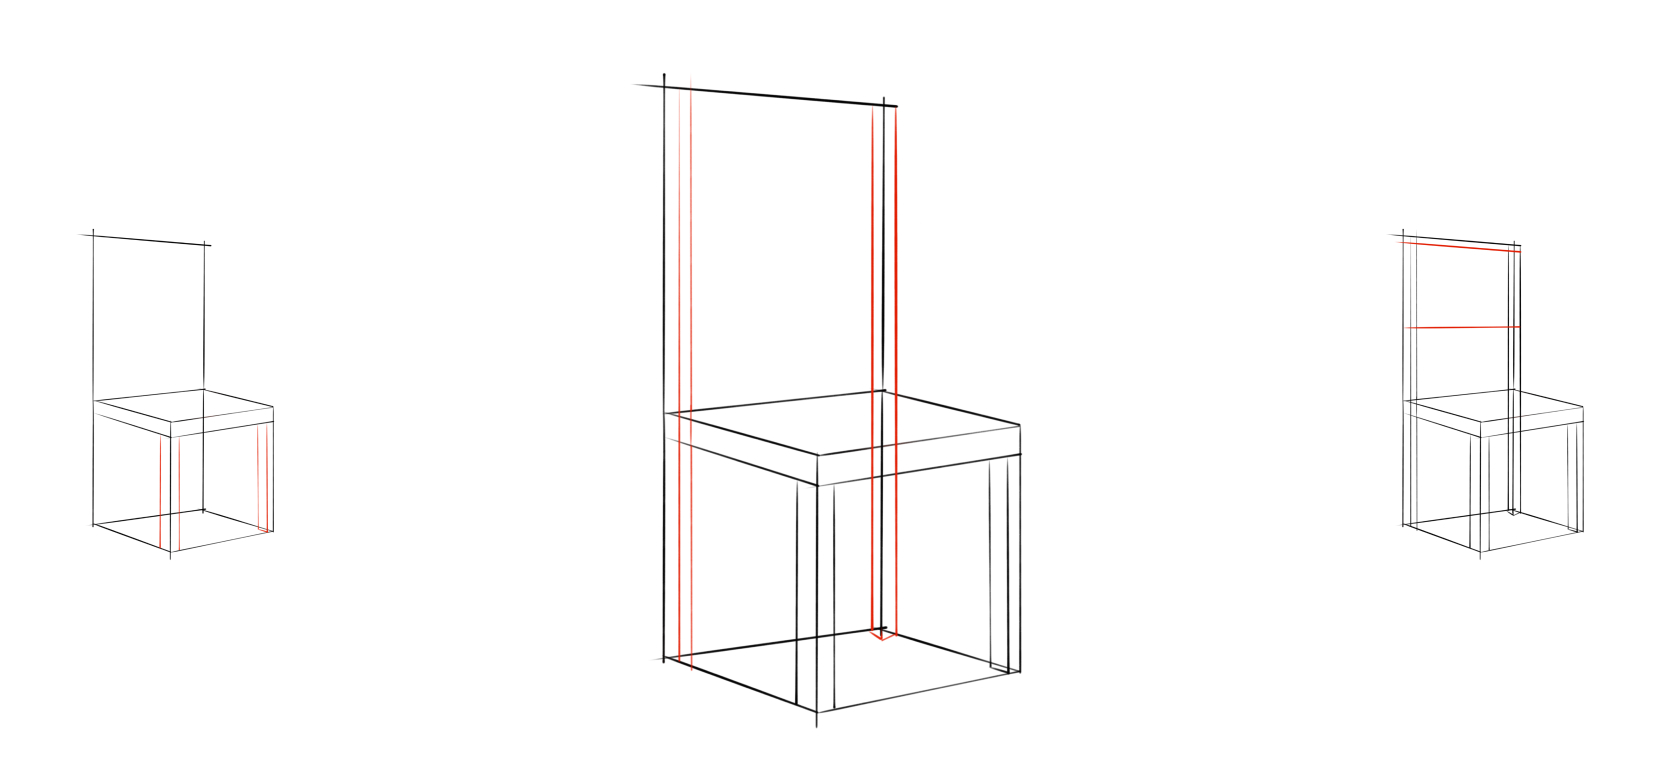
Draw two vertical lines from the back corners of the seat. Each line goes in two directions: down to the floor (the back leg) and up to the top of the backrest (the backrest support).
This way, the back leg and backrest support form one continuous vertical line running through the seat.
Check: all four legs rest on the same floor level, even if the back ones appear visually shorter in perspective.
Step 7. Add a horizontal support bar on the backrest
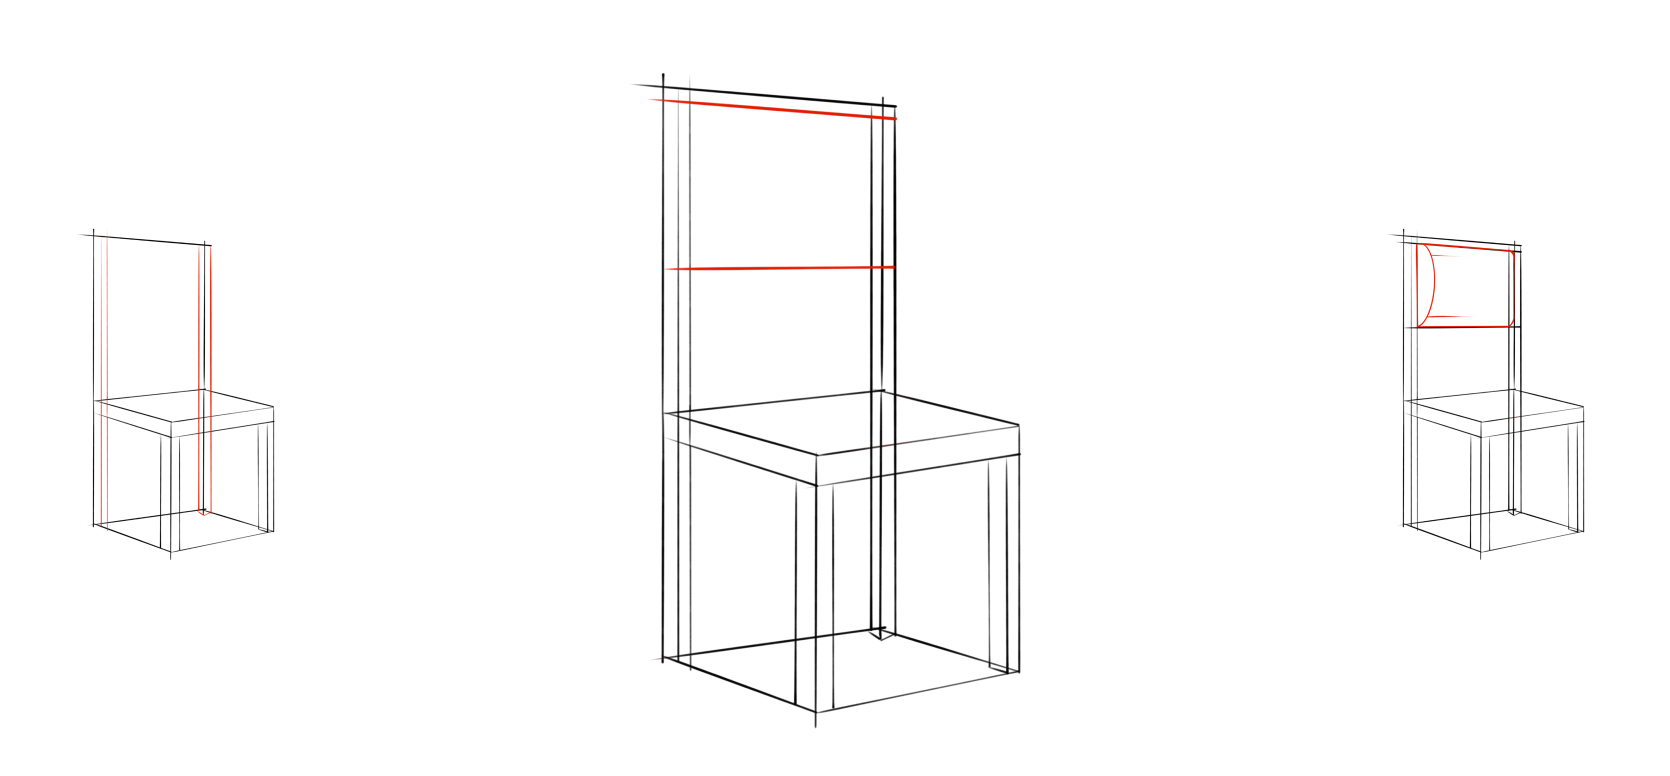
Draw two parallel horizontal lines between the vertical backrest supports of the chair. Position them roughly at mid-height or slightly above.
The top line connects the supports, the bottom line creates the element's thickness. This is a support crossbar, a standard structural component.
Both lines should be strictly parallel to each other.
Step 8. Give the Backrest a Soft Shape
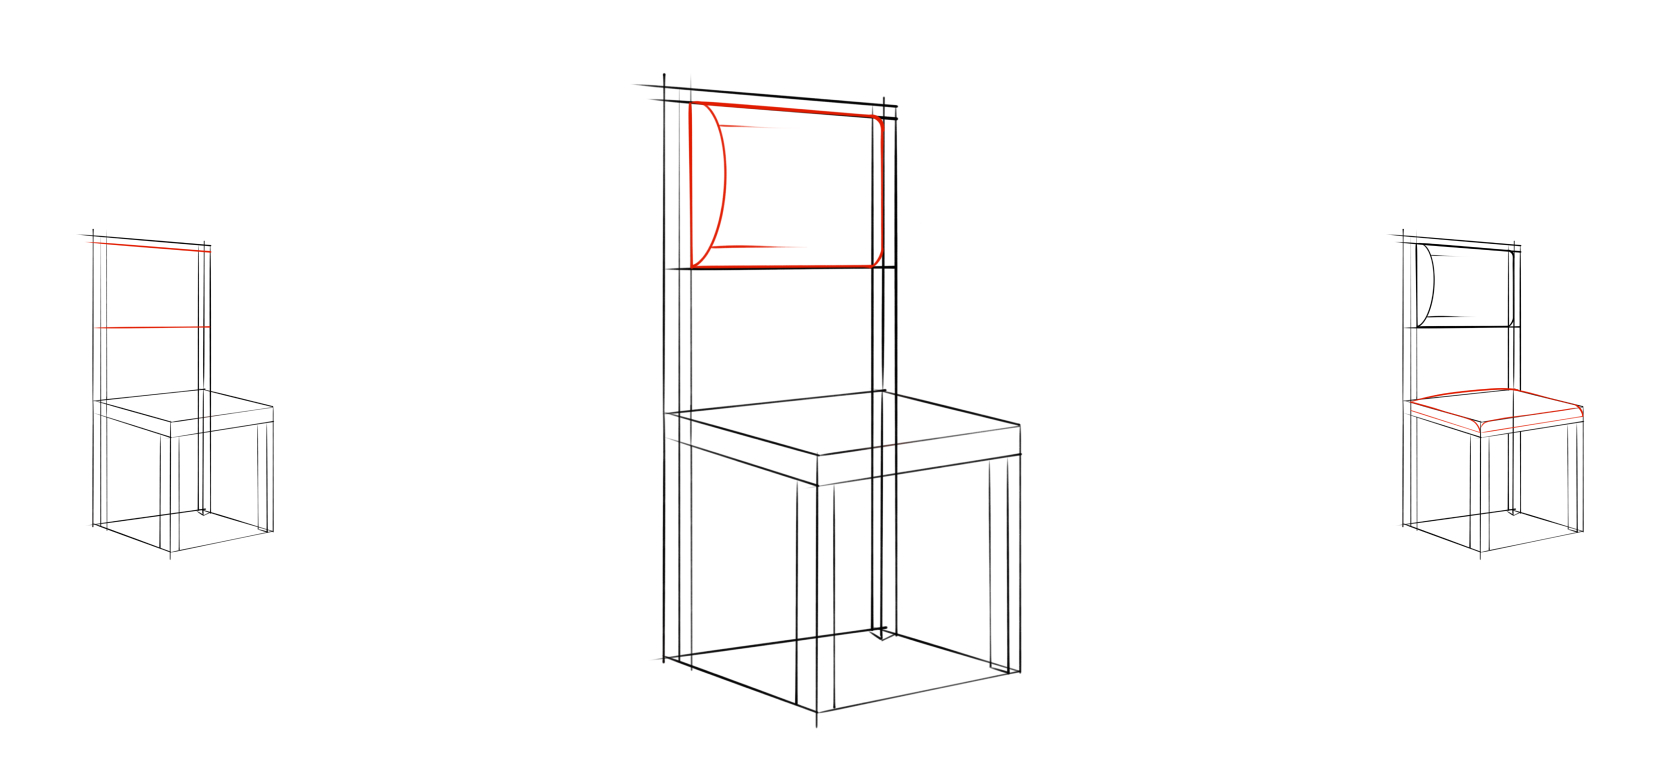
Replace the hard straight lines with smooth, curved contours to refine your drawing of a chair. Trace over the vertical supports and horizontal crossbar with gentle curves.
This shows upholstery, fabric or leather stretched over the frame. The curves should be subtle, especially at the corners.
Tip: Don't make the lines too bulgy, a slight curvature is enough.
Step 9. Shape the Seat
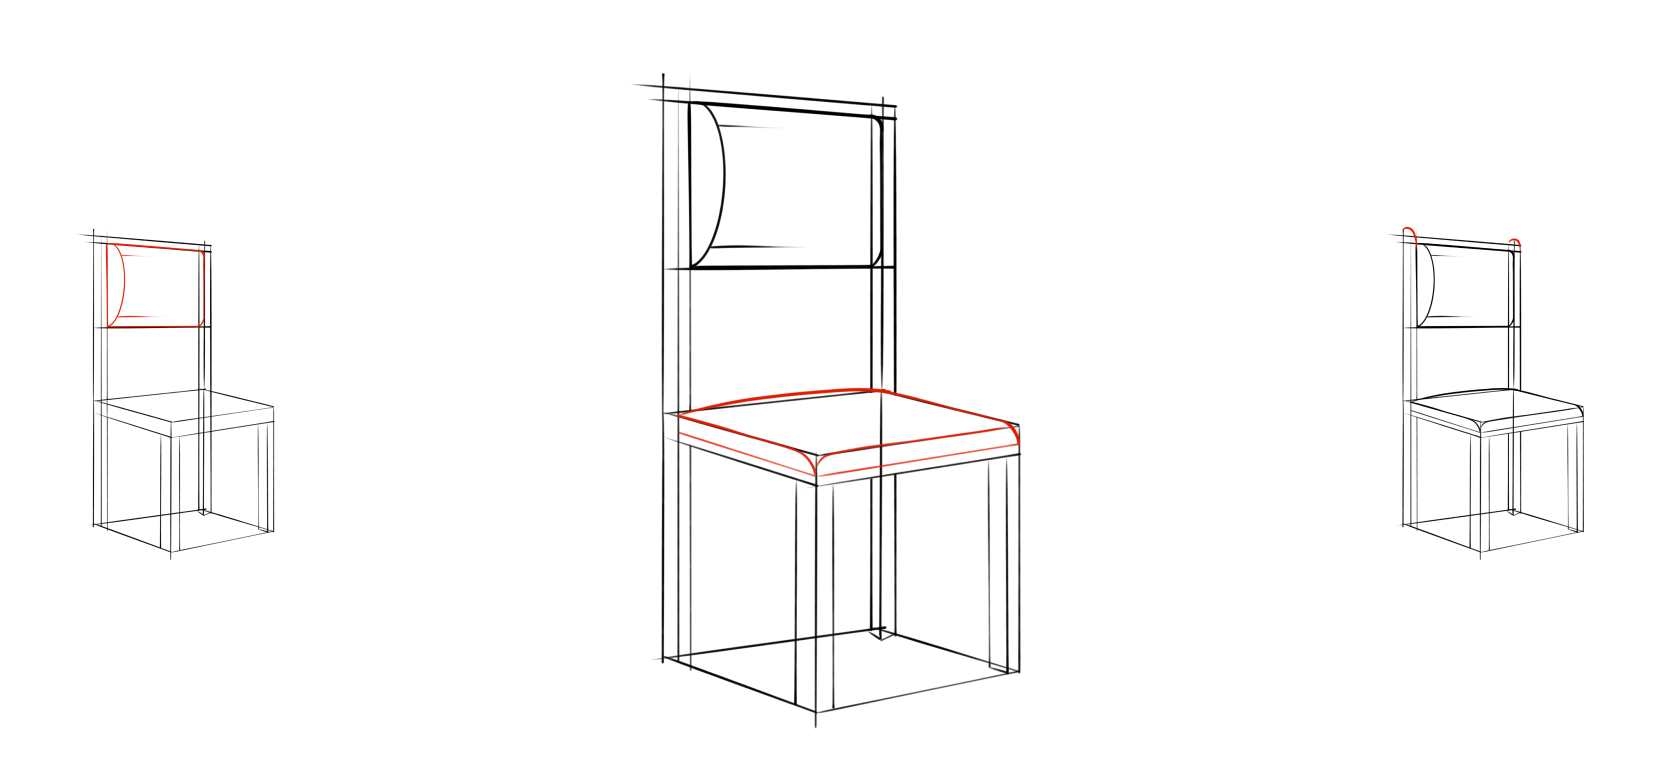
Round off the seat's corners and add a slight bulge to the top surface. This creates the impression of soft upholstery.
The front edge becomes a gently curved line. The side corners become rounded.
Step 10. Round the Backrest Posts
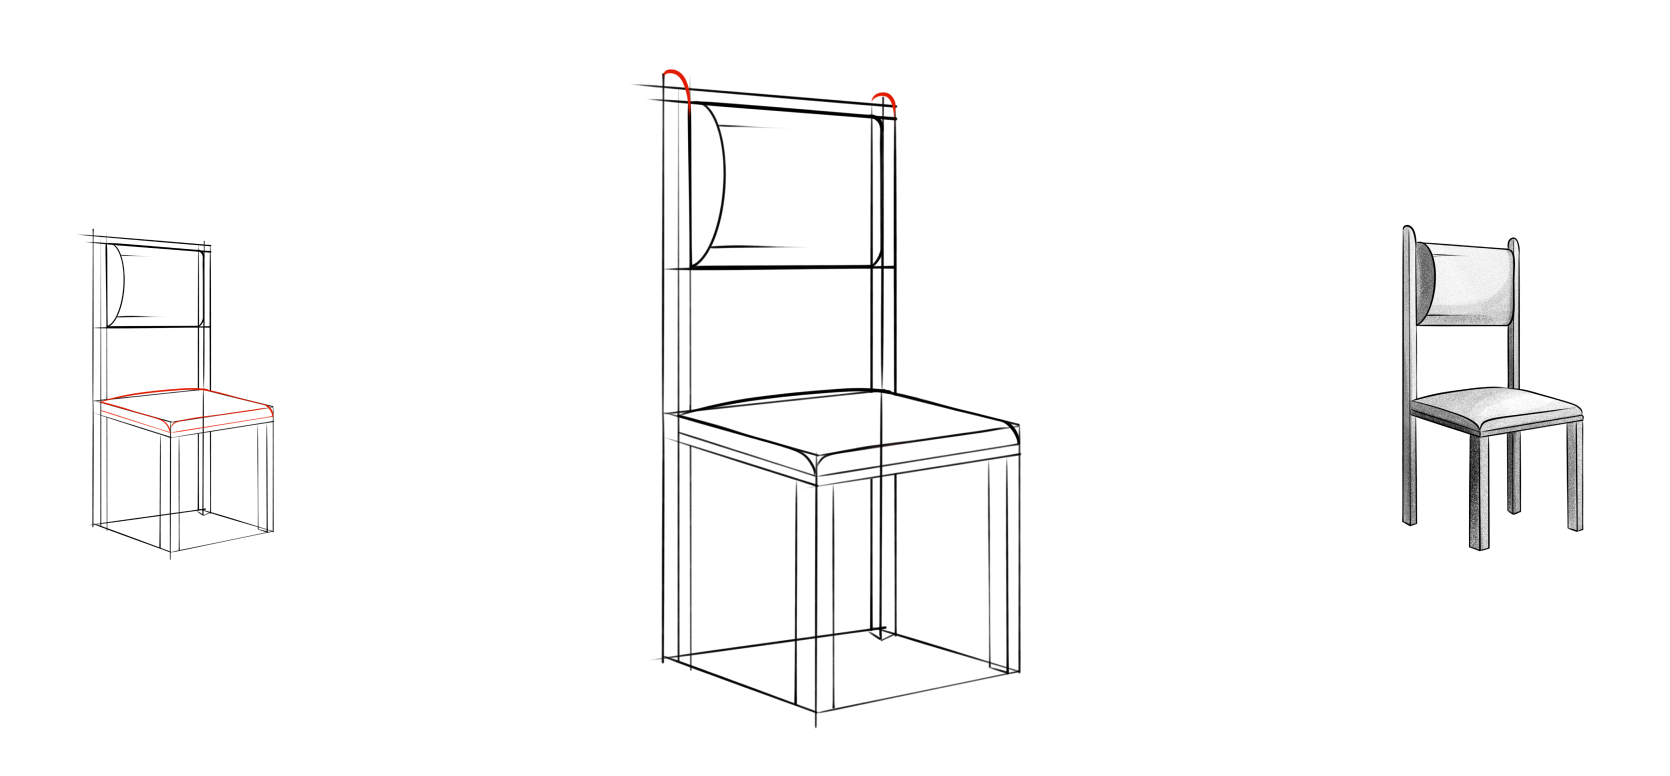
Smooth sharp corners on the back legs, giving them a rounded shape.
Smooth out the sharp corners at the tops of the back supports with flowing lines. This makes the chair more realistic. In real furniture, the top edges are always finished and rounded. Now your basic form is complete.
Congratulations!
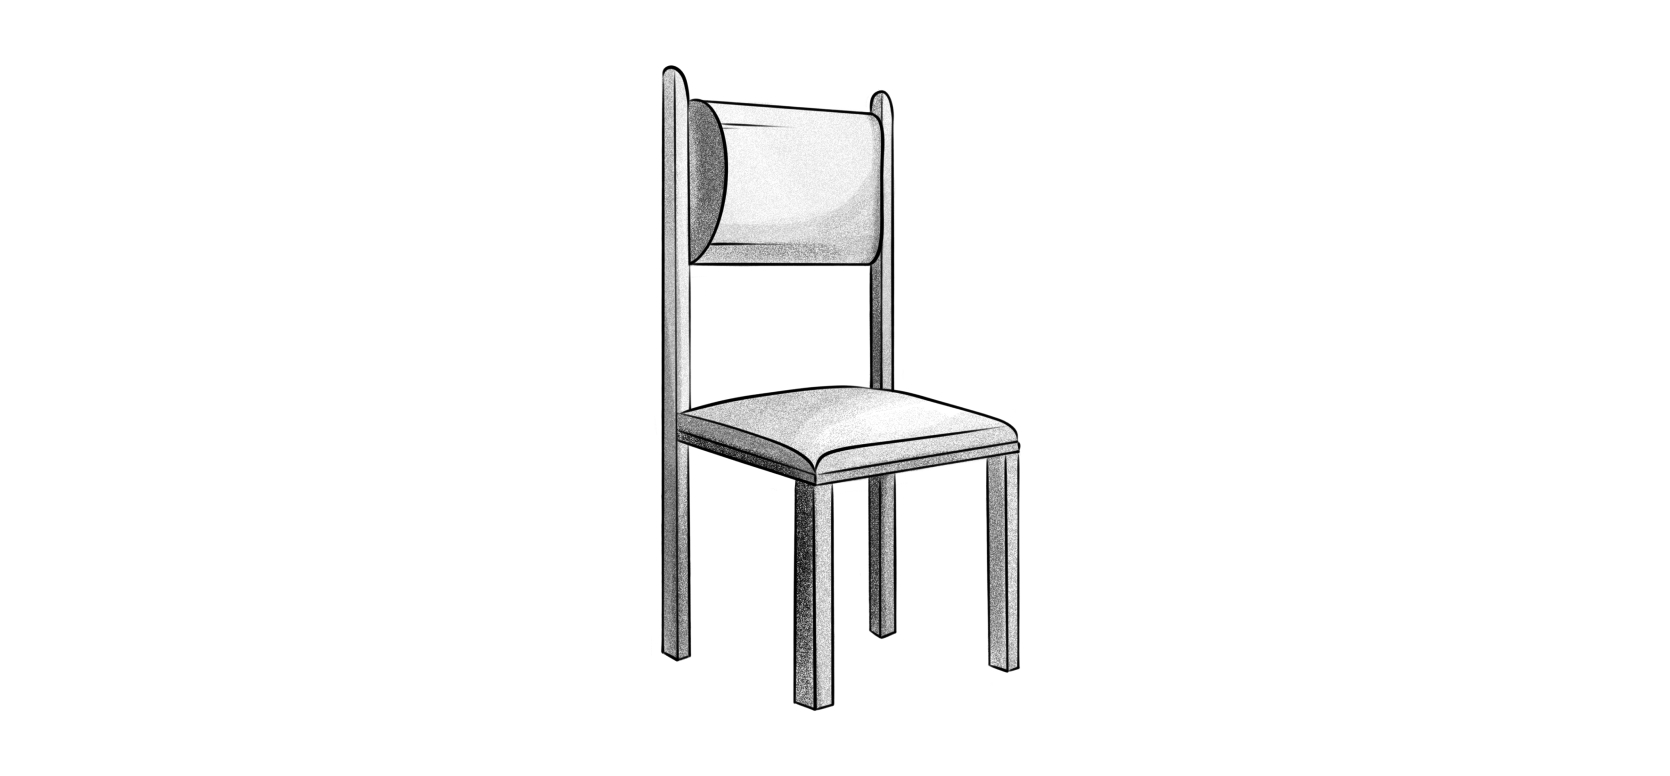
Carefully erase all construction lines. Add shadows and highlights for realism, this is what helps your sketch look finished after you draw a chair step by step.
Shading: Establish a light source (for example, upper left). Darken the opposite sides: the right side of the legs, underside of the seat, right side of the backrest.
Practice this exercise regularly. Each new chair drawing improves your understanding of perspective and proportions. For additional practice, you can use the AR Drawing App ArtEasy - a handy tool for artists of any level.


_1_1_1_1_1_1.webp)