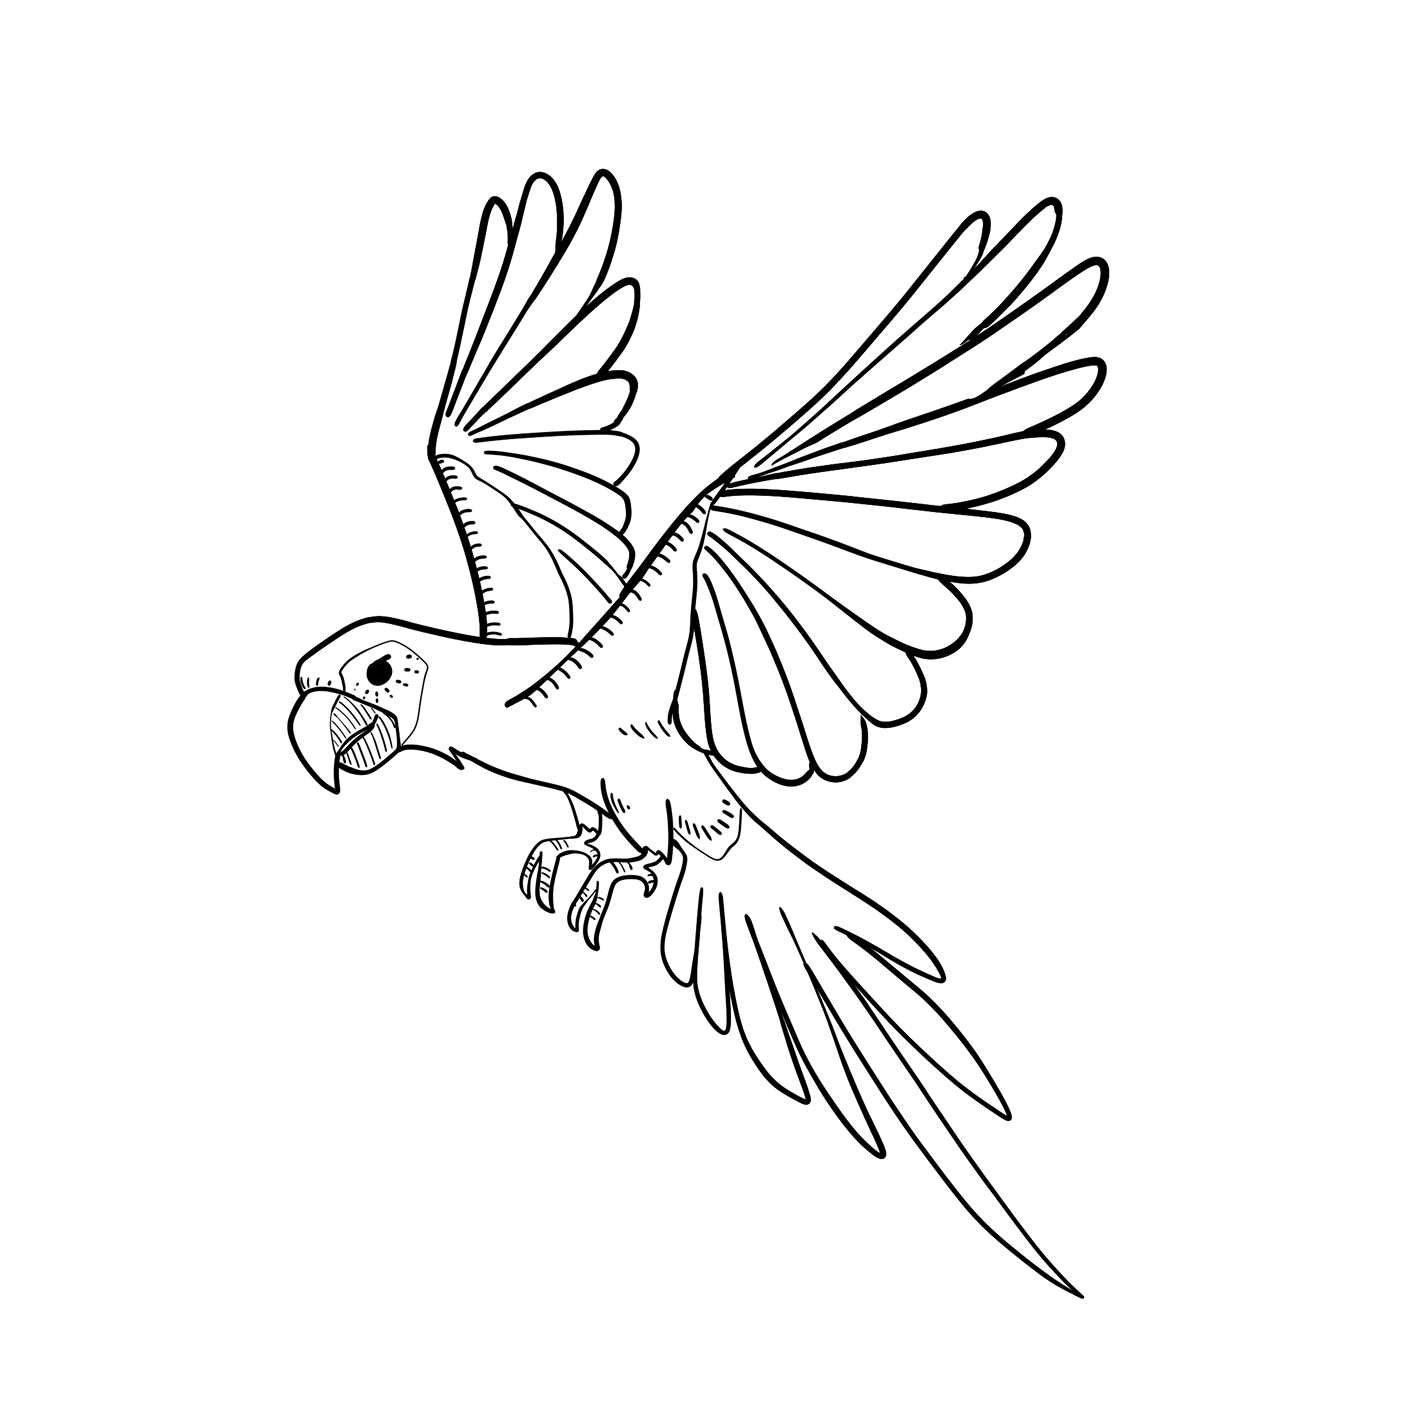
How to draw a parrot step by step
A parrot looks effortless on paper, until you try to draw one yourself. Wings lose their shape, the beak feels off, and the feathers turn into random lines instead of a clear structure. The challenge isn’t a lack of talent, it’s knowing where to start and how each part connects.
This art tutorial is designed to solve exactly that problem. Step by step, you’ll learn how to draw a parrot by building the form from simple shapes to detailed feathers, turning a confusing sketch into a clean, professional illustration you’ll actually be proud of.
Step 1. Draw the head and body
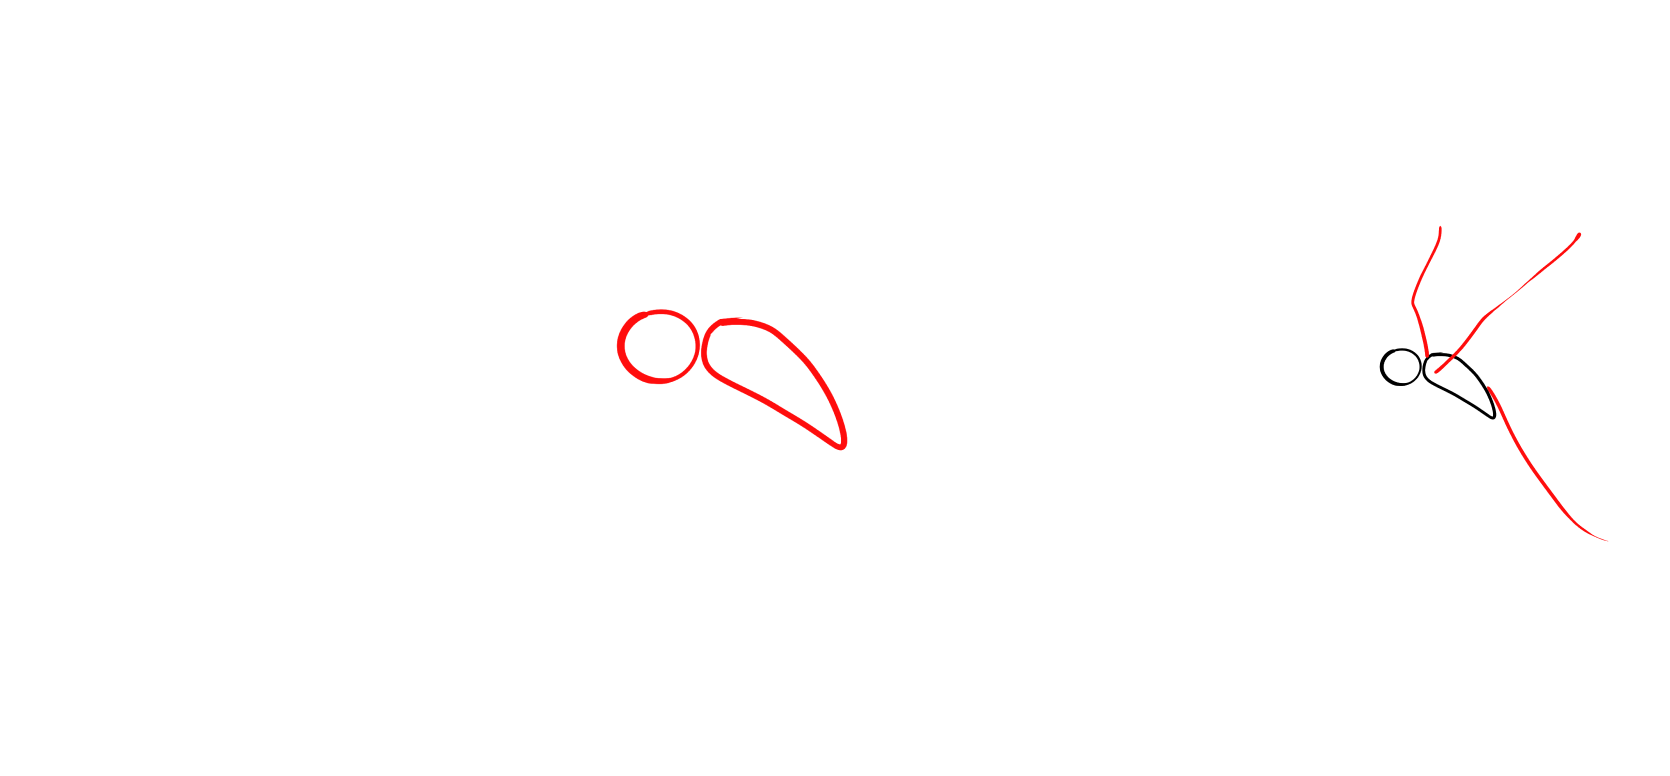
Draw a small circle for the head and a teardrop shape for the body next to it, with a slight overlap. These two simple shapes establish the correct placement and proportions of the entire drawing.
Common mistake: the body is too small, it should be about twice the size of the head.
Step 2. Sketch the wings and tail
Draw two pairs of curved lines from the body: one upward for the wings and one downward for the tail. These drawing guides help establish the wingspan and overall silhouette of the bird before any details are added.
Tip: don’t make the lines symmetrical. The wings and tail of a parrot spread at different angles.
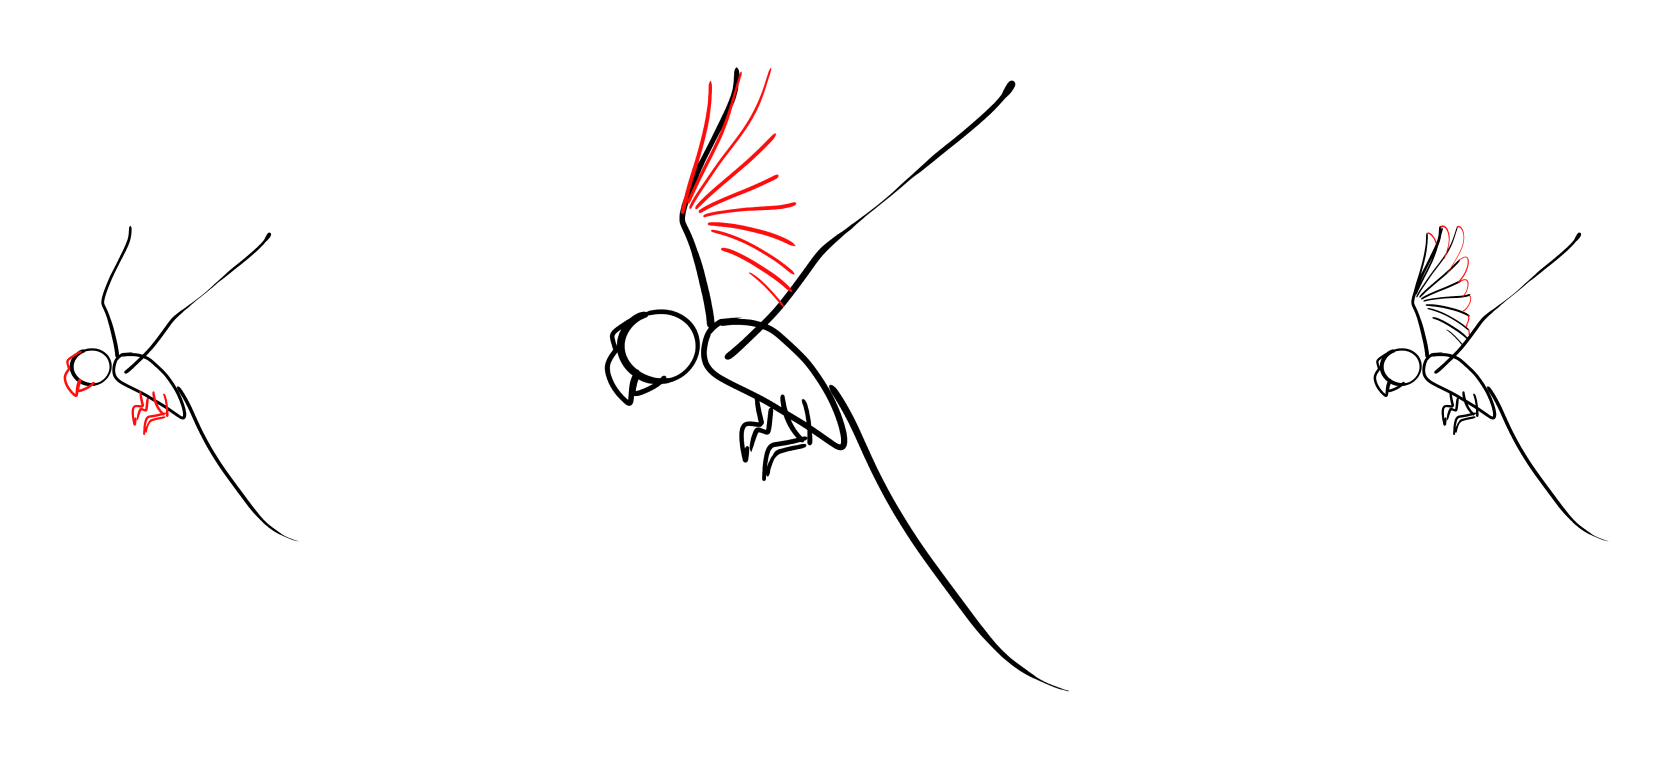
Step 3. Add the legs and draw the beak
Draw small curved lines for the legs under the body and a hook-shaped beak on the head. These details transform an abstract sketch into the silhouette of a parrot.
Tip: draw the legs short and gripping, and the beak curved downward like a hook, this is a distinctive feature of parrots.
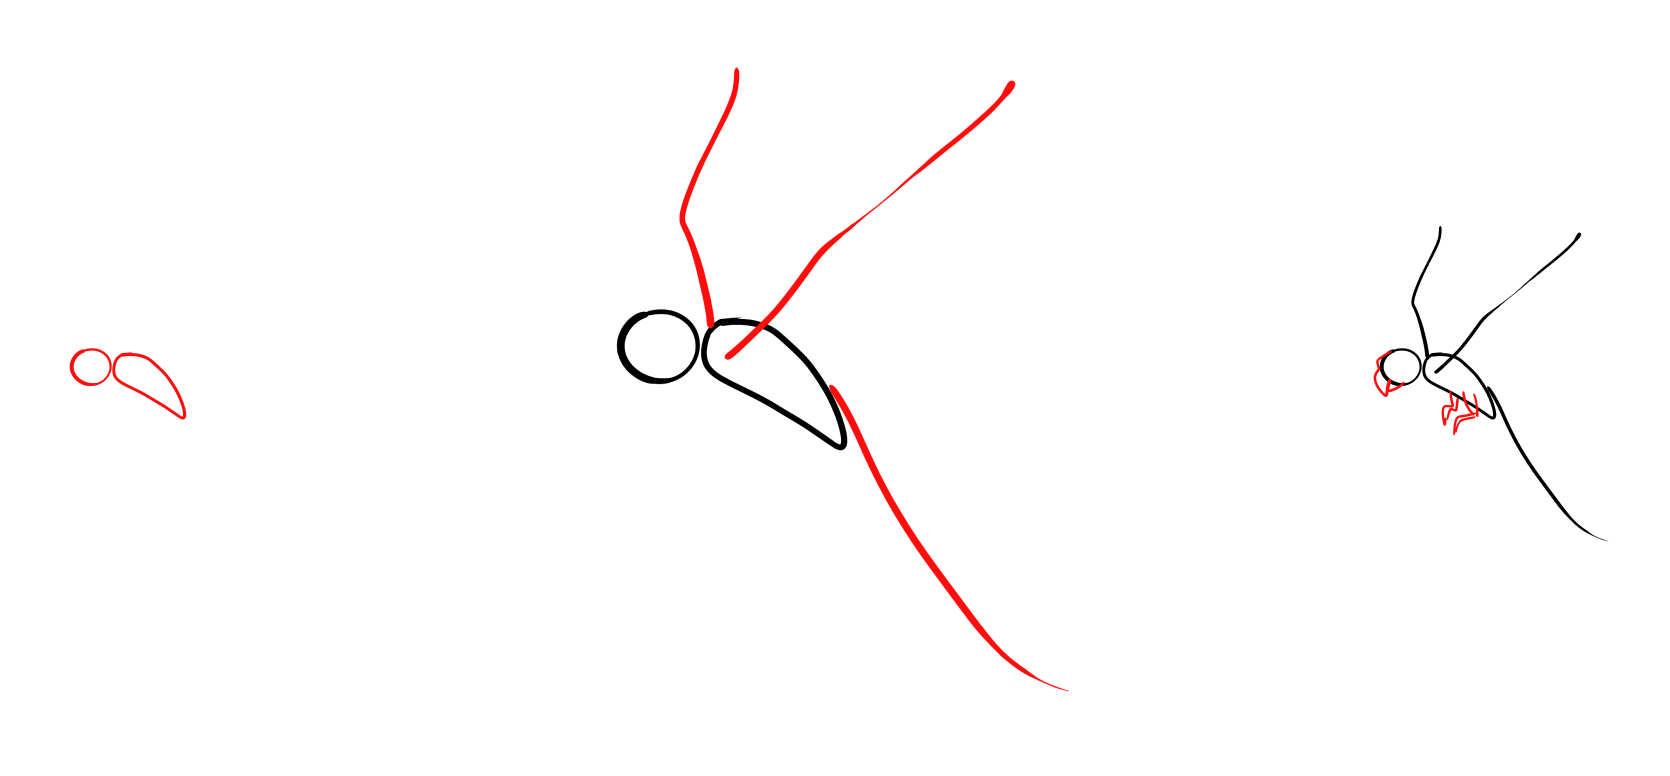
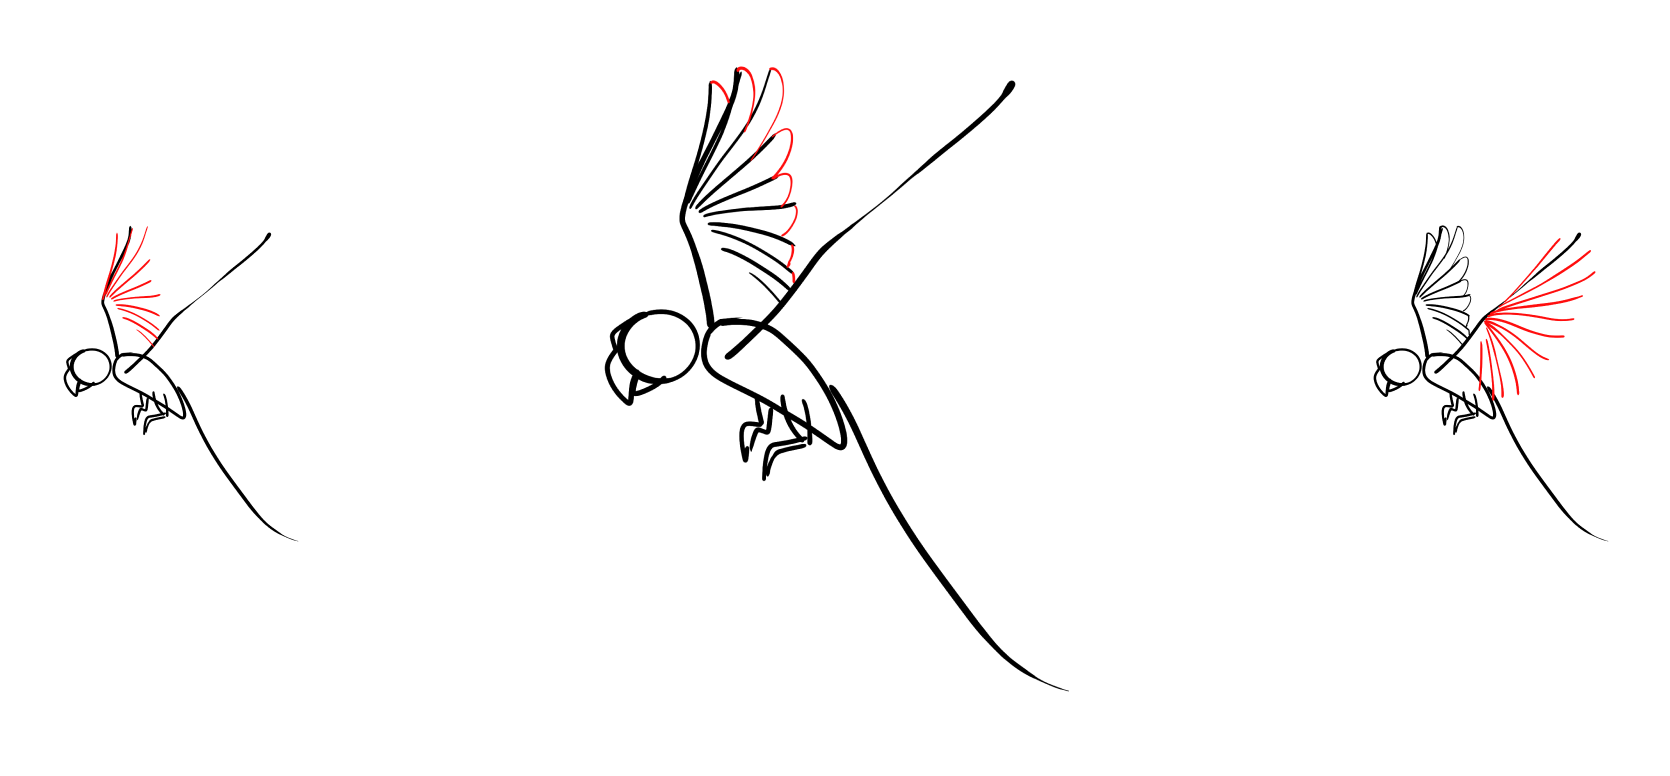
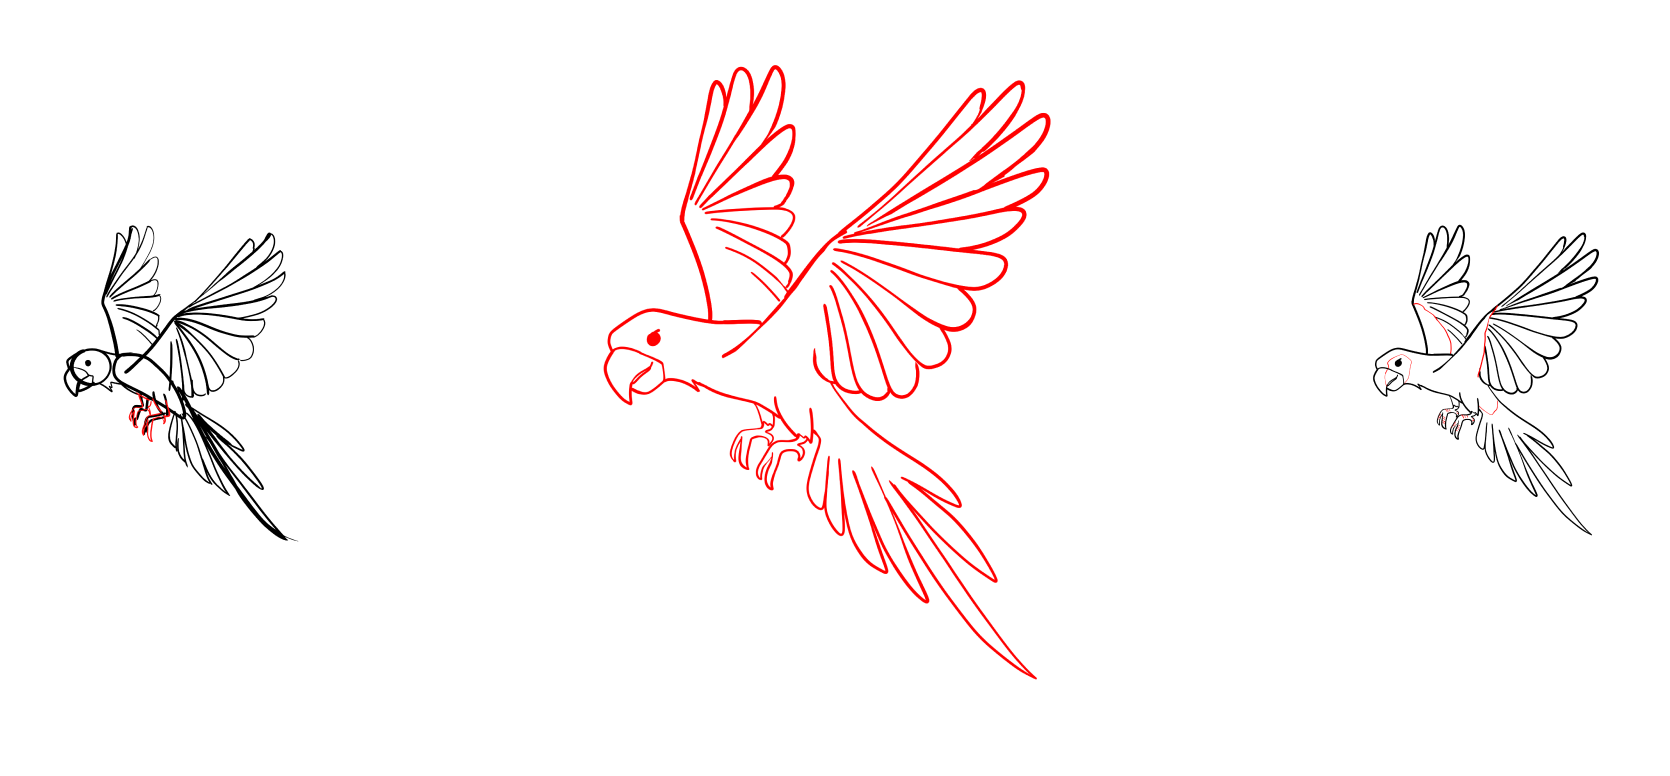
Step 4. Time to spread the wing
From the upper guideline, draw fan-shaped feather lines spreading from the base to the tips. This forms the structure of the upper wing and sets the rhythm of the plumage.
Tip: they should not be the same length: the outer ones are shorter, the middle ones longer.
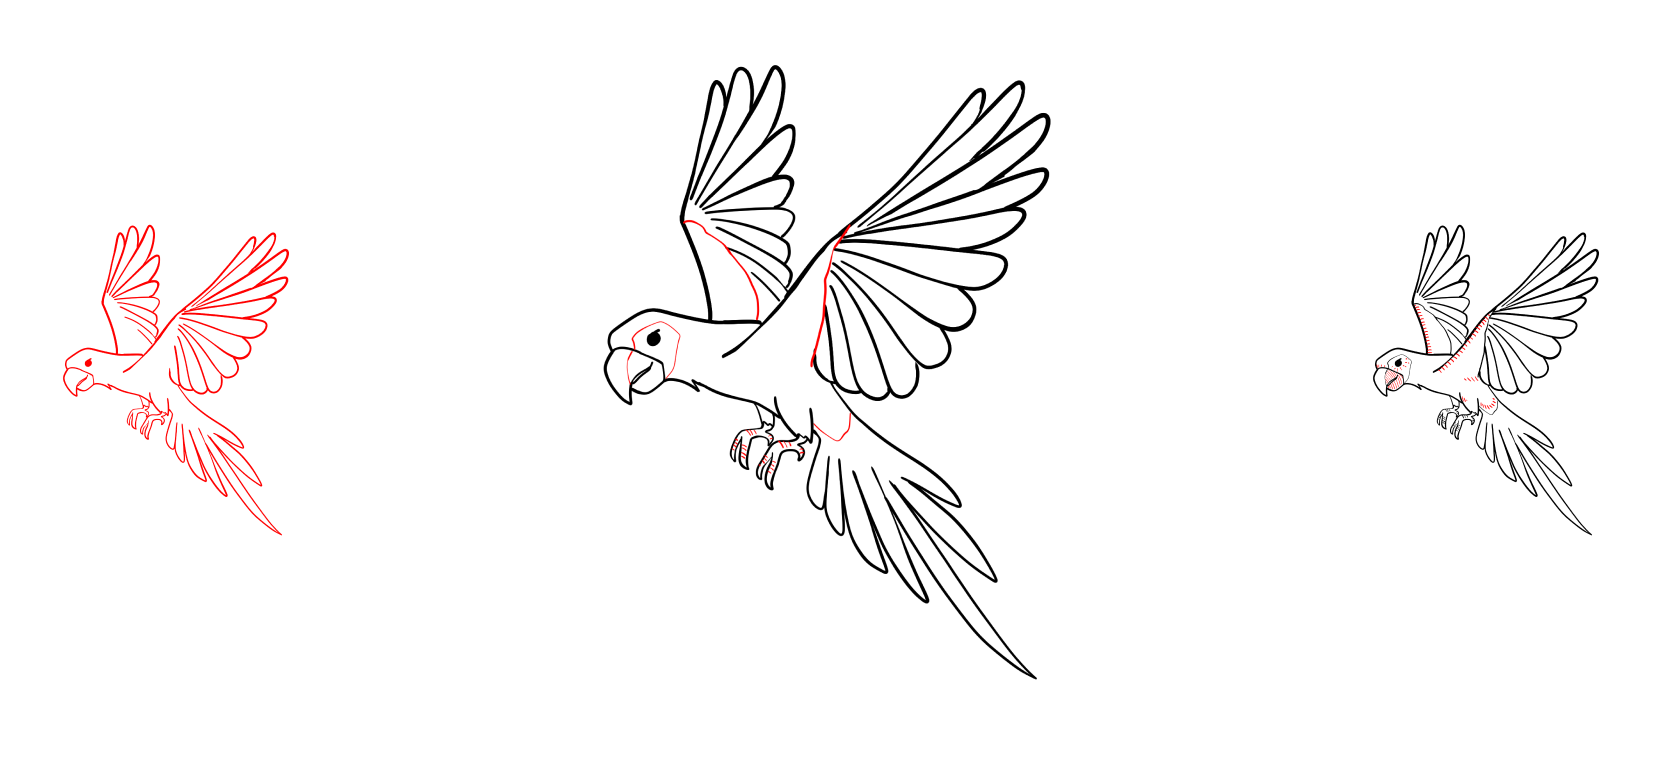
Step 5. Connect the feathers with smooth curved lines
Connect the feathers of the parrot with a smooth curved line, closing the shape of the upper wing. This brings the separate elements together into a clear, unified outline.
Tip: keep the curve soft and flowing. Sharp angles can make the shape look stiff and unnatural.
Step 6. Spread the second wing
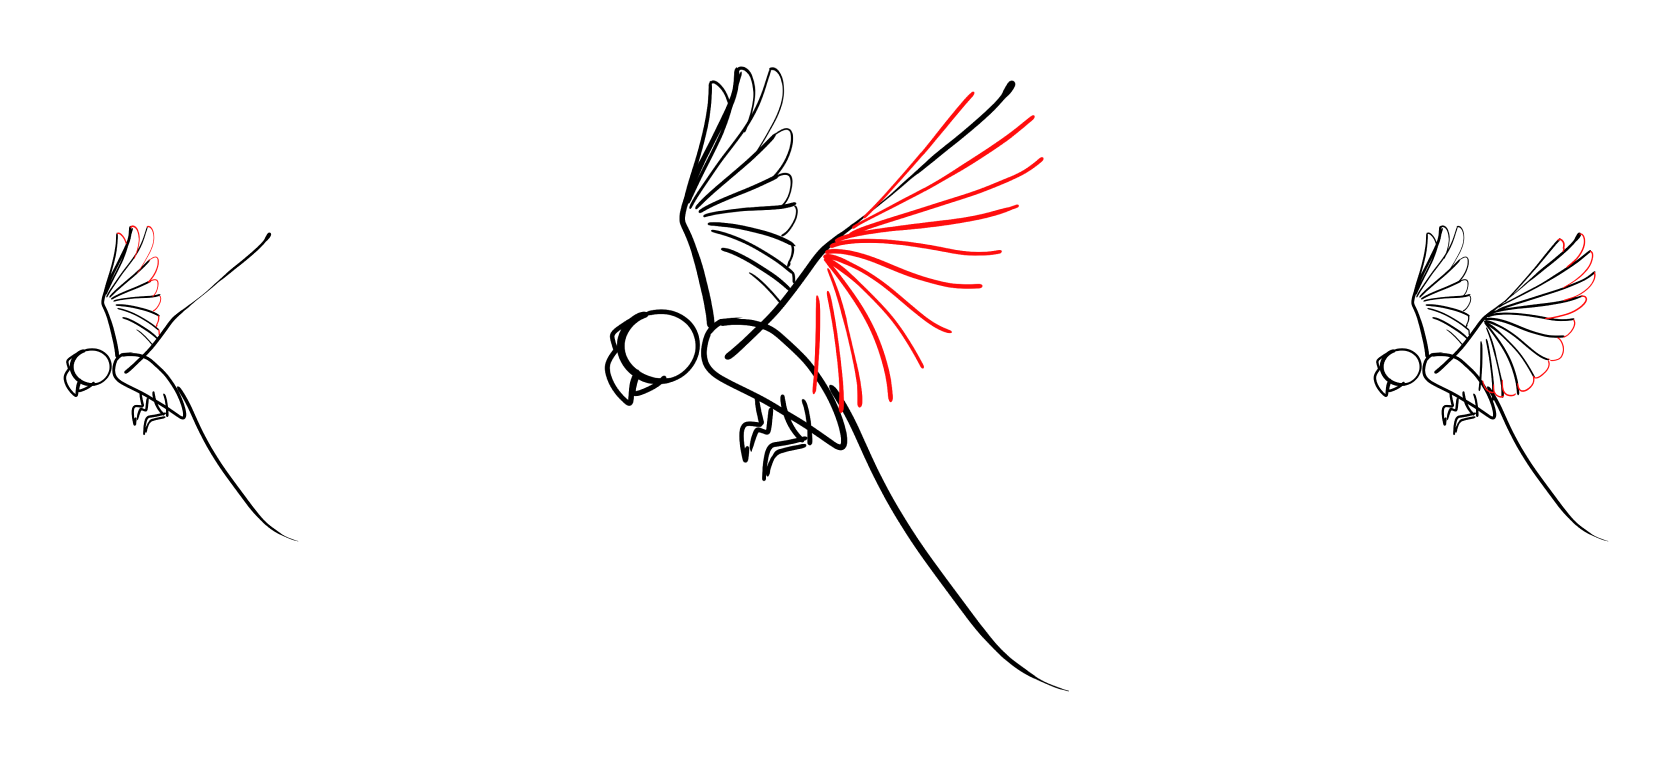
From the lower guideline, draw fan-shaped feather strokes using the same pattern as the upper wing. Two symmetrical sides create a sense of wingspan and movement as the bird flies.
Common mistake: too sparse coverage. You need at least 10 strokes for a realistic effect.
Step 7. Connect the feathers of the lower wing
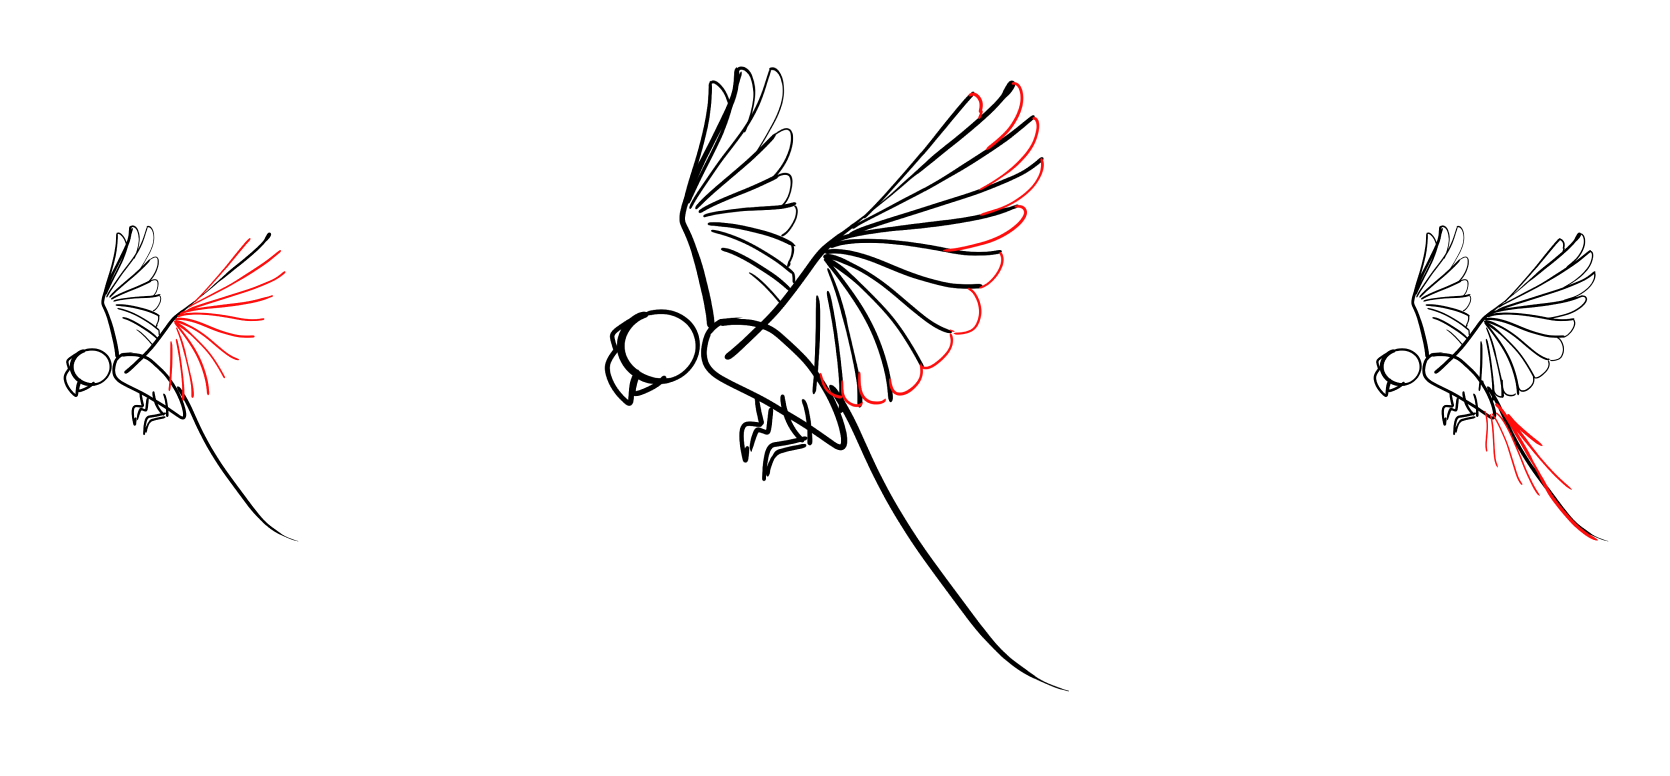
Draw a smooth curved line along the feathers of the lower wing to form its outline. This completes the shape of the second side.
Common mistake: the line is too straight. The curve should feel natural and fluid.
Step 8. Move on to the tail
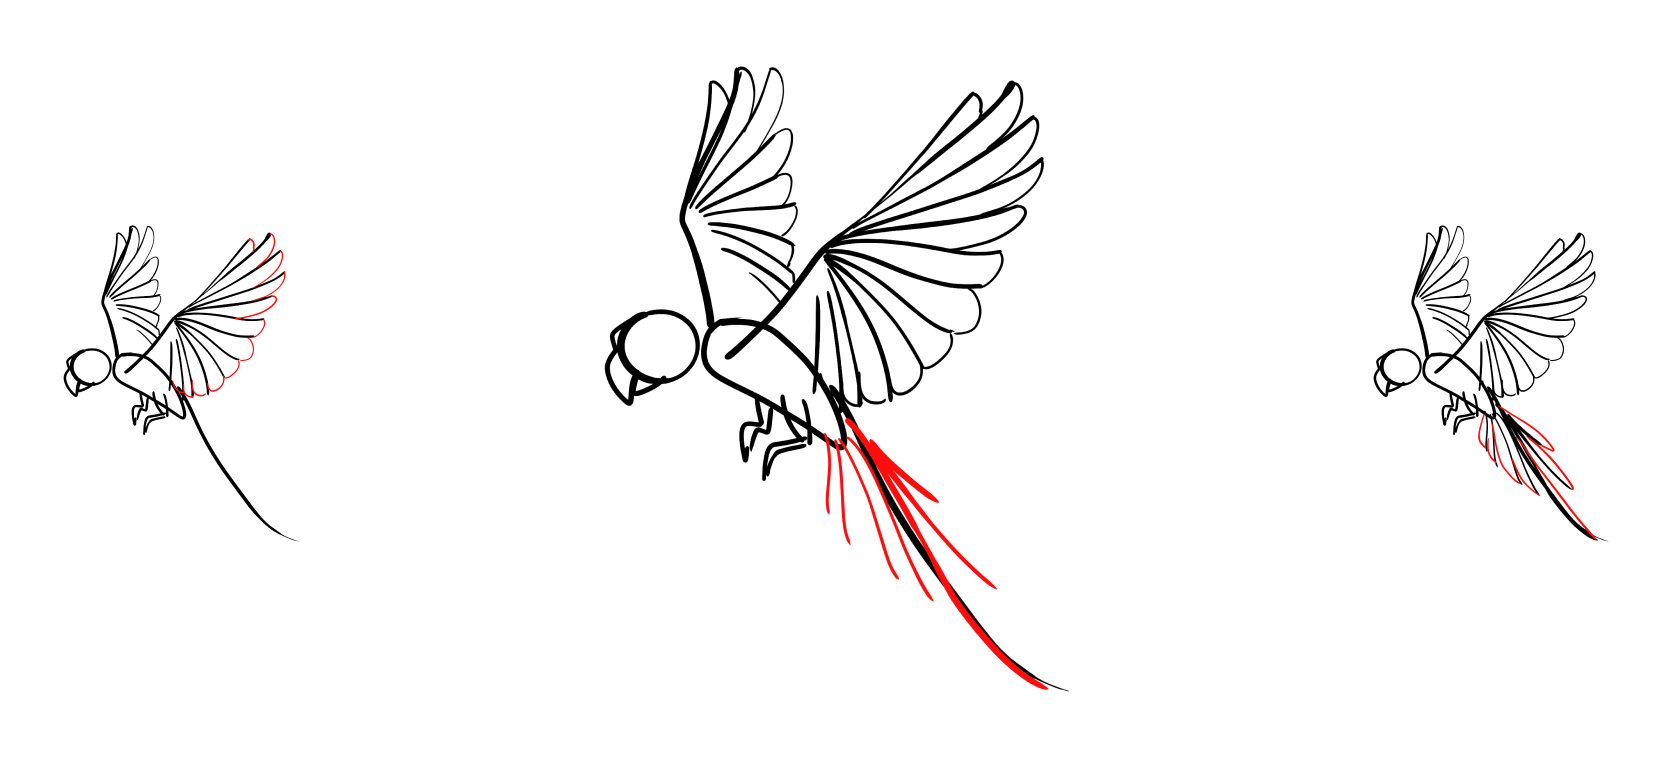
From the lower guideline, draw long, spreading tail-feather lines in a downward fan. The tail completes the main silhouette of the bird.
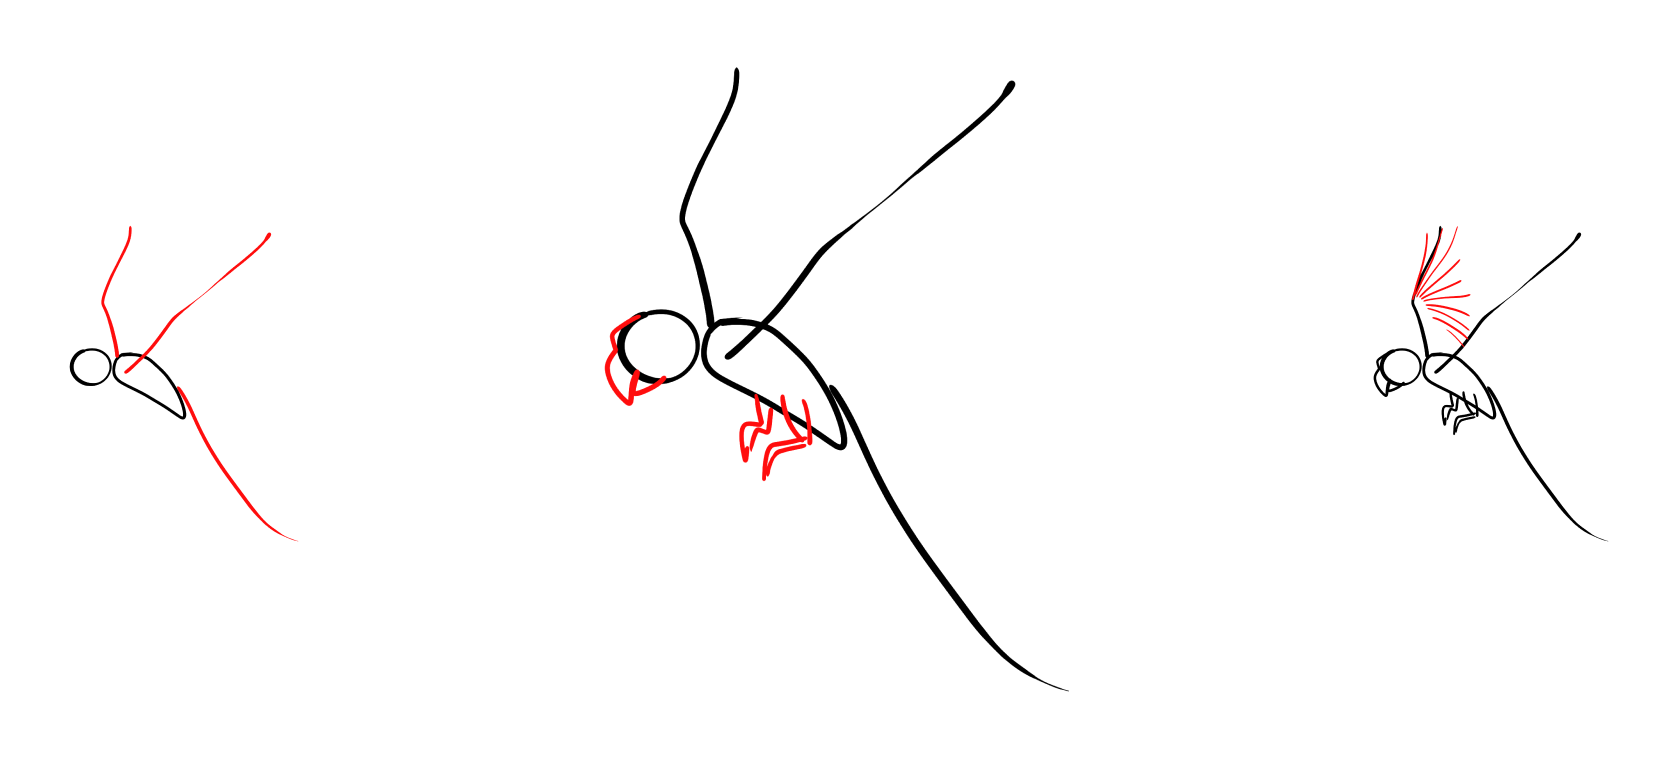
Step 9. Draw the tail in detail
Connect the tail guidelines with smooth arcs, narrowing them toward the tips. This turns separate strokes into dense, overlapping feathers.
Tip: at the base of the tail (closer to the body), they should be shorter and denser, while toward the end they should be longer and more graceful. This creates a sense of "layering."
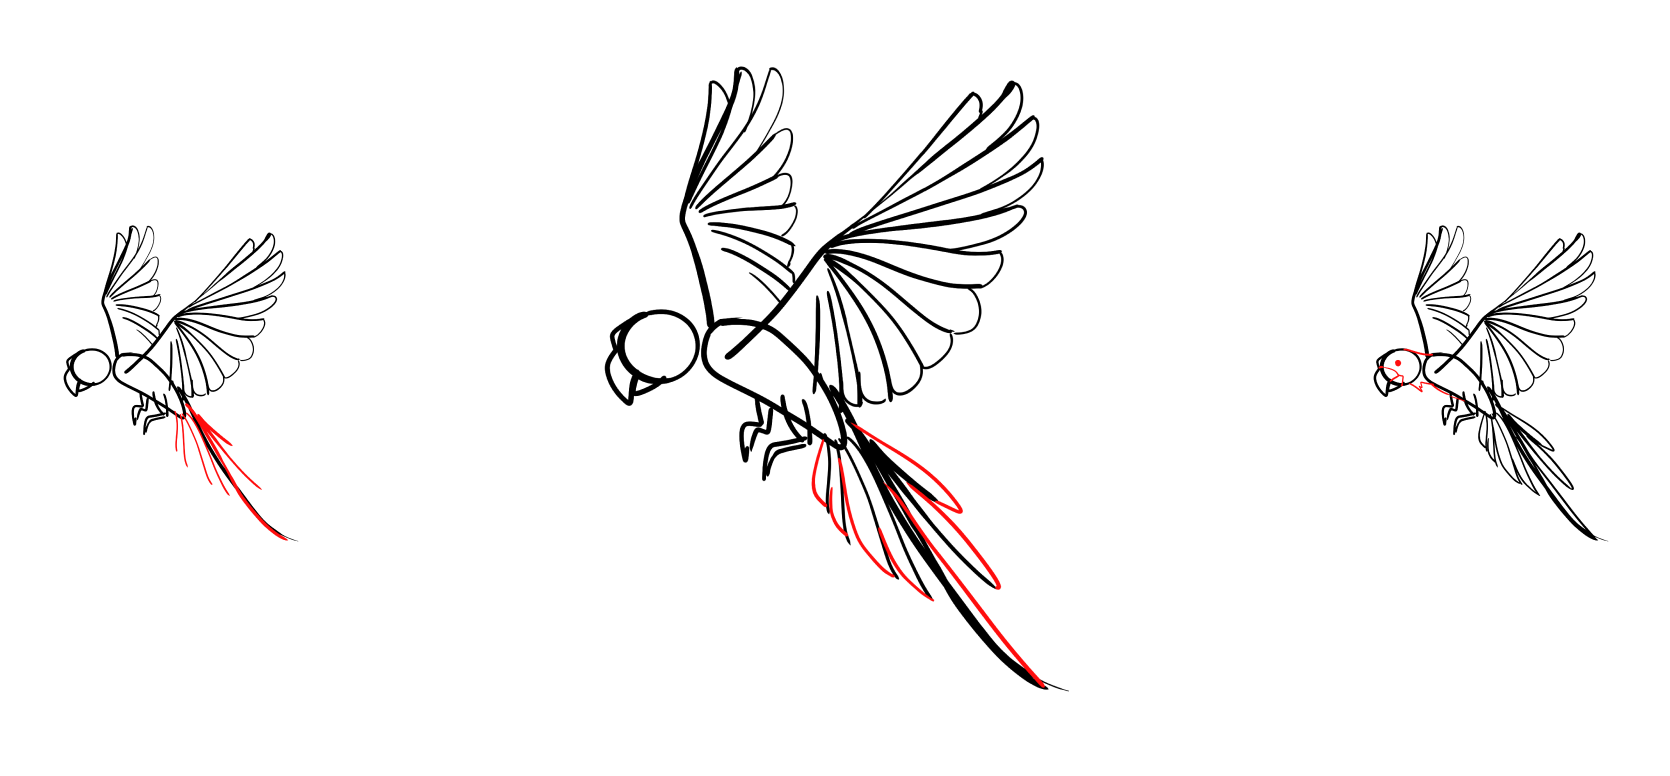
Step 10. Add the eye and divide the beak
Draw a round eye on the head and add a curved line inside the beak separating the upper and lower parts. These details make the parrot’s head anatomically correct.
Common mistake: the beak line is too straight, it should be curved.
Step 11. Detail the legs
Draw the toes with curved claws. The legs complete the anatomy of the lower part of the body.
Tip: parrots have two toes pointing forward and two backward, this is their characteristic feature.
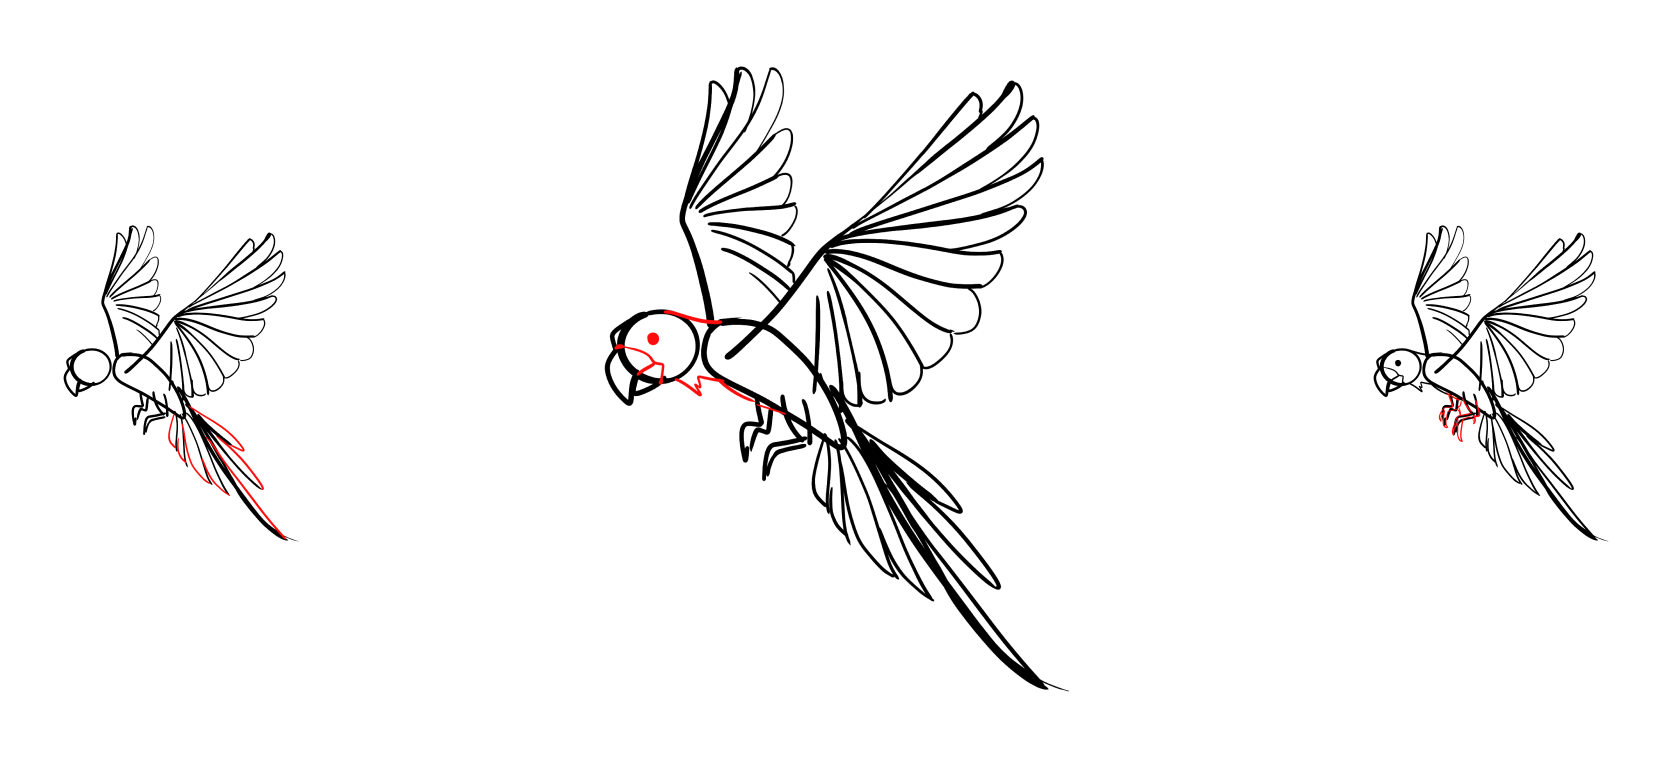
Step 12. Outline the parrot
Carefully trace the entire outline of the parrot with a clean, even line, connecting all elements into a single silhouette. This is the final outline that makes the drawing complete and ready for detailing.
Tip: use confident, smooth strokes. Broken marks will make the outline look messy, and lightly erase any remaining sketch marks to keep the contour clean.
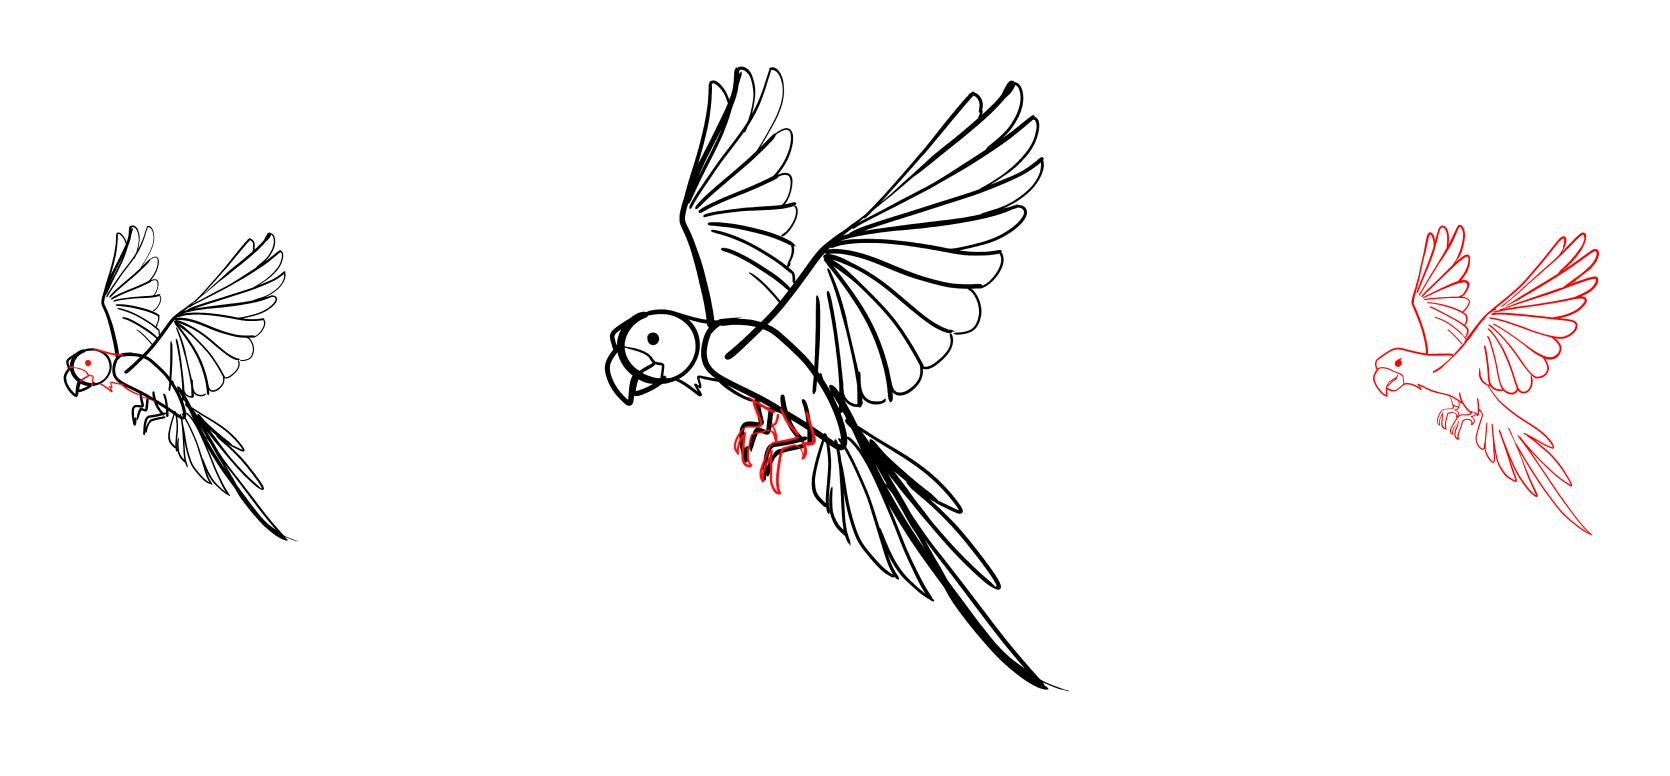
Step 13. Divide the parrot into sections with lines
Draw lines separating the different areas of the body. These create a structure for future coloring and show the boundaries of colors.
Step 14. Add shading and texture

Apply shading to different parts of the body to imitate the patterned texture of feathers.
Tip: don’t shade the entire surface at once. Start with one area and adjust the density before moving to the next. The denser the shading, the darker that area will appear when colored. Careful shading and texture work will complete the parrot drawing, giving it depth, softness, and a natural feathered look.
Common mistake: chaotic strokes in different directions. They destroy the sense of feather structure.
Congratulations!
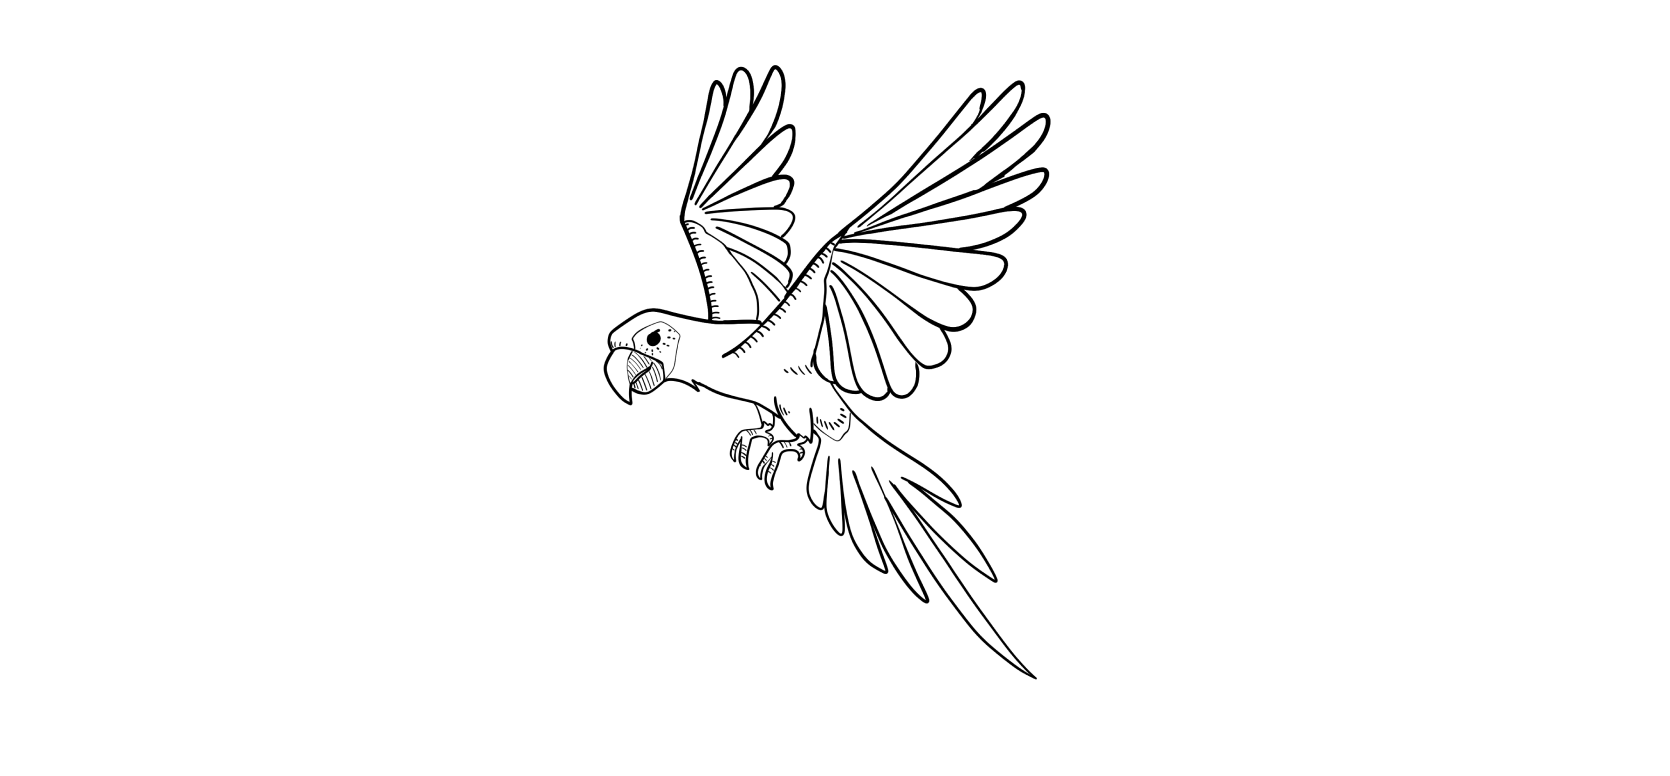
Your drawing of the parrot is ready!
Practice this exercise regularly. For additional practice, you can use the AR Drawing App ArtEasy - a handy tool for artists of any level.

_1_1_1_1_1_1.webp)