How to draw a human face step by step
.webp)
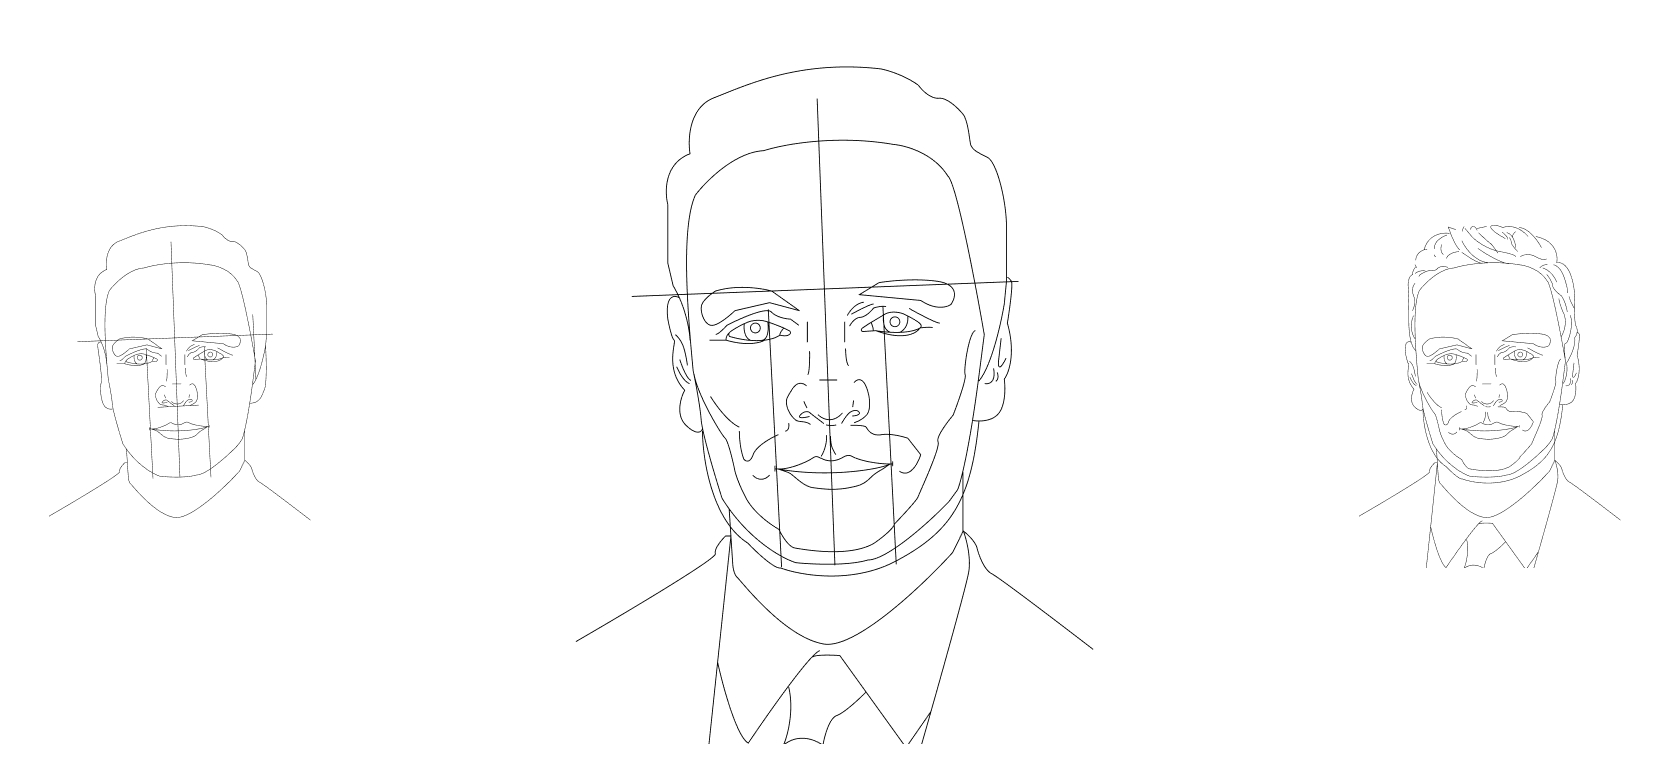
In this lesson, we will learn how to correctly draw a portrait of a man with a pencil. Let's start by building the proportions of a person's face, and finish by working with the tone and volume of the face.
Step 1
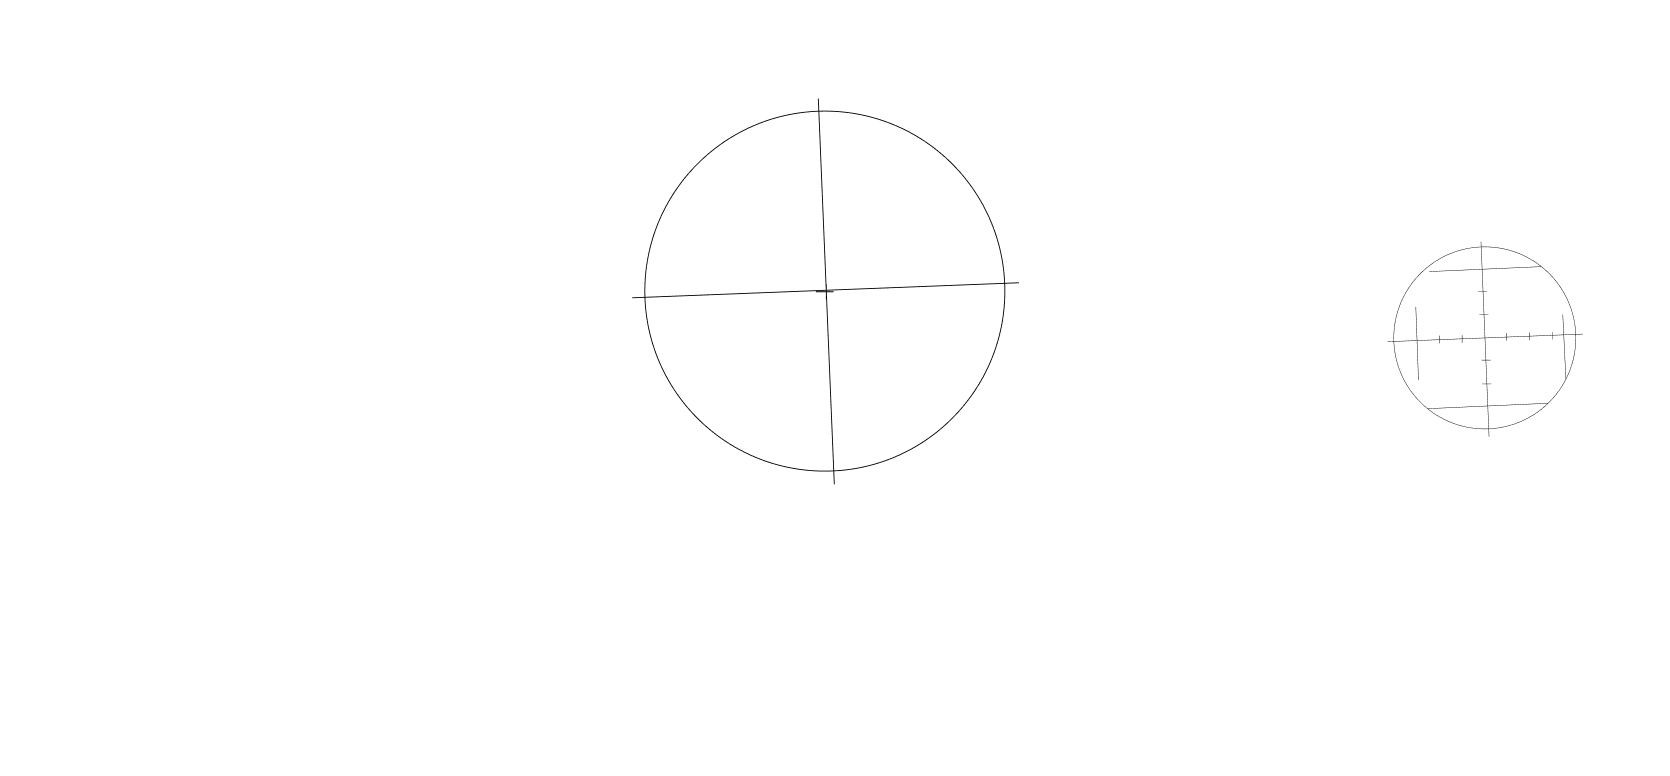
1. Draw a circle.
2. Draw a vertical line through the center of the circle - the axis of symmetry of the human face.
3. Divide the vertical axis of the face with a horizontal line in the center at a right angle.
4. Divide the vertical and horizontal lines into 8 equal segments, put notches. Later, these notches will be needed for marking parts of the human face.
.
.
Step 2
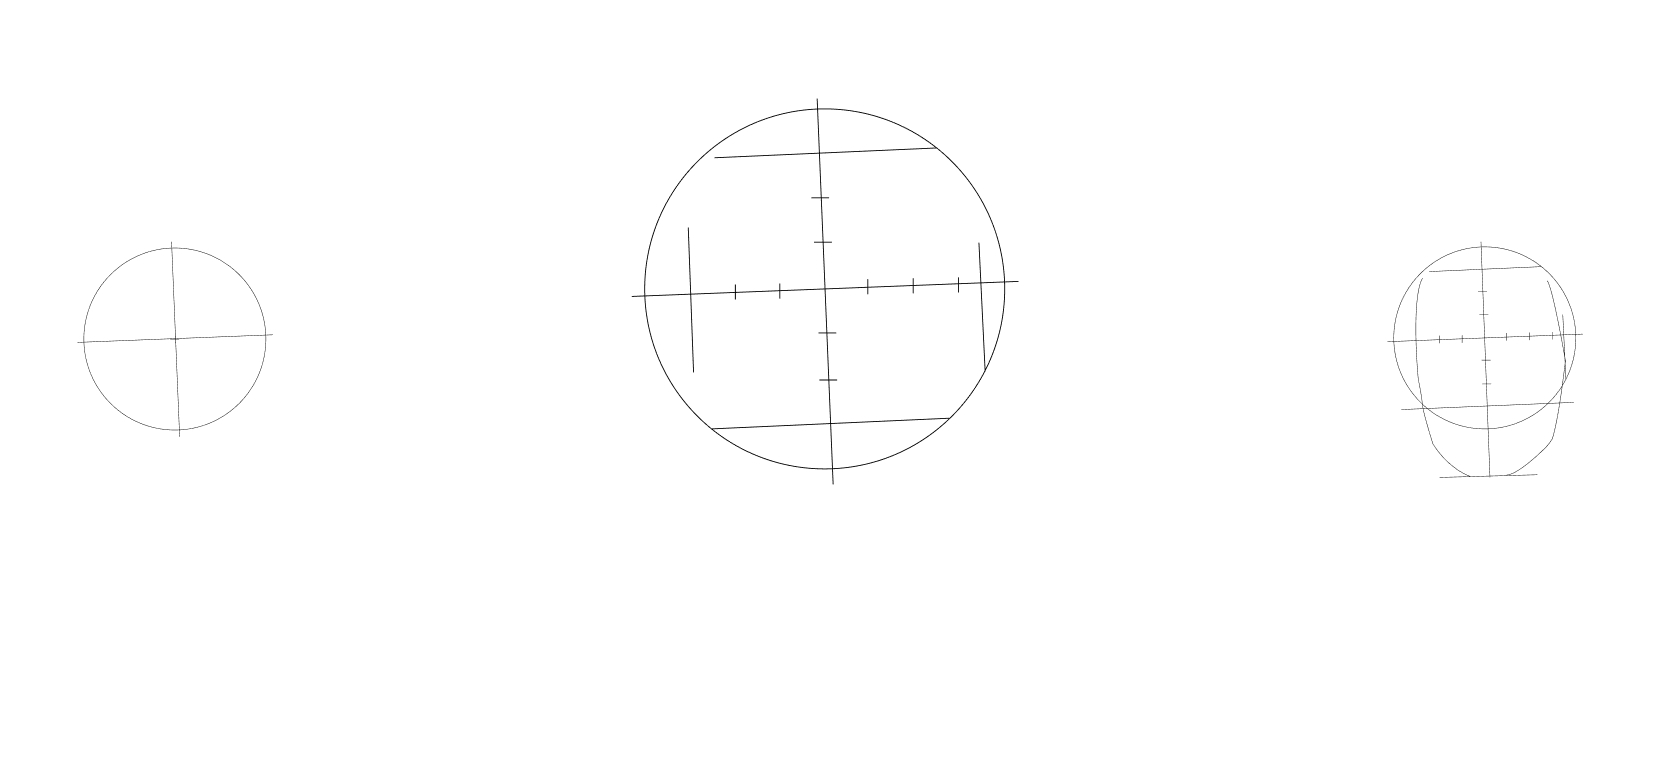
1. We count three divisions from the center of the circle on three sides: top, left and bottom, and lengthen these notches. In this way, we determine the proportions in constructing the face.
2. On the right side, we put a new elongated notch closer to the edge of the circle, since the head is slightly turned and the rightside of the face will be wider than the left.
3. We measure a distance equal to three divisions and put it off from the lower elongated notch. This will be the bottom of the chin. We get 3 equal parts of the face.
.
.
Step 3
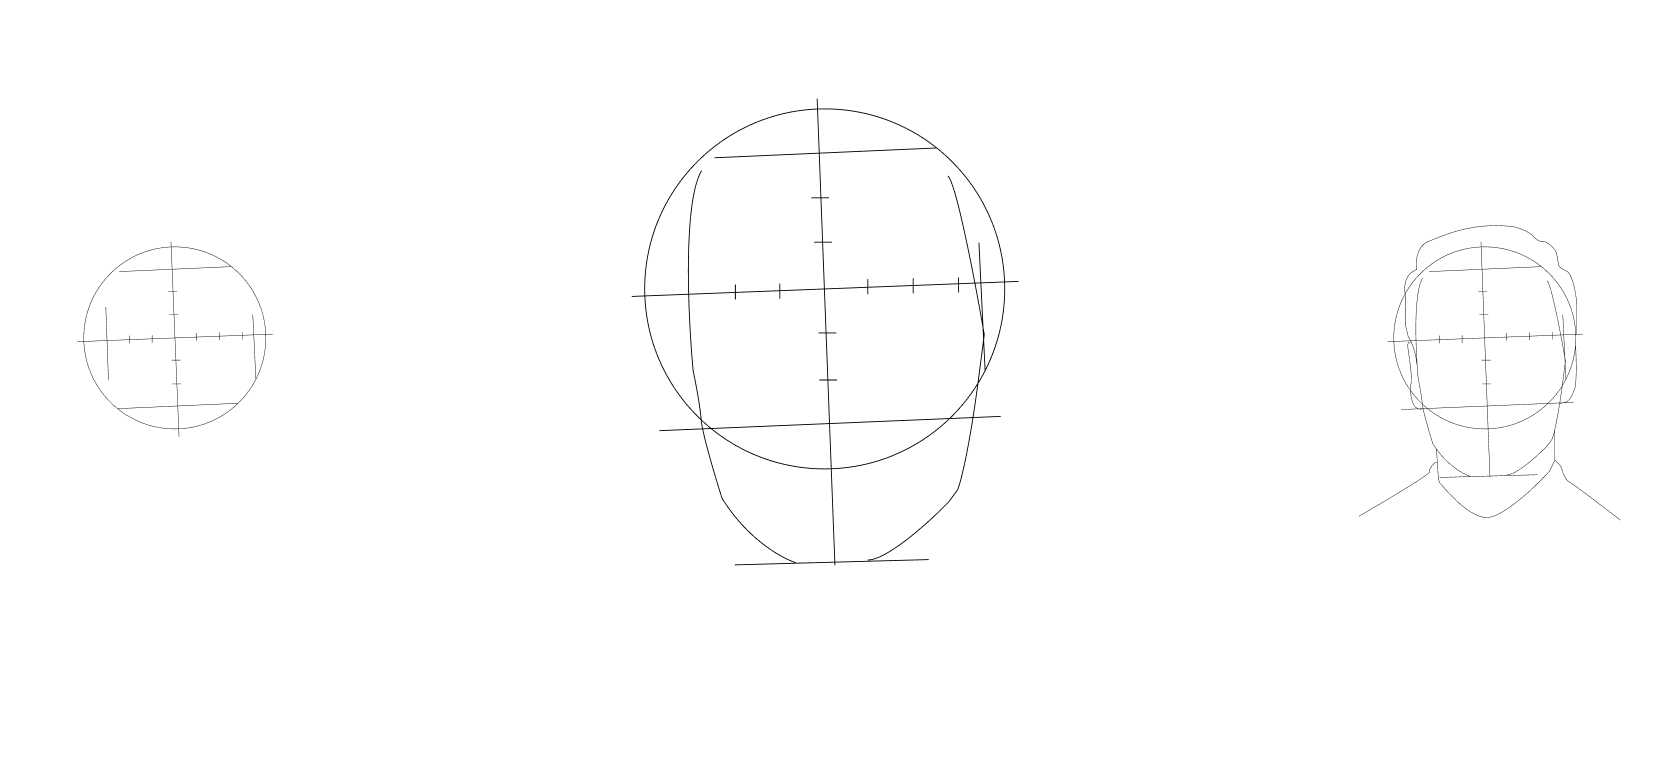
1. Mark the width of the chin.
2. To find the corners of the jaw, divide the distance from the base of the nose to the chin by two. They will be located on the same line.
3. Draw an oval of the face, connecting the previously marked notches of the corners of the jaw and the chin line.
.
.
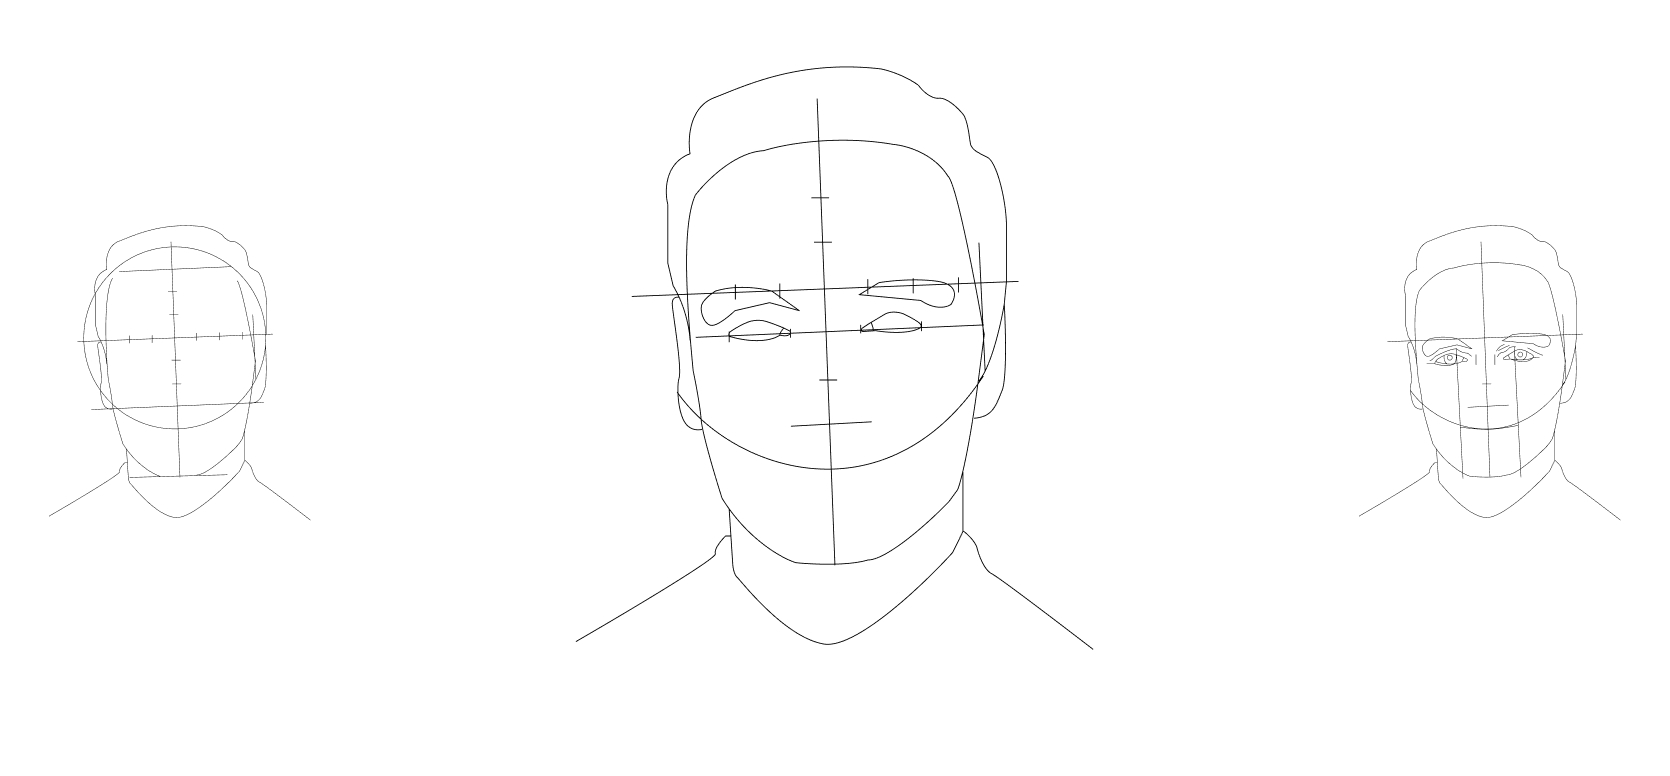
Step 4
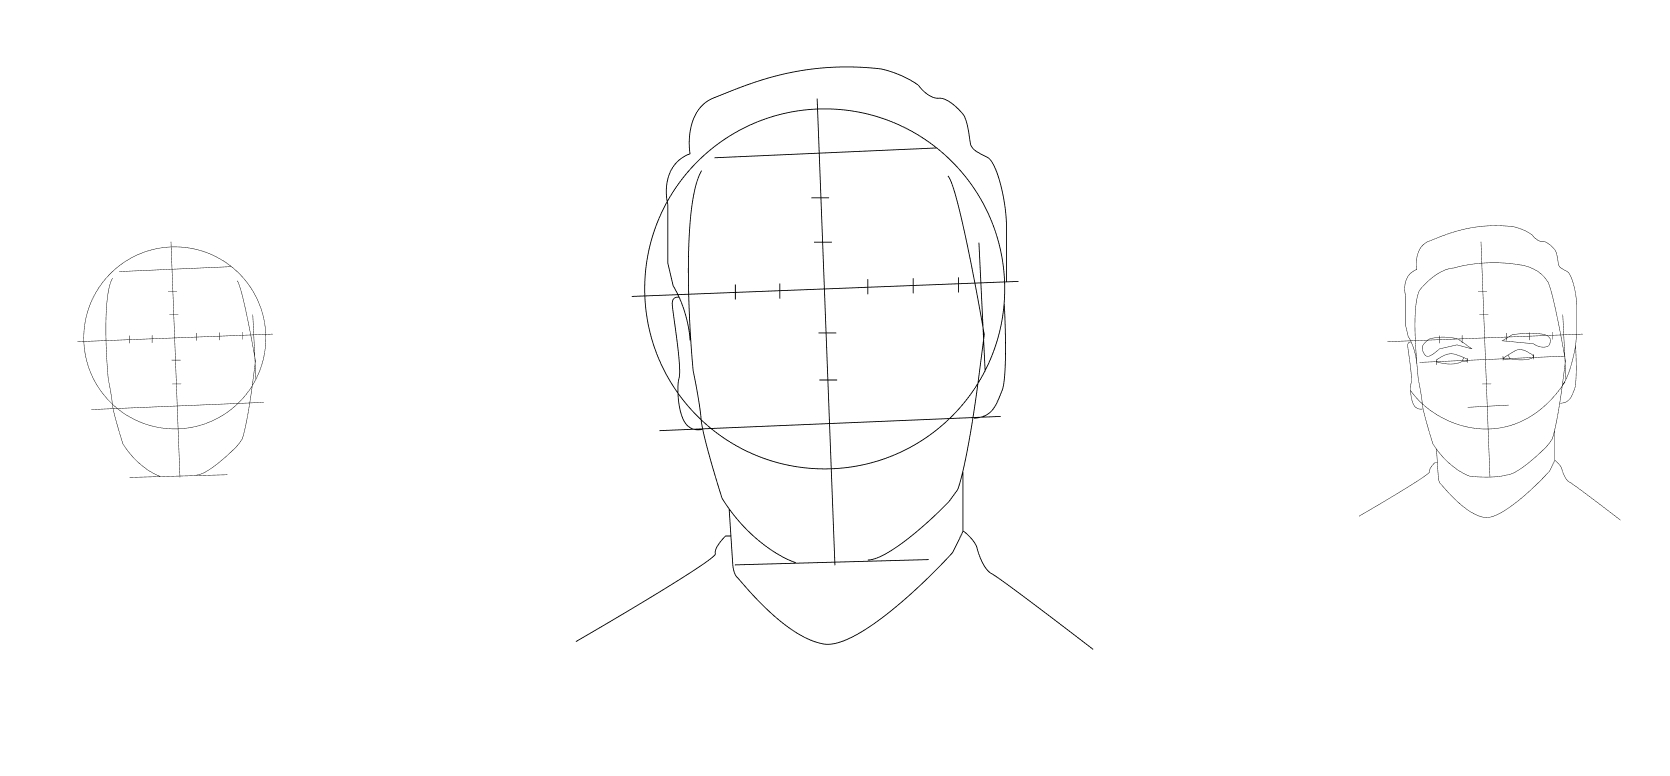
1. Draw the eye line under the eyebrow line. It is located slightly higher than the notch. The eye line is located in the middle of the head.
2. On the eye line, place notches indicating the outer corners of the eyes.
3. Outline the volume of the hairstyle.
.
.
Step 5
1. Draw the eyebrows in the middle of the eyebrow line.
2. Move on to drawing the eyes. Draw the shape of the eyes with a characteristic diamond-shaped bend.
3. Draw the hairline. There will be more on the right side of the forehead than on the left, since the head is in a slight turn.
.
.
Step 6
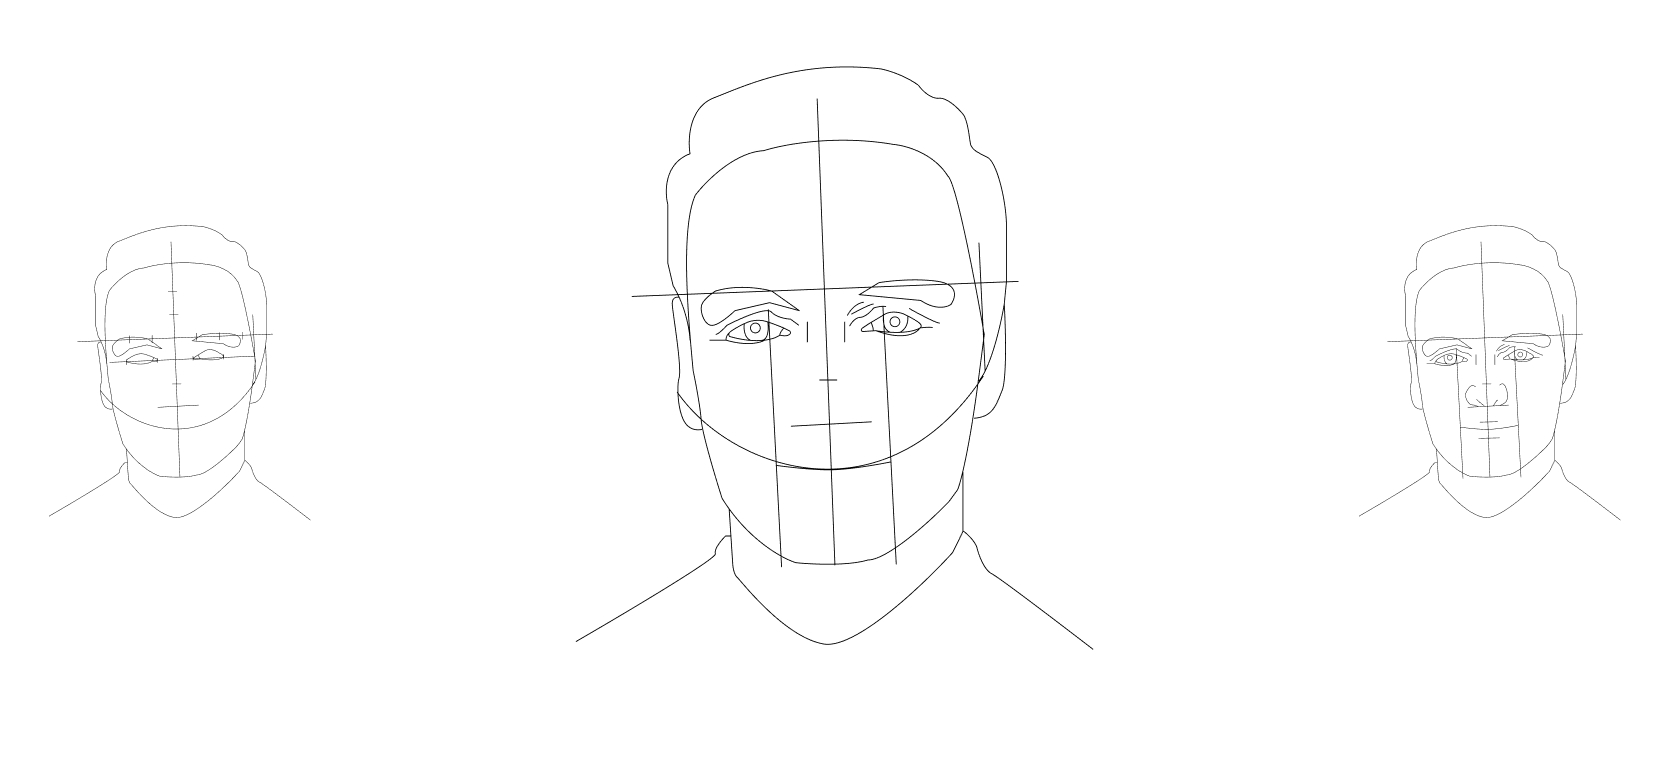
1. We draw the eyes in more detail: we outline the iris, pupil and eyelids.
2. Along the tangent of the irises, we draw lines down to the chin, parallel to the central axis of symmetry. At the intersection of these lines and the arc, we put notches. This will be the length of the lips.
3. From the intersection points, we step back a little lower and draw a line of the mouth. The corners of the lips should be slightly raised in a slight smile.
4. You can erase the line of the circle, we will no longer need it.
.
.
Step 7
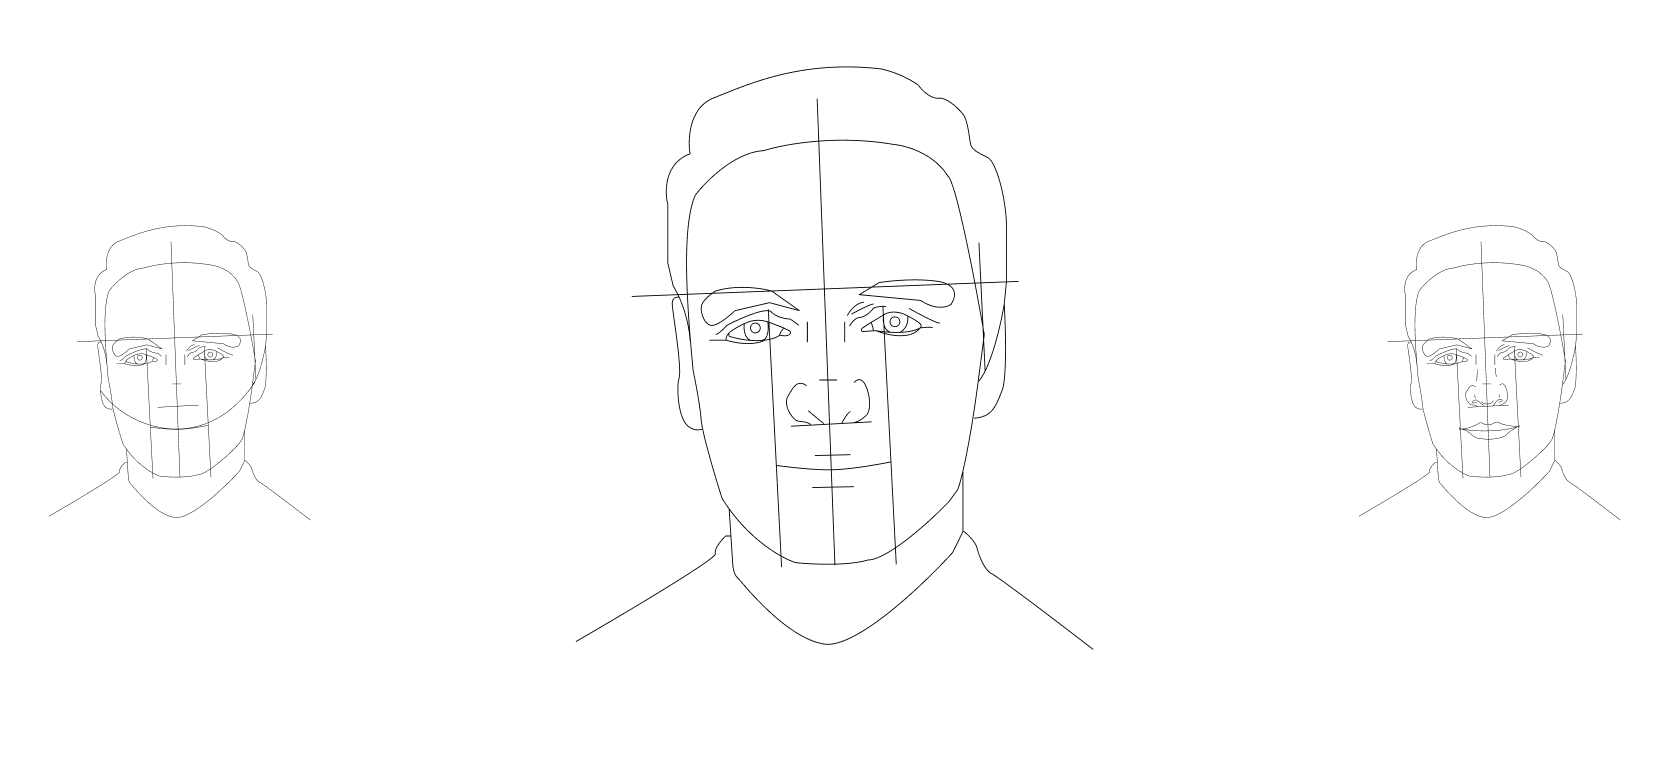
1. Mark the width of the upper and lower lips.
2. Start drawing the nose by marking the edges of the nostrils. To do this, divide the distance between the edges of the irises into 8 parts. Put notches at 1/8 on the right and left sides.
3. Mark the height of the wings of the nose according to the initial notch on the central axis.
4. Mark the lower part of the nose.
.
.
Step 8
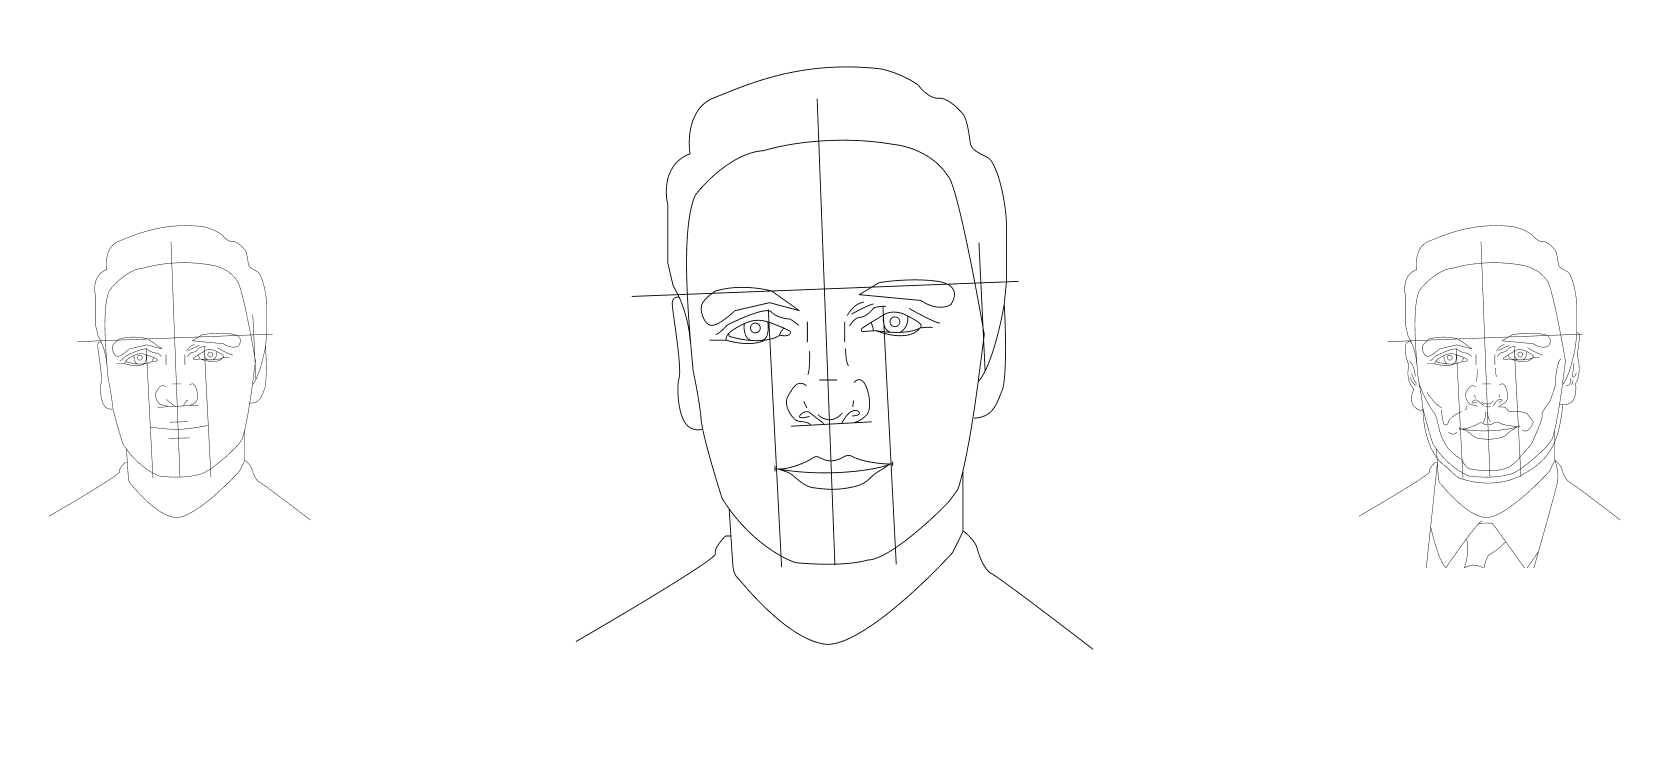
1. We drop the perpendiculars down from the edges of the iris and find the corners of the lips.
2. Draw the contour of the lips. It will determine the character of the male face.
3. Draw the nostrils.⠀⠀⠀⠀⠀⠀⠀⠀⠀
.
.
Step 9
1. Draw the contours of large strands on the hair.
2. Mark the shadow line on the forehead on the left side.
.
.
Congratulations!
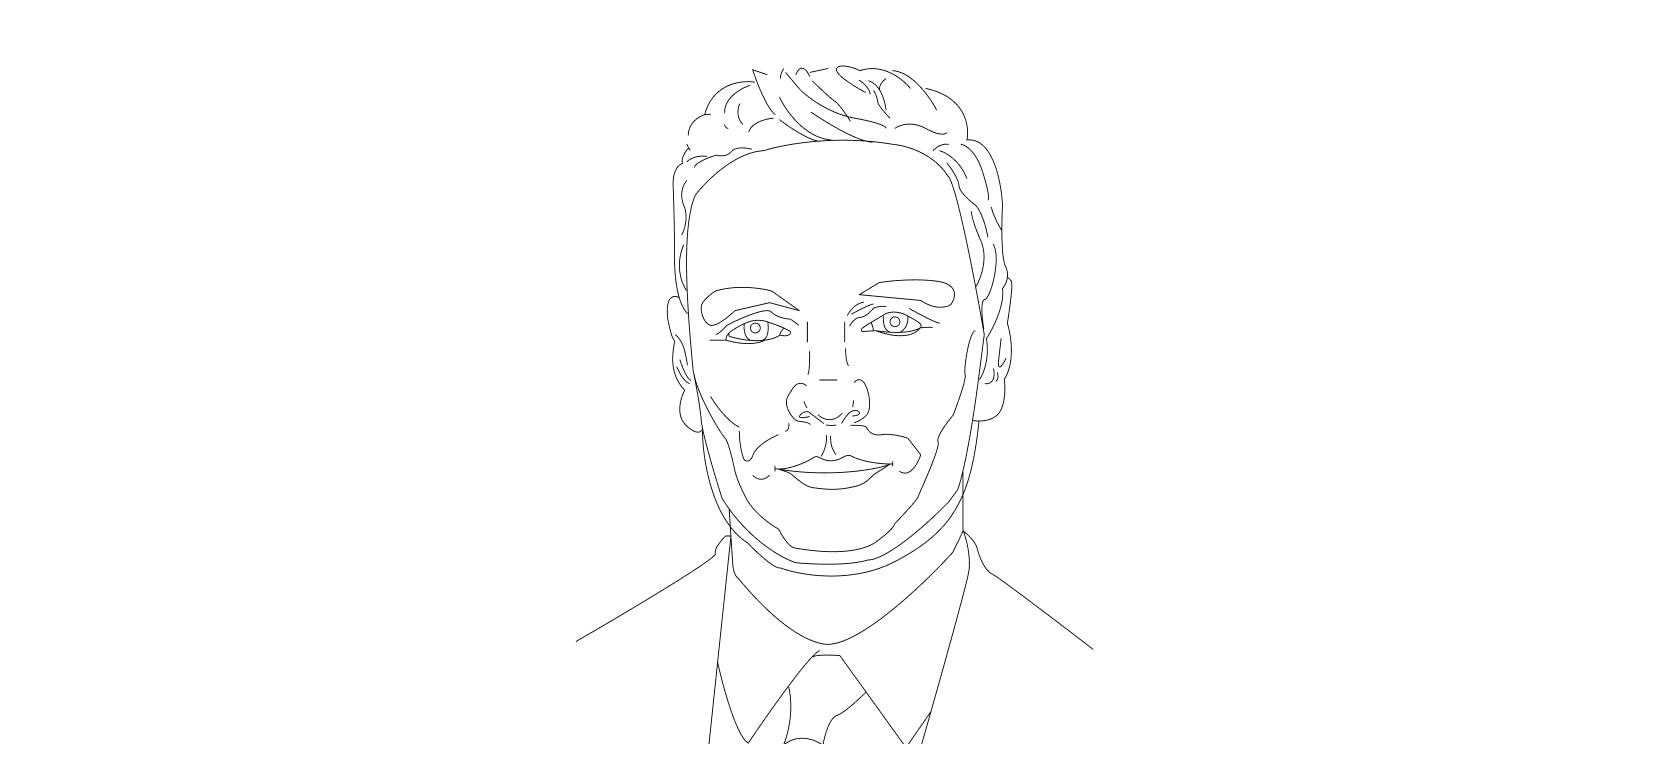
1. Using a slanted stroke, shade the jacket and tie.
2. Apply light slanted shading to the face.
3. Draw wrinkles and eyelashes.
4. Shade the curves of the ears in more detail.

_1_1_1_1_1_1.webp)