How to draw a lion step by step
Beginner illustrators often distort the anatomy of large predators. The root cause is usually jumping straight into detailing the outline without first establishing basic volumes. This guide offers a systematic approach to solving that problem. By following straightforward steps, we'll break down the process of simplifying a complex animal figure. Step by step, we'll learn how to draw a lion, moving from rough geometric shapes to a fully detailed illustration. This method minimizes structural errors and builds a solid foundation in constructive drawing.
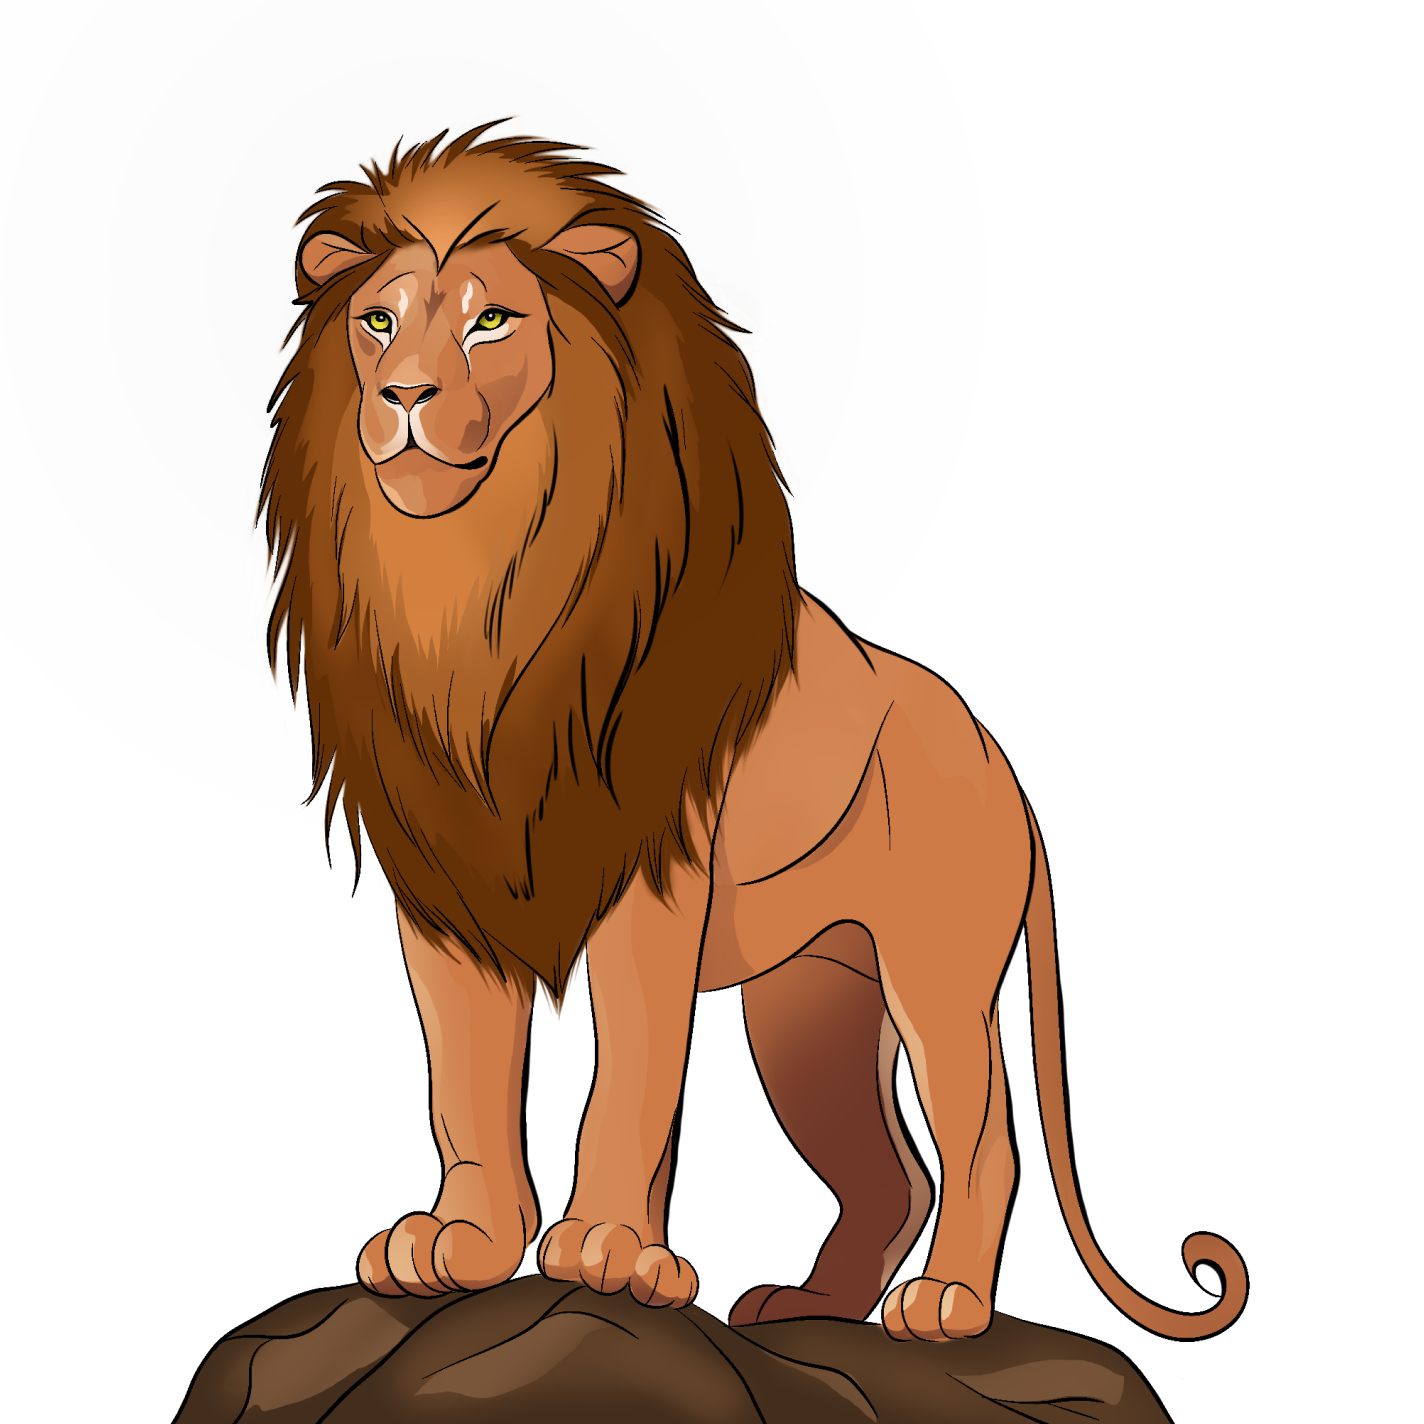
Step 1. Start with a sketch of the lion’s head
Start with a rough sketch: draw the inner outline of the face and the outer teardrop-shaped silhouette of the mane. Use a hard pencil. This step establishes the basic proportions. The lion's head will serve as your unit of measurement for the rest of the figure. Keep your strokes light so the graphite can be erased cleanly in later stages without damaging the paper's texture.
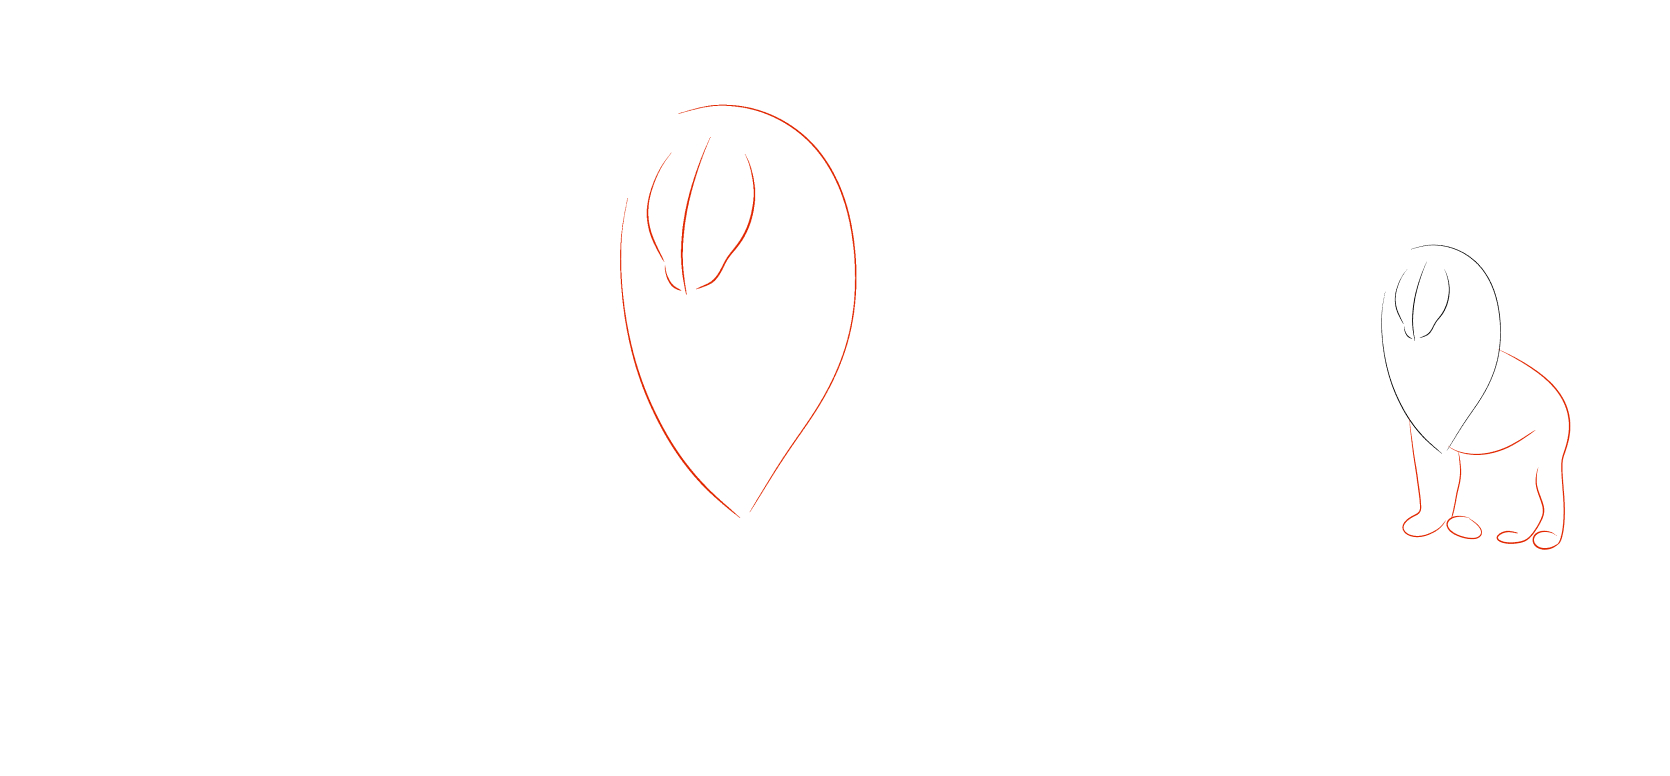
Step 2. Draw the body and a simplified “skeleton” of the legs
Draw guidelines along the back and belly. Sketch the front and back legs, ending each one with an oval at the bottom. These elements come together to form the body, overlapping with the central circle. This establishes the primary leg shapes and grounds the figure on a surface. A common mistake here is making the back too long. Keep an eye on the distance between the neck and the hips to avoid distortion.
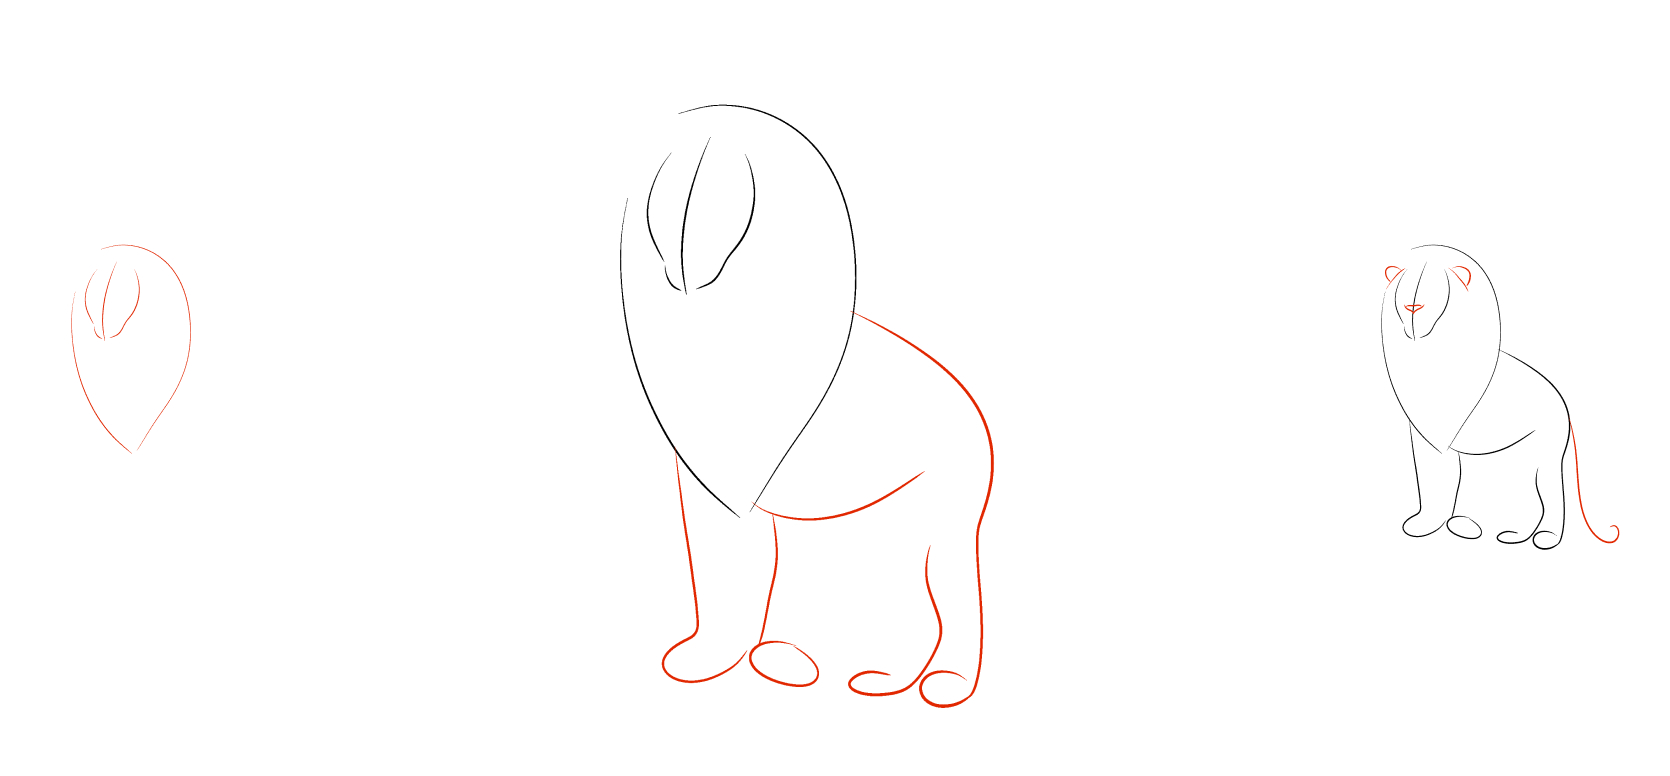
Step 3. Placing the Ears, Nose, and Tail
Mark the ears, then indicate the nose at the center of the facial oval. Draw a guideline for the tail extending from the hips. The top of the head gets anchor points for later detailing, and the line at the back sets the direction of the tail. Since this tutorial relies on strict symmetry, make sure all features sit precisely on the central axis.
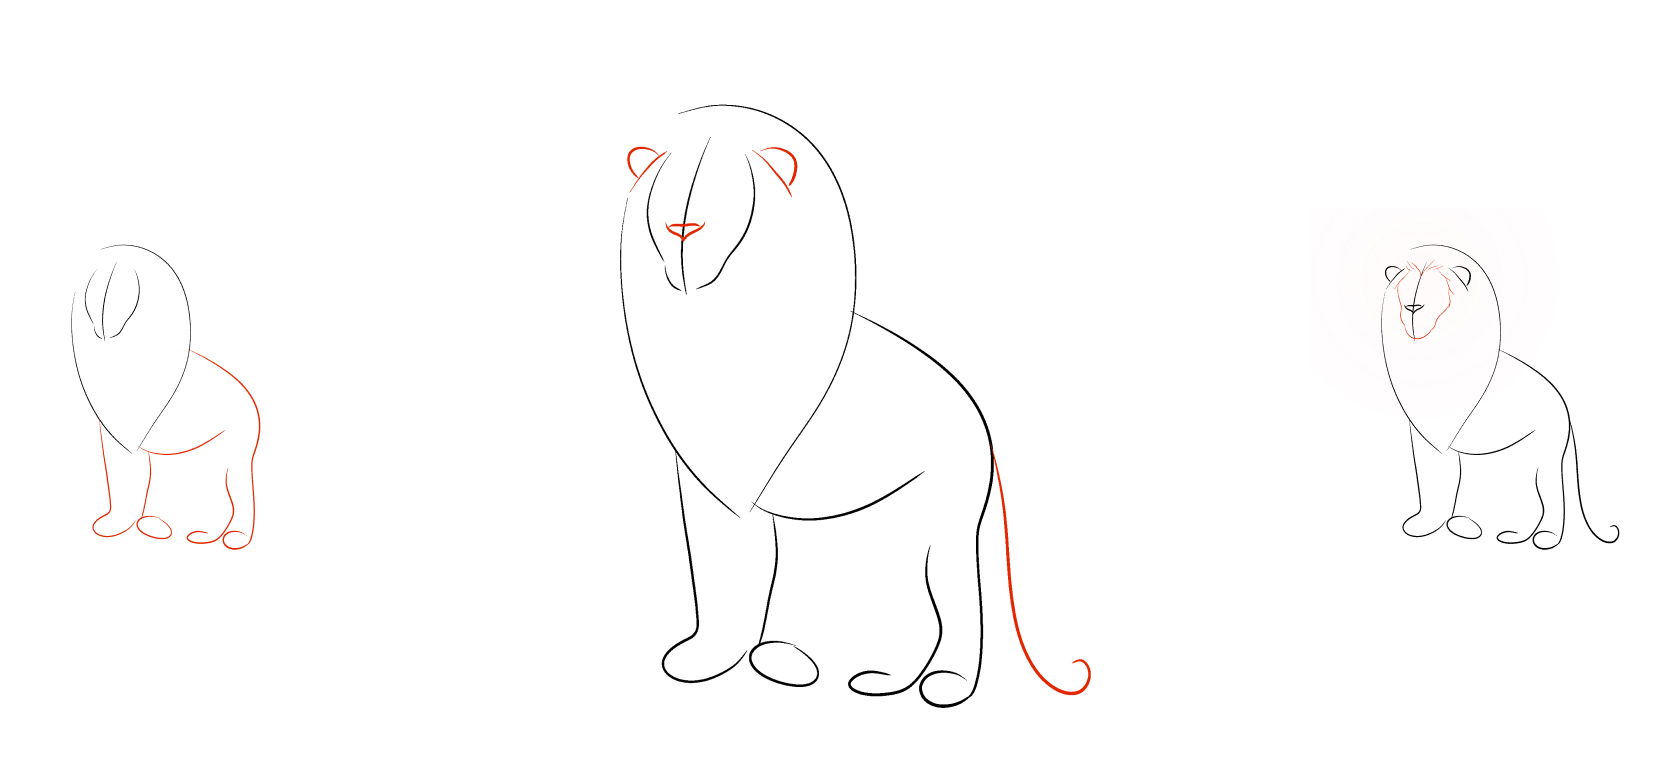
Step 4. Refine the shape of the head

Inside the outline, start shaping the lion's face by adding the brow ridges, cheeks, and chin. Draw a curved line to indicate the skull's surface relief. The muzzle takes on well-defined boundaries, and the planes for the eyes are established.
Step 5. Draw the eyes, nostrils, and mouth.
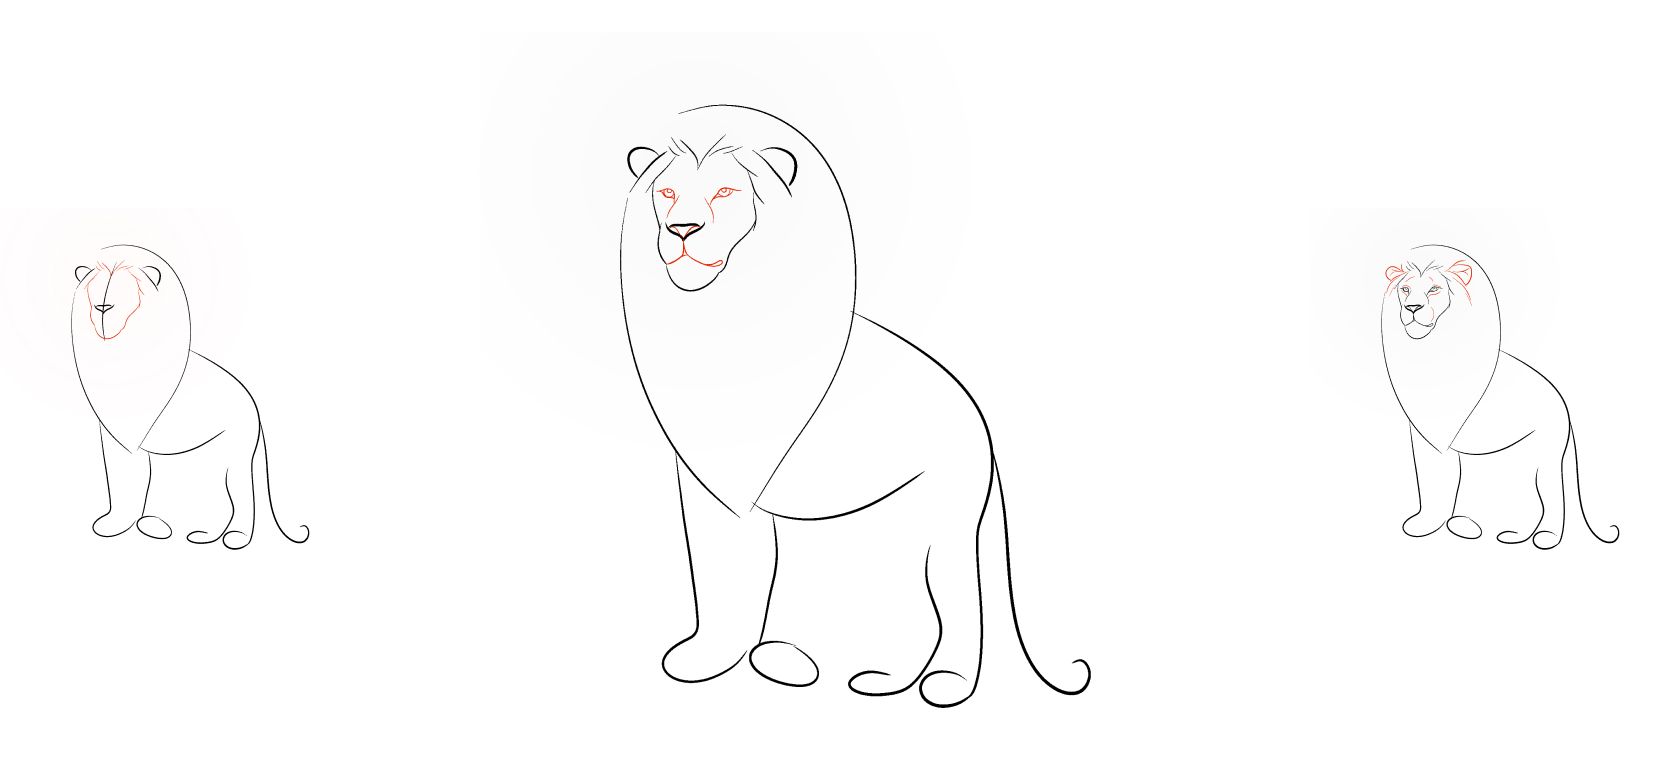
Place the eyeballs, draw the nostrils and the line where the lips meet, and mark the corner of the mouth. The drawing begins to take on its characteristic expression: a powerful lower jaw and the distinctly predatory shape of the mouth start to emerge. A frequent mistake at this stage is placing the eyes unevenly. They must sit on exactly the same horizontal axis.
Step 6. Refine the shape of the ears
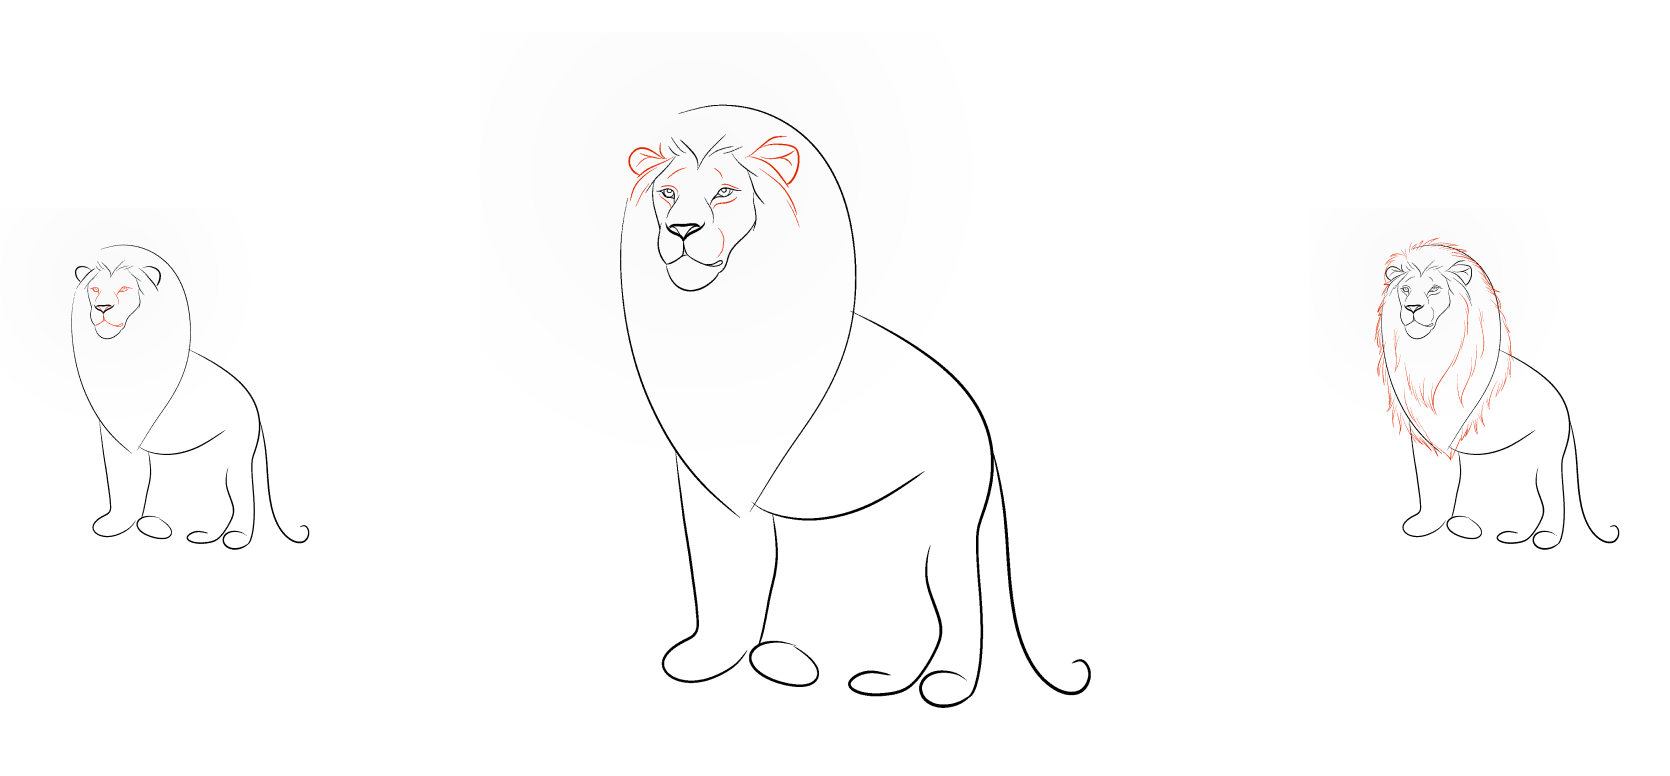
Refine the structure of the ears, then add strands of the mane along the top edge and sides of the head. Each rounded ear shape gains volume, and the indicated fur sets the direction of hair growth. Keep anatomy in mind: on male lions, the ears are partially hidden by the mane, so they shouldn't appear too large in the drawing.
Step 7. Draw the mane using long, chaotic lines
Frame the head with jagged contour lines. The full mane should naturally overlap the neck and flow down onto the chest. Define its outer silhouette: this voluminous mass of hair is what gives the lion its majestic profile. Avoid drawing every individual strand; focus on the overall shape.
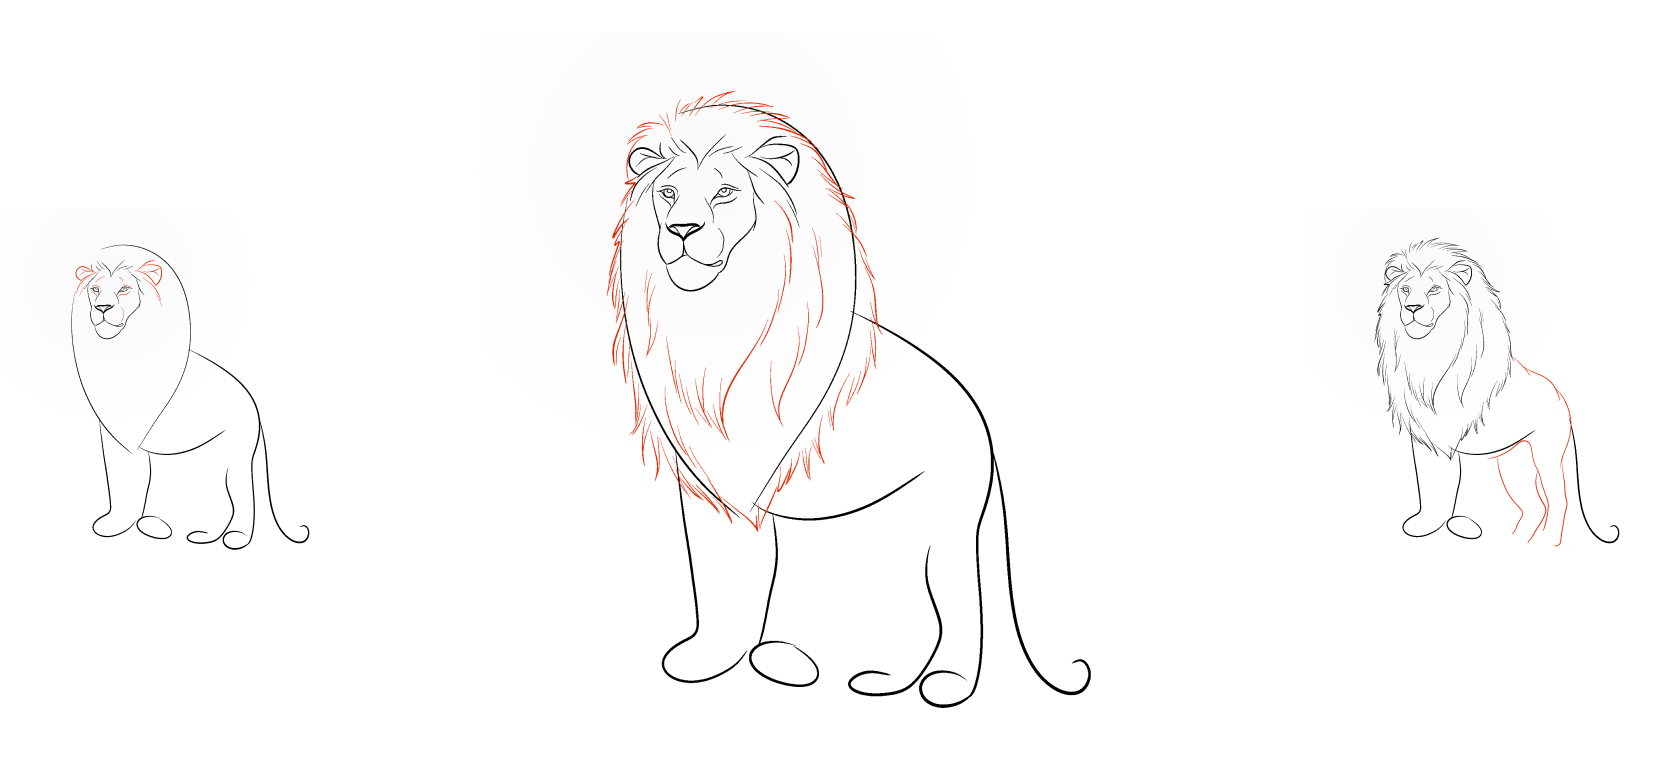
Step 8. Refine the body shape, adding slight muscle bulges
Refine the contours of the haunches and back, and add lines to suggest muscular definition. Work the muscle detail into the legs as well. The lion's body takes on realistic density, and the careful angles convey the animal's sheer weight. To draw the lion accurately, make sure to show the characteristic flare of the femur where it connects to the hip joint.
Step 9. Detailing the Front Legs
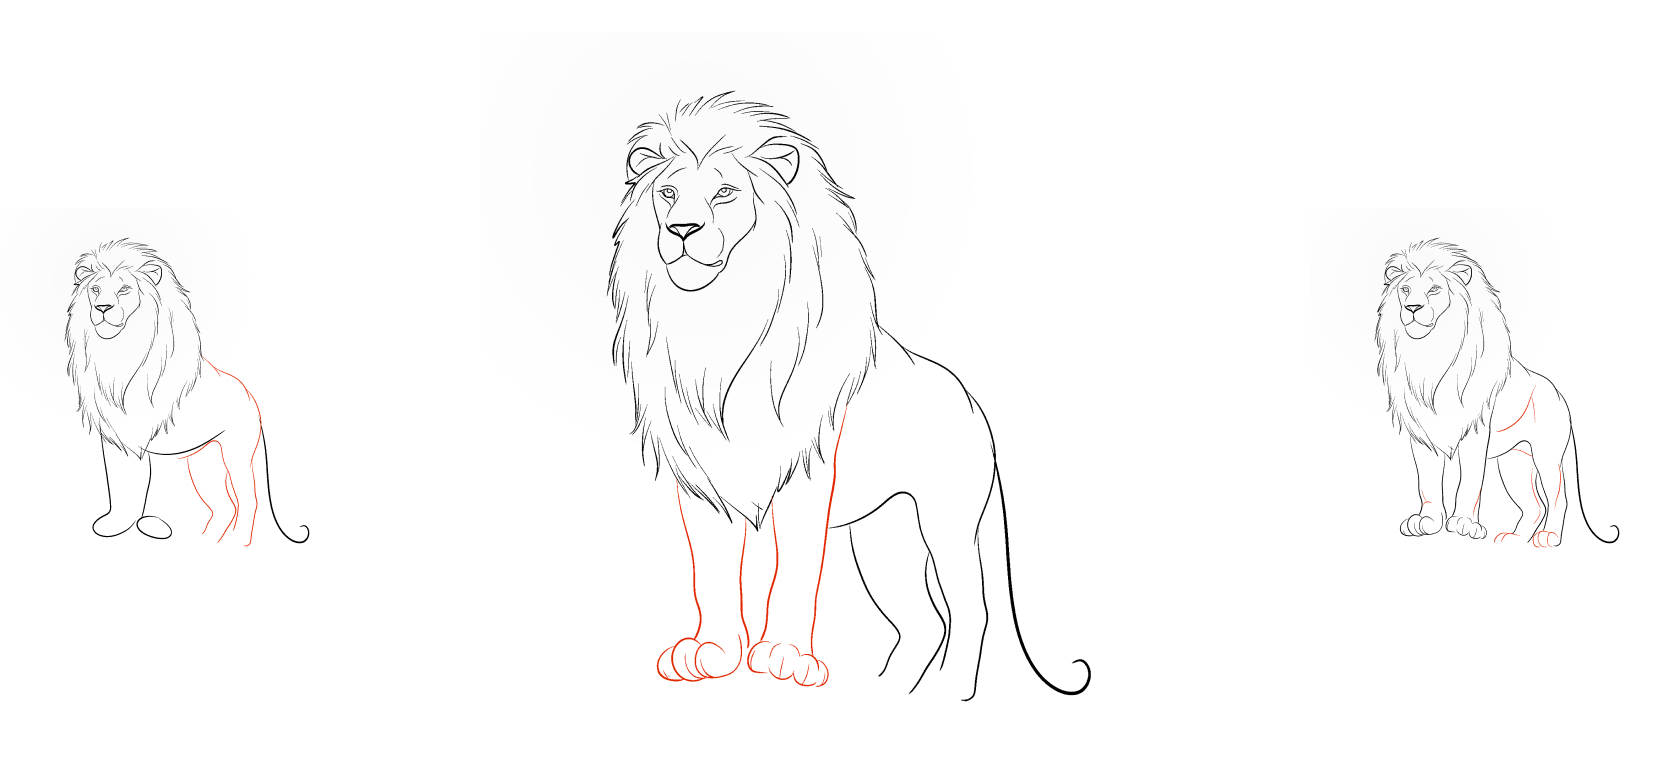
Work through the front limbs: define the shoulder, forearm, and paws with their individual toes. Use an eraser to remove the construction guidelines. The supporting paws take on their final volume, and the lion drawing is now ready for shading. If you're new to drawing, pay close attention to the thickness of the joints, the skeleton shouldn't look too thin or fragile.
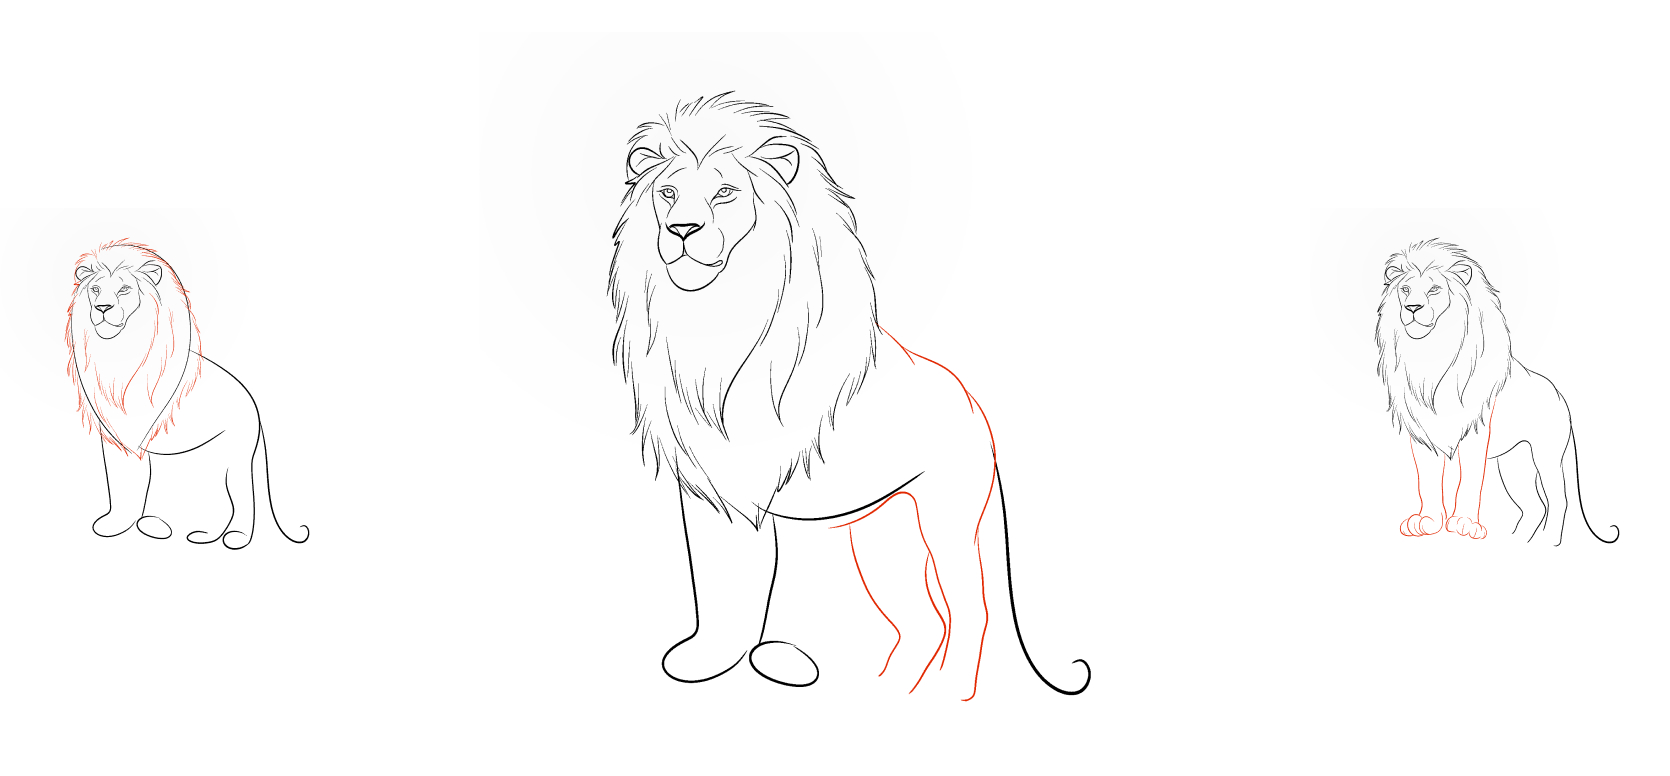
Step 10. Refining the Paws and Body Muscles
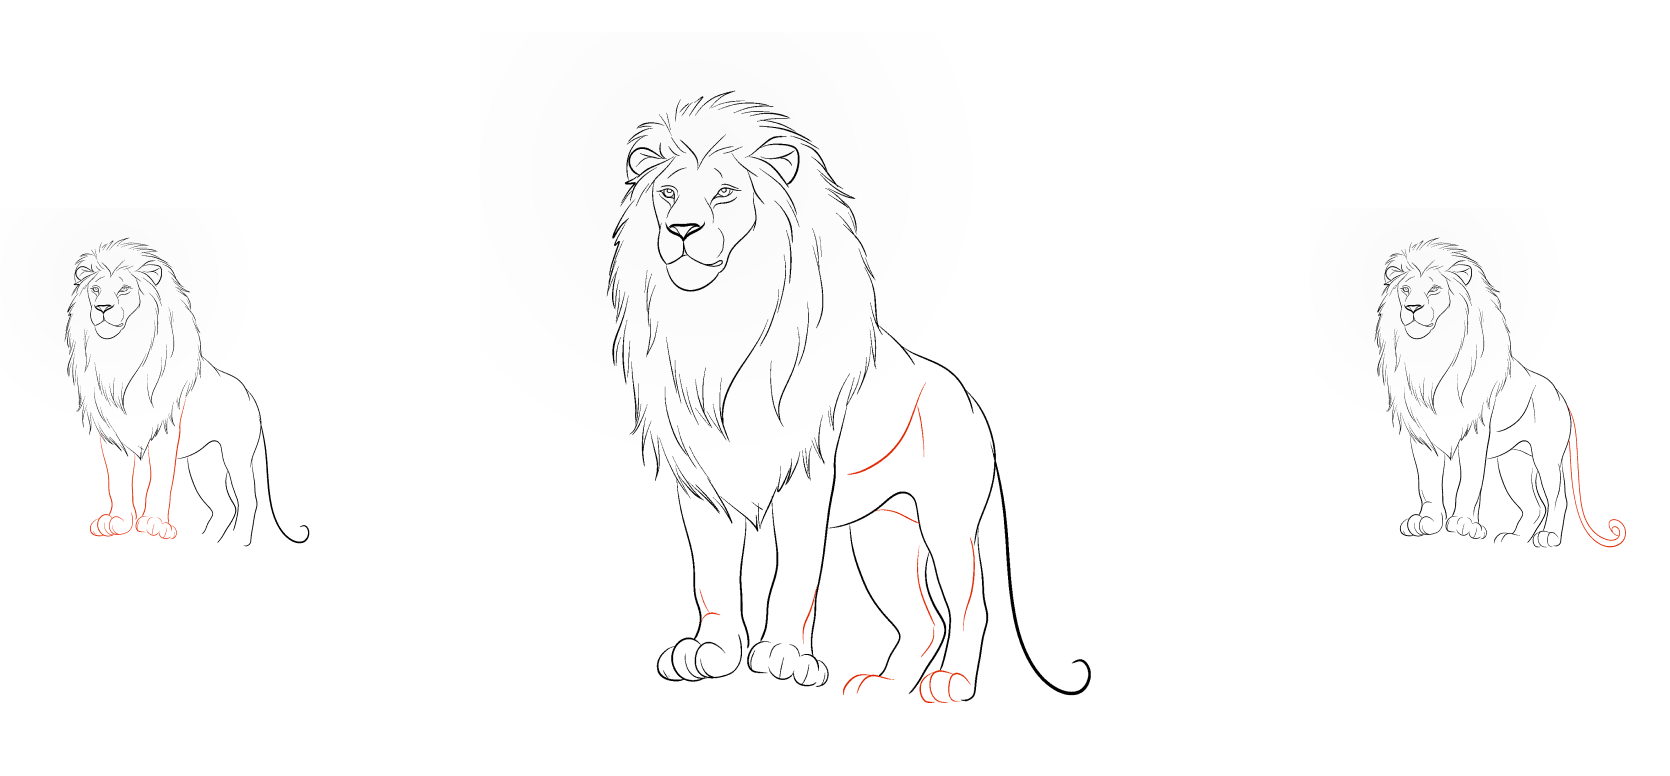
Draw the toes on the back paws. Add short lines along the shoulders and sides to reinforce the underlying framework. A common mistake here is letting the lines go in random directions. They should always follow the curves of the muscle fibers.
Step 11. Shaping the Tail
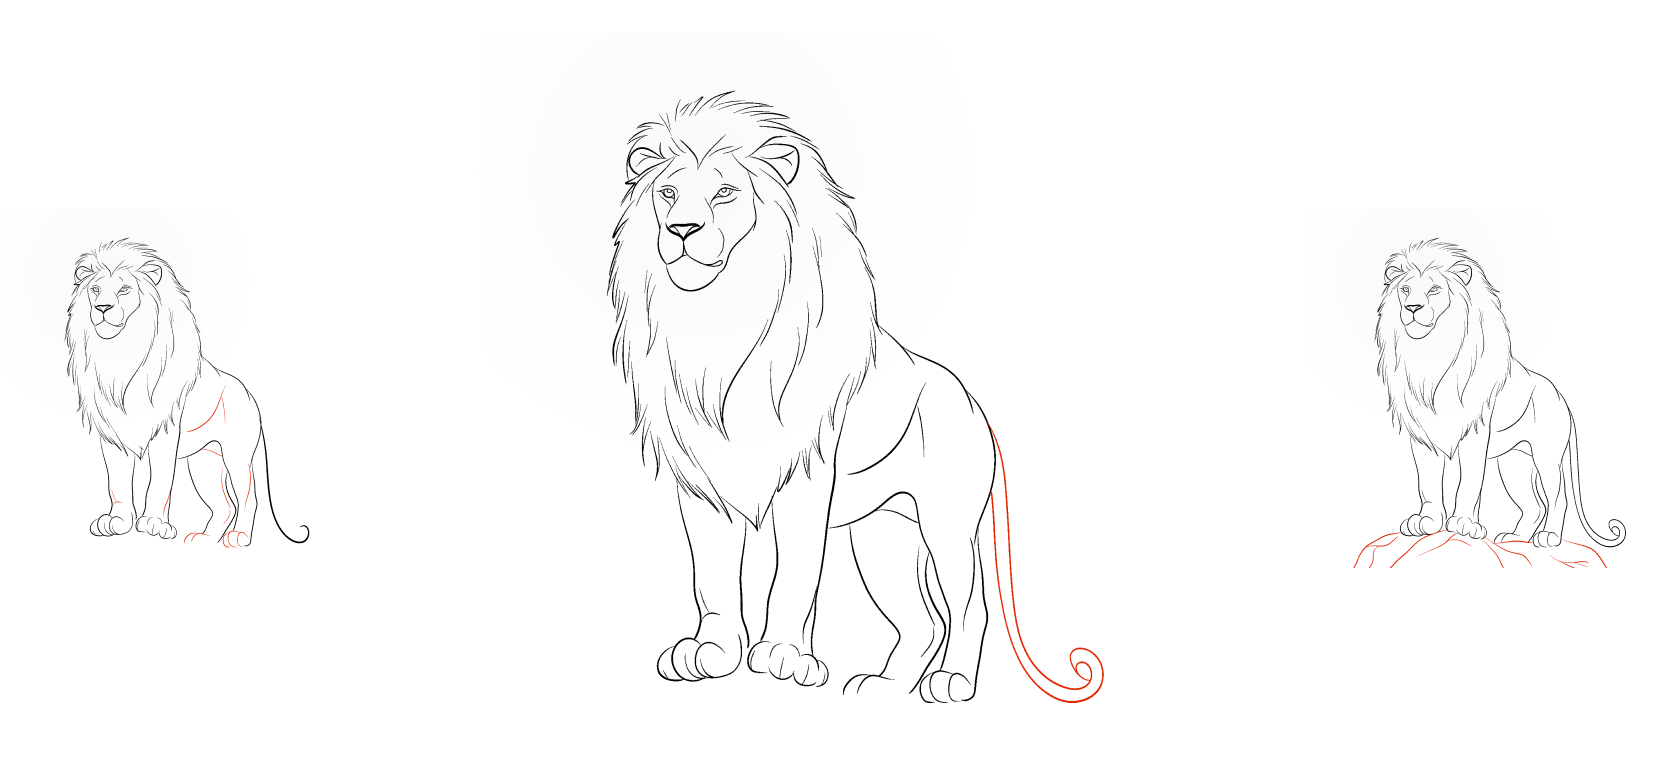
Draw a line parallel to your original tail guideline to give it volume. At the tip, form a fluffy tuft. The tail acts as a visual counterweight to the lion's heavy front end and brings the silhouette to a natural close. Keep every curve smooth, and avoid making the base too thick where it meets the hips.
Step 12. Adding the Ground
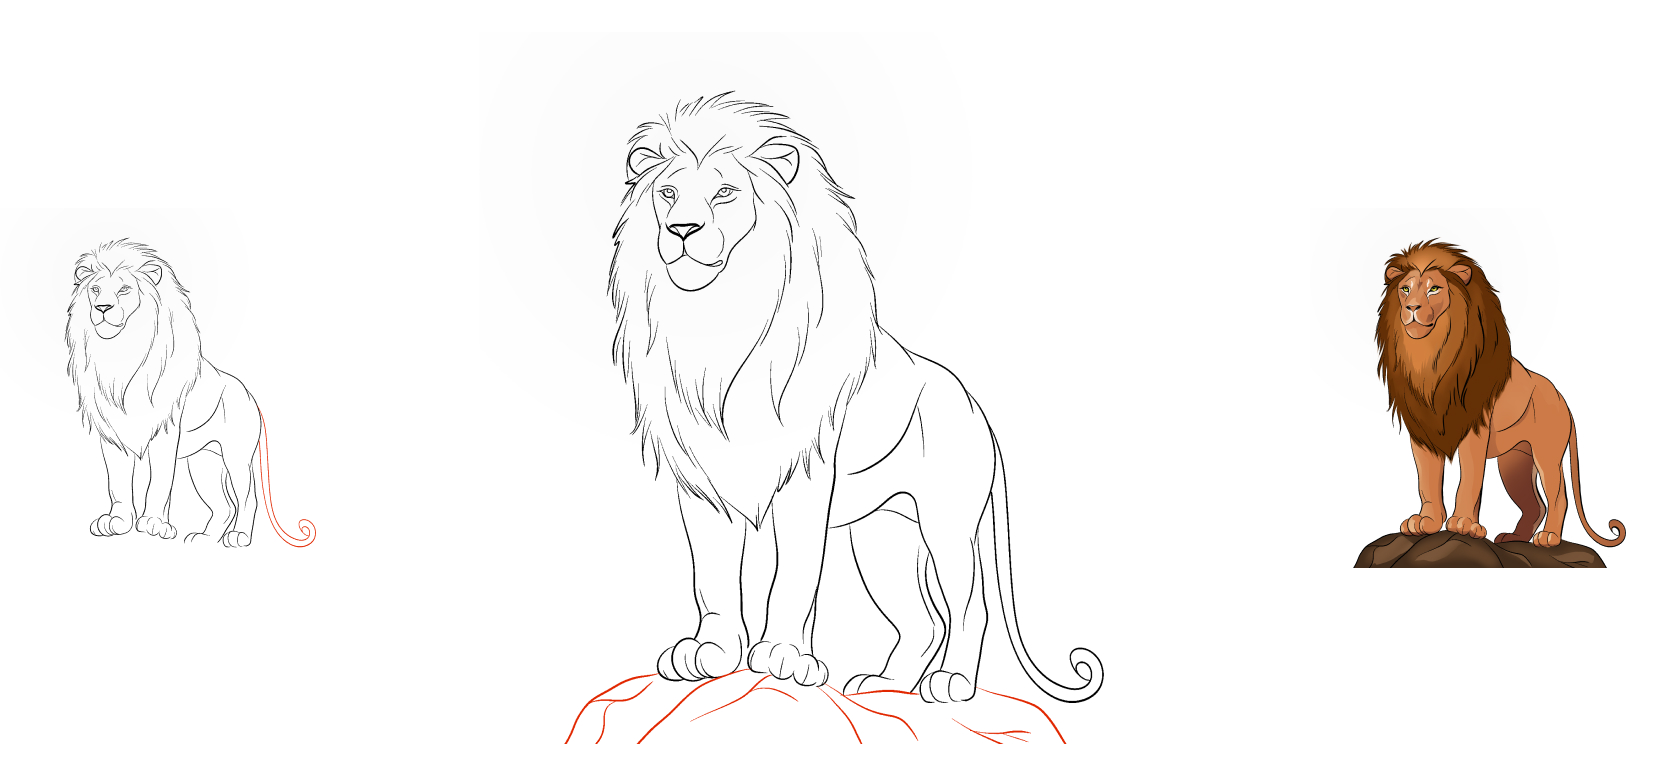
Sketch a rocky base beneath the lion. Add dense hatching under the belly, around the paws, and within the mane. The rock gives the figure a solid anchor, and the shadows add a sense of three-dimensionality. Don't shy away from strong contrast, deep shadows emphasize form and are what push a drawing from looking amateur to looking polished.
Congratulations!

Follow these steps and you'll be able to draw a realistic lion with confidence.
Practice this exercise regularly. For additional practice, you can use the Augmented Reality Drawing App ArtEasy - a handy tool for artists of any level.

_1_1_1_1_1_1.webp)